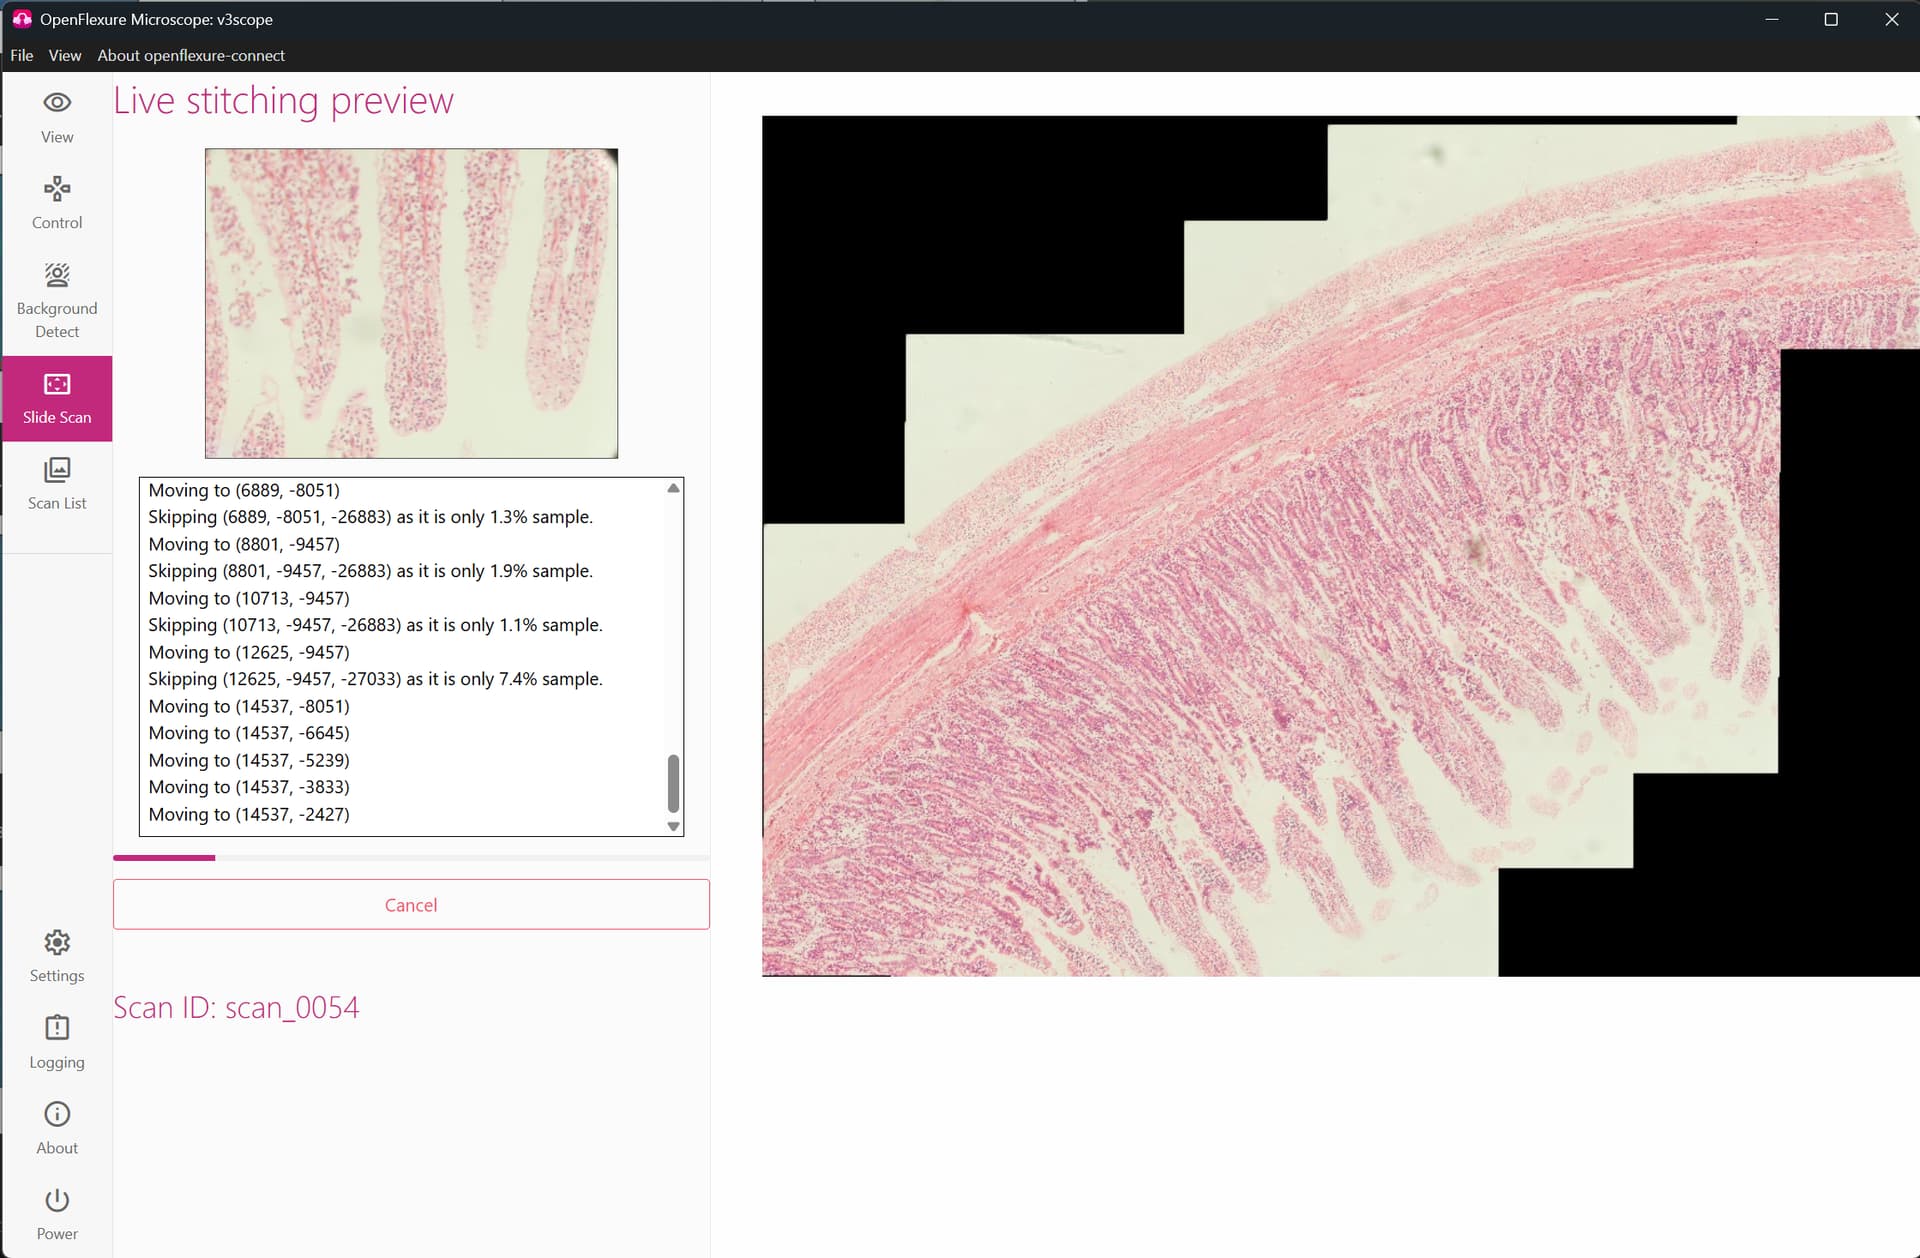
Excited to share the first (as far as I know!) OpenFlexure Microscope with the 12MP Raspberry Pi HQ camera. Support for the PiCamera 2 isn’t going anywhere, but being able to use the HQ camera comes with some major benefits. The physically bigger sensor means a bigger field of view, and the issues we’ve been facing with colour desaturation at the edge of the field of view have completely disappeared (see Image resolution and colour correction ). We’ll still be working on fixing them as much as possible for other cameras, but this looks like a really promising update for roughly an extra £35 when buying components.
Thanks to @j.stirling for the hardware design. The code to run it is on a branch in Gitlab. Happy to share instructions on running it for confident Gitlab users, while we work on how to make it as easy as possible to use. Excited as always to hear suggestions, feedback, praise, etc
I’d tend to politely disagree that it’s the first, we build Customizable microscope camera case for Raspberry pi HQ cam by pixel | Download free STL model | Printables.com at the start of the year. I guess it qualifies as a “half ofm”, as it uses only the server-software, is not motorized at all and the color-calibration had to be done manually with greycards because the hq-cam was not supported back then. however, it indeed did work with the v2-server . However, great to finally see software-support for the hq-cam, as it enables builds exactly like the linked above.
I knew as soon as I typed it that someone would call me out, people have done almost everything I can think of with an OpenFlexure by now!
Thanks for sharing your write up as well, I’m glad you both like the project so much and the pictures of your build are incredible! Pathology is the main thing that I’m working on this for, so glad that you’re having success with it, and that you’ve got so many suggestions for the workflow
yeah, basically we wanted to test out, if the v2-server recoginzes the hq-cam at all, and it did, only things like autocalibration have been very off. however, I did a lot of photography (analoge including manual developing of images as well as digital), color-correction is something you always struggle with and you should have a rough idea of which way to push the sliders, so it was not very complicated to get somewhat useable images. However, I really don’t want to downplay efforts of proper hq-cam-support, because this would enable alot of cool and also cheap builds (even tough the cam itself is more expensive), because you can get the picam with C/CS-Mounts, and you don’t have the problem with saturation-falloff at the edges, which is another huge bonus.
Wow! This is a great development, @JohemianKnapsody !! Sending lots of praise first and foremost! Was this done on a high resolution OFM or a low cost one? How does the scanning speed compare to an equivalent OFM with PiCamera 2 on board?
Thanks @evolk , it was pretty painless to get working, now the challenge is to make it work well!
It was a high res OFM, and the scan speed is better because the field of view is roughly 3x bigger, and you can get away with a smaller overlap between images, due in part to the lack of colour issues. Currently, I think it’s not giving as much contrast as we’d like, but you can test it out when we release alpha 3 this week!
The HQ camera has not got an associated lens to make a well defined low-cost module. We could get an M12 lens or something, but they would be quite difficult to specify for a reliable build. The HQ camera is most suited to use with a microscope objective. We shall retain the picsmera v2 low cost, and @j.stirling has got a long way in makingvthe colour response better for that.
Thank you for sharing these details! I am thinking about converting my lowcost OFM to high res with the HQ camera. Forr this I only need to reprint a couple of parts and reassemble the objective and the camera bits, correct?
I am really eager to try this HQ camera. I have just received it by post a couple of days ago and was a bit surprised at the size difference with Pi Cam v2! I hope I ordered the right thing! But even if I did this definitely means different 3d printed parts, right?
Are there already instructions on how to convert my high res OFM to high res HQ cam OFM? I will be happy to test them and give feedback (I am a great tester because I make all the possible mistakes and when the text is ambiguous I always pick the wrong interpretation first )
The assembly is pretty much the same as the normal optics module except that you need to remove the big heavy black C-mount ring from the Camera. This is done by removing the two little screws on the back and then twisting off the mount (it is glued down, so it needs a bit of a firm twist to remove.
On the v3 alpha image you will need to ssh into the microscope and modify the /var/openflexure/settings/ofm_config.json file to change from picamera2 to picamerahq.
We think that currently the images have too low colour contrast with the HQ camera (and actually to some extent with the Pi Camera2, but less badly). @JohemianKnapsody is now working on adjusting the colour correction matrices to improve this.
Let us know how you get on. Sorry it is a bit of a faff at the moment while it is in an experimental phase.
Thank you so much for the detailed answer, @j.stirling ! I am already printing the optics module Does it mean there is no need for a camera cover at the moment? I mean, I can see how the cover’s function is more for the neatness and the protection of the board and might not be necessary at this stage, but just checking
My camera came with a tripod mount - I guess I can remove it as well!
First of all, the Openflexure ist a very cool and helpful project
Today I assembled my openflexure microscope with the hq camera and here are some first impression of my tests:
First build, went with the HQ camera. It’s having issues with stage camera calibration (starts moving in Y, I see it zip past, but it reports no movement found after ~8k steps). For the illumination solution that I’m using right now, I’d call this a success ^^
I am an ok-ish Gitlab user, I would be very grateful for the instructions @JohemianKnapsody ! I have assembled the HQ cam version today and tried it out with the current server v3 version but I cannot pass the camera calibration stage - the image looks dark with a green bent stripe.
Would it be possible to release a v3 full image of the server please? I wanted to test a screen with my microscope, but can only find the -lite artifact
V3 is still very much a development alpha. The team are working on stability and functionality at present. You can see the planned development in the tagged issues on Gitlab.
Building a version with full desktop OS is not a high prioity at present, as there are still important functions and back end to get right.
While we wont have fixed the clipping on the corners, the next alpha (which we want to turn around in the next 2-3 weeks) should have a bit better HQ support.
I think it will also be easier for people to try out newer bleeding edge dev branches. So maybe if we wait for alpha 4, we can give some instructions for those who want to follow along with dev and try some things out for us