Hi everyone, I’m new here and also in the field of microscopy.
My research investigates the interactions between minerals and fatty acids vesicles, and to do so I’m using a microfluidic system.
As I’m working with iron sulfide, I’m conducting experiments in an anaerobic glove box. Because of budget constraints and mostly the limited space in the glove box, I’m planning to build an openflexure microscope that I can put inside.
Before starting working on this, I was looking for some advice as it’ll be my very first time doing something like this, I only have experience in 3D printing.
is it possible to control the stage remotely? Like adding a bluetooth component so I can plug in the microscope with the electricity inside the glove box. In this way I won’t have to make a hole in the box to attach it to the outside computer.
With the microscope, I’ll need to look at both micron and nanometers structures (usually the vesicles size range is between 400 nm and 15 micrometer). Would the Raspberry pi camera be able to visualise those small versicles or would be better to consider another camera? And can the Raspberry pi camera take slow motion videos?
I’ll need to use fluorescence and pseudo-phase as it’ll be easier to visualise the mineral. Would you recommend to build the Delta Stage microscope or customise the high resolution microscope (which maybe are the same? I got a bit confused on this)
In the future, once I’ll build the first one and have a better understanding on how to do it and how it works, I plan to further customise it to do microfluidic imaging/video analysis.
Thank you!
Welcome @Selene. Remote or autonomous peration is exactly what the motorised version is designed for. The Raspberry Pi has WiFi, depending on your network administration there may be restrictions on what you can connect.
For the size of your structures the smallest will be hard to see with any brightfield optical microscope. Using a high NA 100x oil immersion lens would be able to resolve sub-micron, but the depth of focus is very small, also sub-micron. 15um will be relatively easy to see. The best thing to do would be to try to look at some of your samples on a standard microscope with different magnifications, which will help you to find out what you can see. The Openflexure Microscope can be configured with any opjective that you need. If your vesicles are in a microfluidic channel then you do not so much need the xy motion, just focus (z). You could place more than one set of imaging optics along the channel or on oposite sides with different magnifications.
For slow motion/high frame rate the hardware can be altered to mount different cameras, but currently the software only works with the Pi Camera V2. This will not do slow motion. You will be able to find the camera specifications.
Fluorescence and DIC (pseudo-phase) are the same on either the Delta Stage microscope or the standard cartesian Microscope. The documentation and testing are not as complete as for brightfield, and are a bit spread between different places.
With this microscope I will also look at minerals, and I wanted to try to focus at different depths. But I was wondering if a long working distance or infinite lens (which also do epifluorescence) can work on this microscope, or I would just spend a lot of money having the same quality with another objective.
It would also be a big help if anyone could share links of the objectives they bought (as you can tell I’m finding it hard to navigate the objectives world )
Most objectives will work with the Openflexure optics. The key requirements are RMS thread and a par-focsl distance of 45mm. You can use either objectives designed for a 170mm tube length, or objectives designed with infinite conjugates if you print tbe appropriate optics module.
Long working distance objectives sometimes have a longer parfical distance, so you would need to check that. Otherwise it should work. I have tested a couple of different ones from Motic. This will not give you a bigger depth of field, but will allow you to look at things further from the lens surface into the material.
Your last question depends on what you mean by quality. For a high resolution objective the lens is designed to give a flat focal plane and good colour correction with a defined optical setup. For a biological objective this usually assumes that the sample is covered by a glass coverslip 0.17mm thick and then there is air between that and the lens. Some lenses are designed for oil between the coverslip and the lens, usually at 100x. For a metallurgical objective the sample is assumed to be a surface with only air between that and the lens. The cover glass thickness is marked on the lens barrel (0.17 or 0 for these cases), and oil immersion lenses are marked oil.
You situation is different from either of those, so the lens will not be working in its optimised design configuration. It will not be worth getting a really good lens, but a mid-range lens will still be noticeably better than a cheap lens.
The objective arrived and I was able to do the first failed attemp (x40 Plan N from Olympus).
I wonder if anyone already encountered this issue and was able to solve it? I’m almost sure that it’s linked to the above illumination not fully illuminating the objective, but I was also curious to know if it could be a parfocal distance problem.
The other issue I’m facing is that the motors are not being recognised. I get the following error: no stage connected. The Raspberry Pi and the sangaboard v 0.5.4 are connected to two different energy sources (not sure if it makes any difference). Or is there a way to reboot the system?
The coloured image could well be caused by overcorrection because of uneven illumination. You can adjust the illumination position by loosening the screws holding the illumination dovetail and moving the dovetail carefully. You should delete the illumination calibration first, so that youvare seeing the uncorrected illumination when trying to centre it on the camera. It is fiddly and will take some trial and error, but it should only need doing once. First make sure that you have the condenser height adjusted to focus on your sample.
The Sangaboard not connecting is a more difficult issue to pin down. Somehow this has happened to another user also today. You can see my response on their thread.
With the illumination and Sangaboard sorted, you can then look at the focusing. With a 40x lens the depth of field is small, so you will need to search for the right z position. The distance from the sample to the object is also small, so the object needs to be on the same side of the slide as the lens - on the bottom for the standard inverted OpenFlexure Microscope.
Connecting the Pi and Sangaboard to different power sources is not recommended - the Sangaboard is designed to power the Pi so the sources will be tied together in parallel in this configuration which can cause problems.
Can you check what the state of the LEDs is on the Sangaboard? (The 4 LEDs on the top left of the board).
Can you please post a picture of your connection between the Sangaboard and the pi? this is very strange, the power 5V pins from the pi are directly connected to the USB-C power so whether it’s powered from the Pi or the USB port shouldn’t make a difference to the Sangaboard itself.
Thanks for mentioning the connections because, somehow, I didn’t double check them. I actually made a mistake in the connections and now both boards are workings, as well as the motors!
Now, I’m focusing on getting the illumination and the objective distance right
@Selene, I’m curious if your anaerobic glove box is commercial or if you implemented a design. Next year, we want to start with experiments in anaerobic conditions, and we are looking for DIY/open-source options.
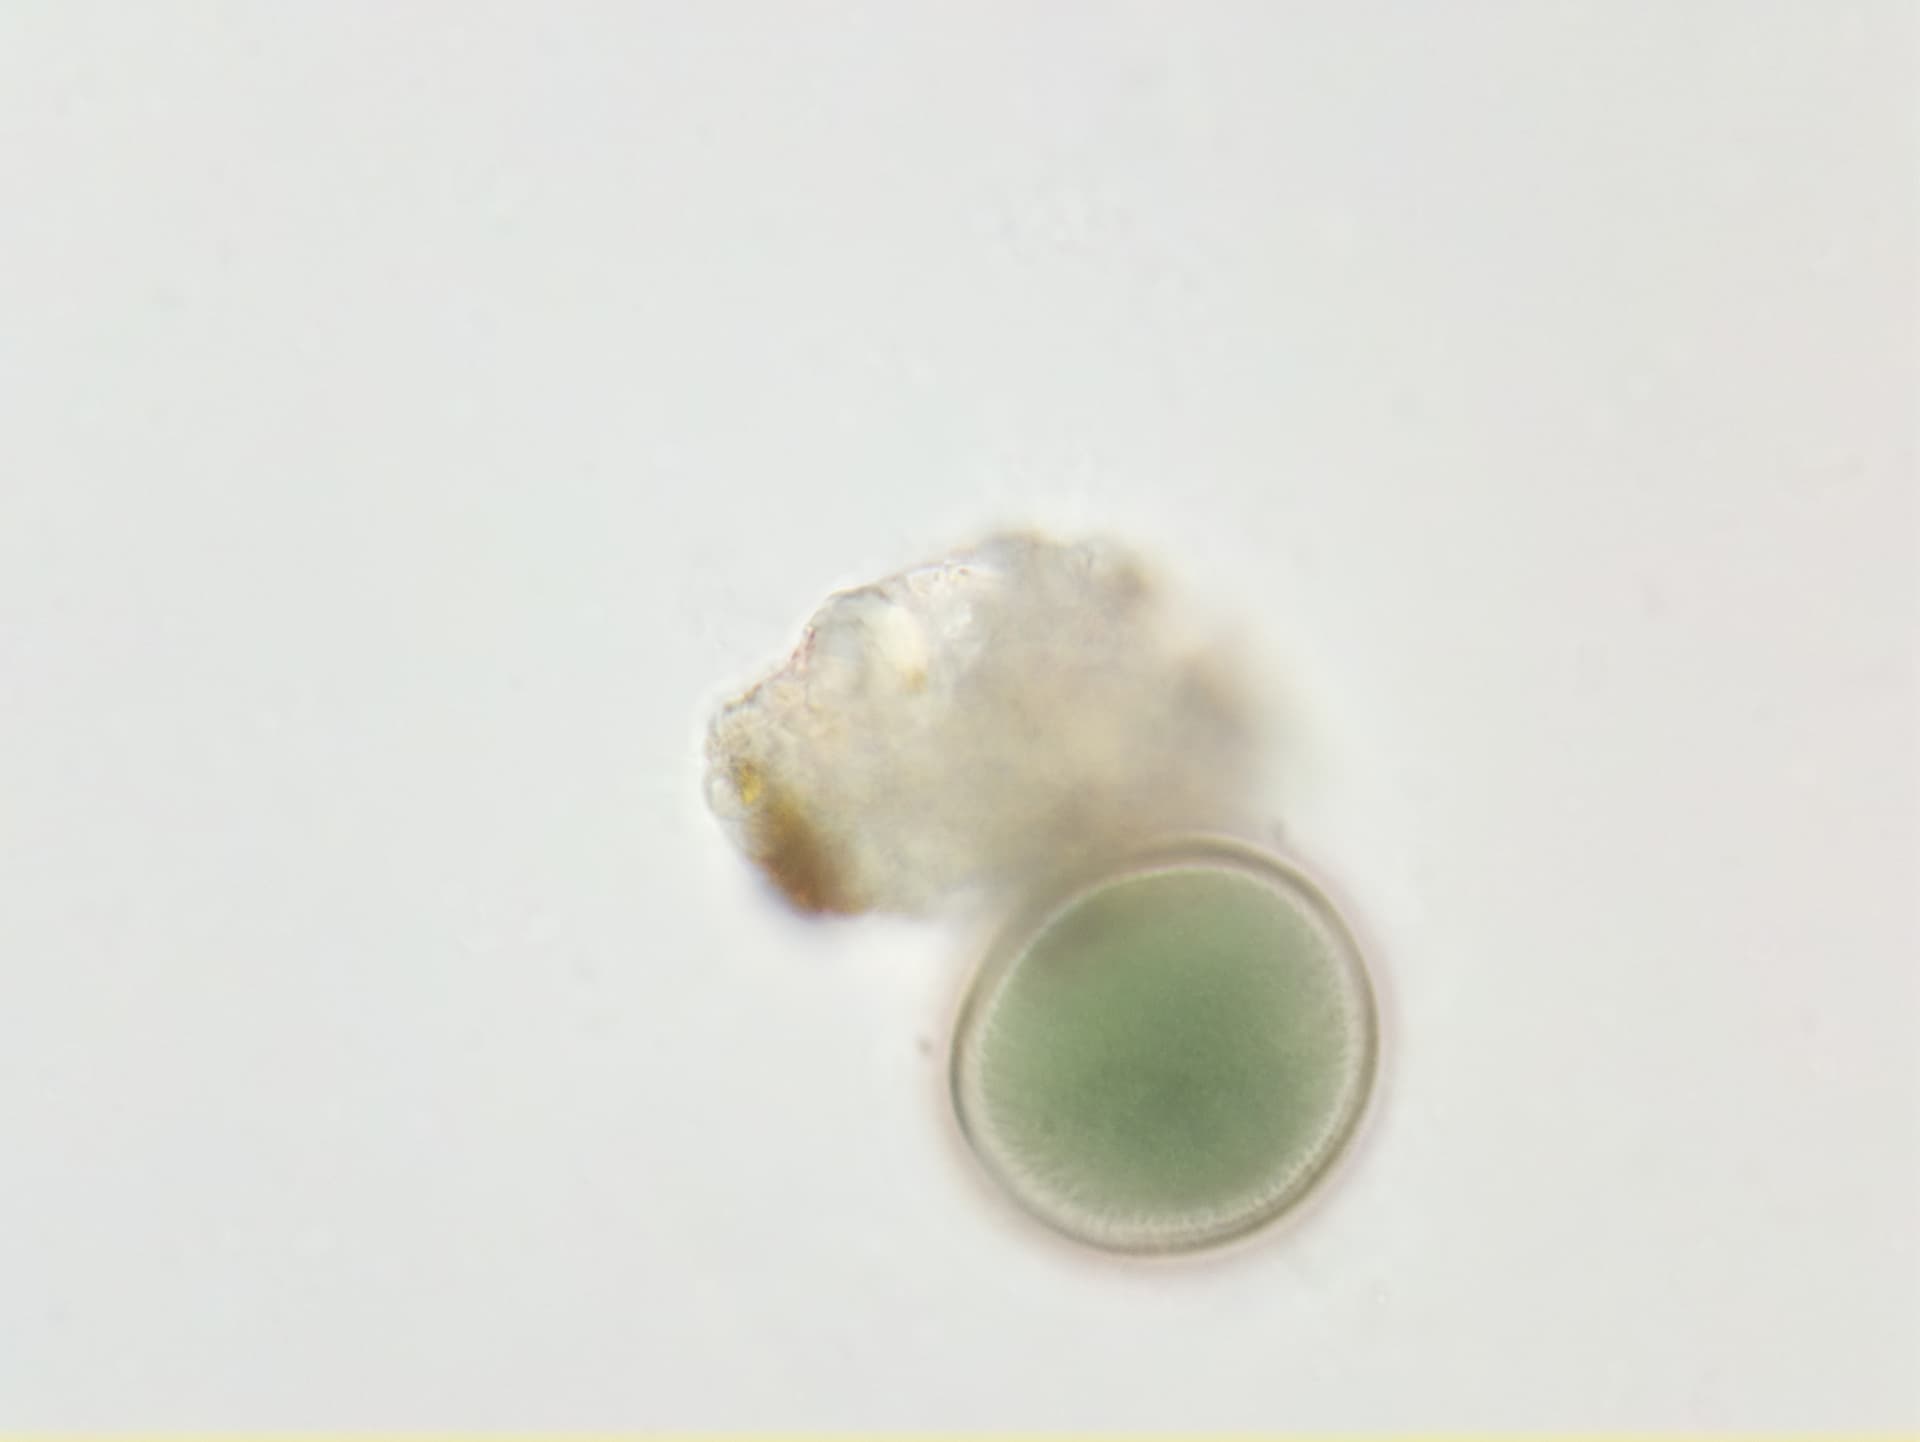
While reading your post, I remembered that I did some tests regarding microfluidic applications and using a 100X objective. Here are some pictures captured with an OpenFlexure Microscope V6: