We just released the second alpha release of v7 of the microscope
The instructions for the High resolution version should be significantly improved. The upright microscope is also now included.
More work is needed on the instructions for the upright and low cost versions.
4 Likes
This is great! If you did not dip your toe into the water for V7.0.0-Alpha1, this is certainly worth trying. Fundamentally it is the same microscope as V6, but there are a whole suite of changes that make it more robust and easier to assemble.
Let us know how you get on.
Has anyone considered printing the base in sections? It’s common for 3D printed designs to break up a case like that into flat pieces, both for strength and speed, and then you join them together with fasteners. I’ve even experimented with printing the flexure section in pieces that bolt together and have found the results encouraging. It isn’t just faster but can provide the ability to print different sections with the ideal orientation.
Incredible! I just printed mine and looks awesome!. much easier assembly and love the cable management. The Raspberry pi fit very snuggly without gaps. I used some spare old light condenser model I had printed. Printing the new one now.
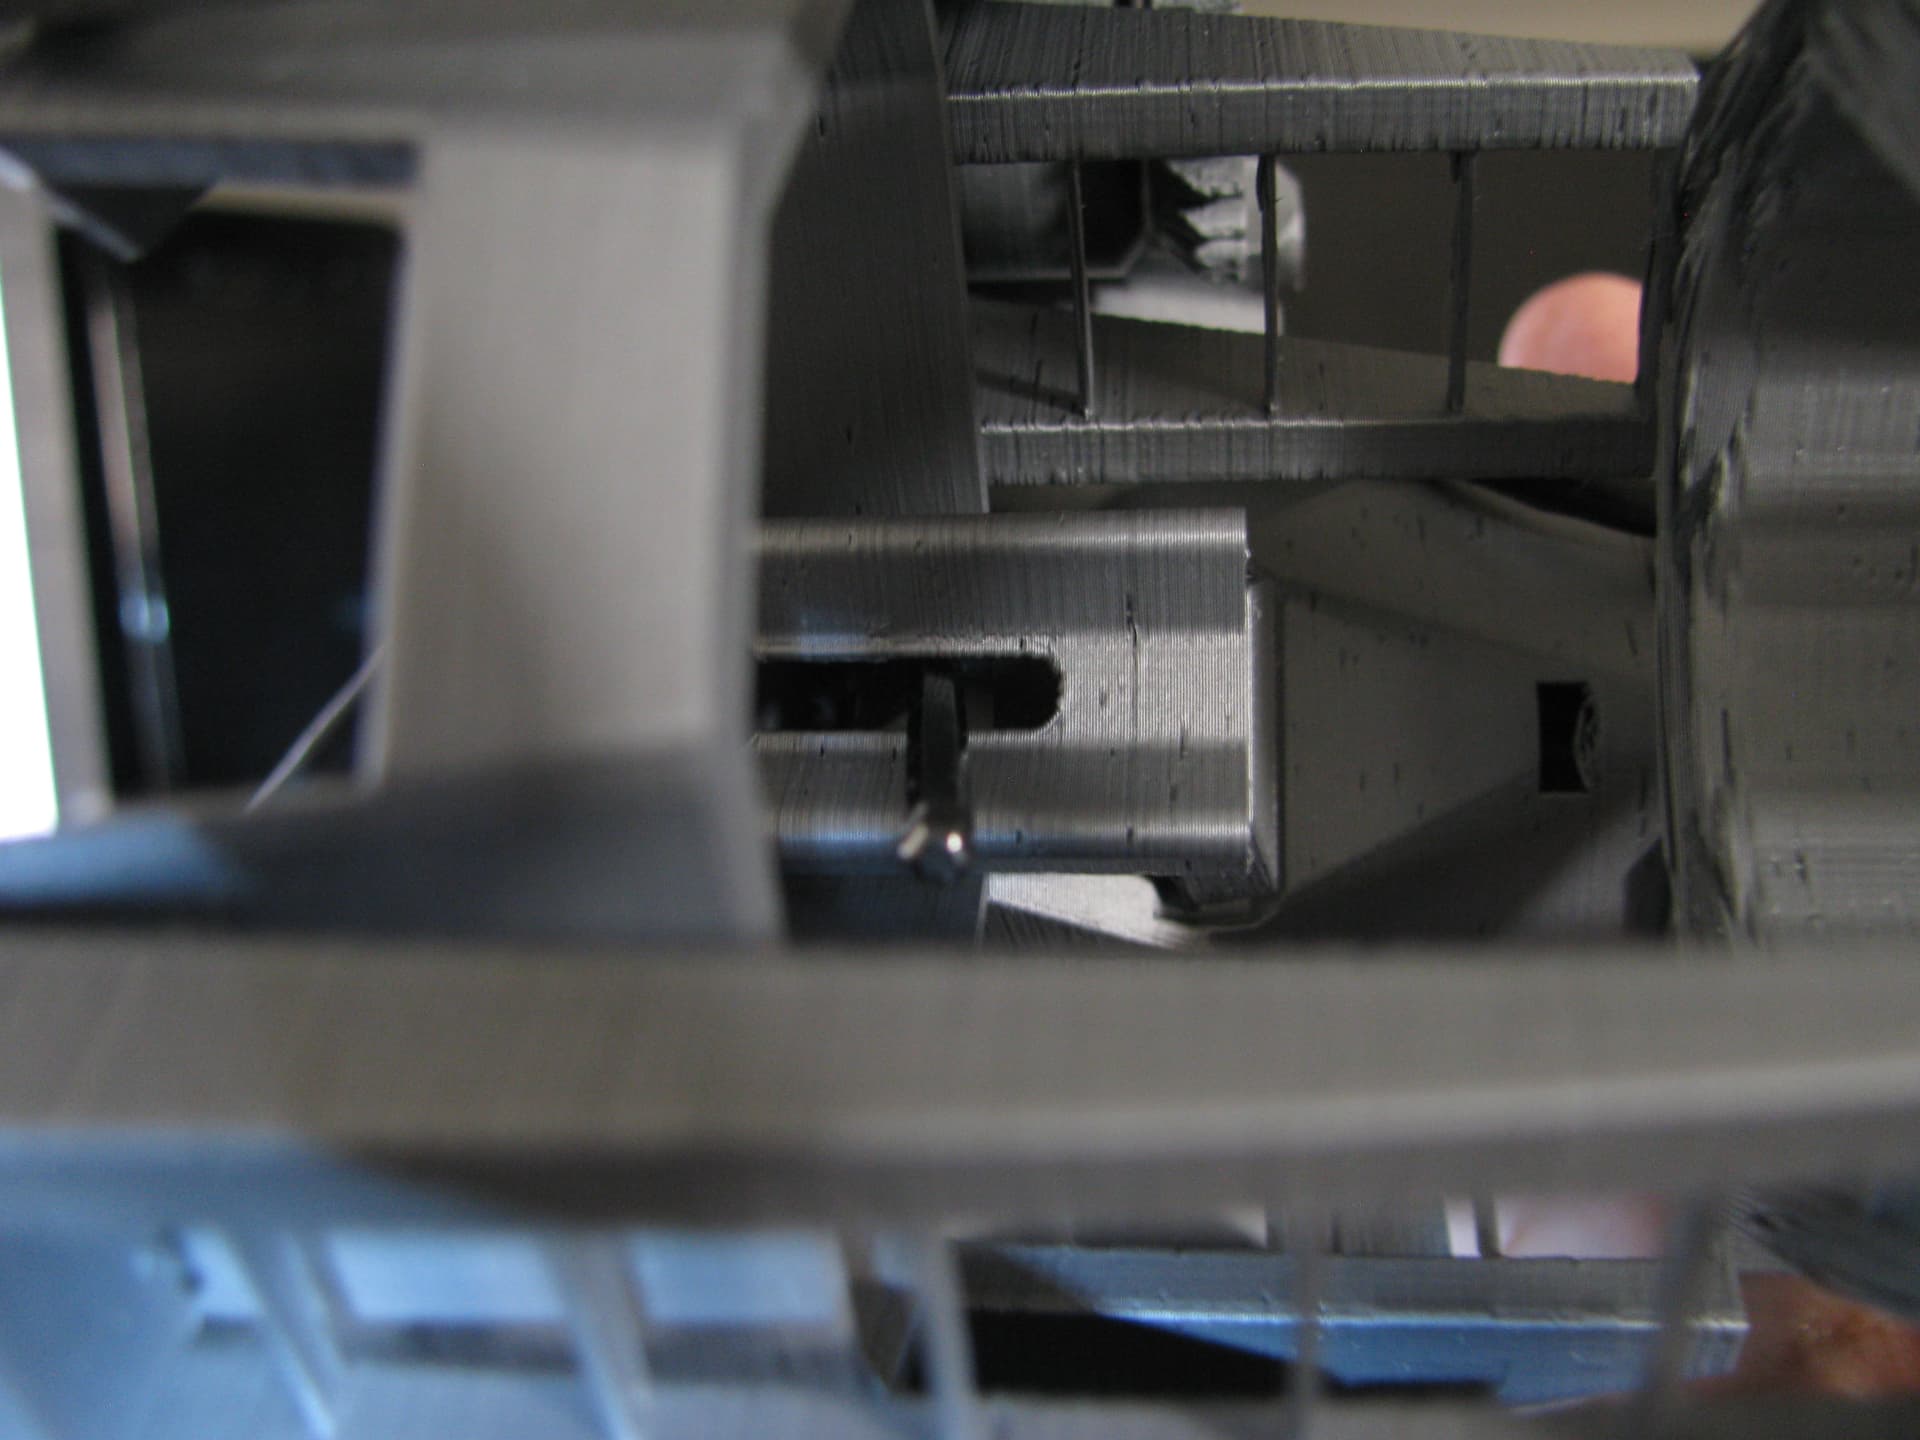
I struggled a lot trying to screw the camera platform through the tiny hole near the z stepper motor. It was very difficult to adjust to it to right height.
This screw hole along with the rubber bands are the 2 things I think need some modification to make it a more robust platform.
Great job OFM team
3 Likes
@dgrosen it can be a little tricky. A good ball-end hex driver really helps to be able to get into the socket and to be able to do up the screw.
Is it just getting the screw tightened and loosened, or is it difficult moving the optics up and down the dovetail? Sometimes the dovetail optics can have an overhang at the bottom that can get caught.
I am using a long ball-end hex driver. The optics have to go very high to be in focus and I cannot reach it with the driver anymore. I have to tighten it and the push it hard to reach all the way up
That is a really clear picture.
Is that camera platform from the STLs of the V7? It looks as though you have the V6.1.5 where the screw is higher up than in the STL for V7.0.0 https://build.openflexure.org/openflexure-microscope/v7.0.0-alpha2/models/camera_platform_picamera_2_pilens.html

There is I think a 10mm difference in screw position.
The V6.1.5 version:

I just printed the V7.0.0 Alpha2
They did a great job.
In the spirit of improving, I designed a cover for the LED, and redesigned the illumination Dovetail with a 5mm hole going from the top to the bottom; I drilled a hole at the body to take the wiring down. Then I realized that I could have gone through the hole (not opened yet in this version) of the Z cable tidy cover. Anyway, there are pictures and file for the diode cover. Cheers. Luis (lightandcolour@yahoo.com)
Microscope Dovetail v3.stl (121.8 KB)
OpenFlexure Led Cover Bottom v3.stl (255.8 KB)
4 Likes
Ha! That explains. Thanks. 
1 Like
Nice! I have a very similar cap in design as well. Out plan was the same, put the LED in the cap, we want this to be compatible with bot the standard LED and the new circuit board we are creating and with a standard. This way we can have a diffuser on the top of the condenser and build in a well defined aperture.
We didn’t get this finished and tested for alpha-2, but it will be part of v7 release eventually
We do still need to improve the dovetail mounting. I think the biggest thing we need to change is to shorten the key-hole in the main body so that when the optics module is at the very top of the keyhole it is at the correct position.
I agree; the access to the bolt of the optics module casing cannot be accessed from the back of the Main Body when the bolt is in its upper position in the tang slot. (even when the Z stage is in its lower position)
A little tweak in the slot of the Main Body would allow the Allen wrench to reach the optics module bolt.
The optics modules should not need to go up as far as that to get focus on a slide. The suggestion from @j.stirling is that the slot is made only as long as it needs to be. That also should make it all a little stronger. The ball driver should be able to reach as far as it is needed for all standard V7 optics modules in the V7 body. I have only used the basic optics module myself so far.
1 Like
I am searching for a base model, that doesnot hold the raspi. i will use mine externally.
Save some time printing and height on the table.
can anyone point me to a file?
1 Like
Hi @dusjagr. There is a base without space for the Pi for Version 7.0.0-alpha2, but it does not seem to be linked anywhere from the build instructions. There is a download of all the files for the release where you can find it. All releases of the microscope are at https://build.openflexure.org/openflexure-microscope. The relevent zip file https://build.openflexure.org/openflexure-microscope/openflexure-microscope-v7.0.0-alpha2.zip is quite large as it contains everything, but in the models directory there is the file you need microscope_stand_no_pi.stl.
Alternatively there is a simple hack in the “Where are you (OFM location survey)” thread https://openflexure.discourse.group/t/where-are-you-ofm-location-survey/771/16. The first link in that post has a microscope standing simply on long M3 bolts in the mounting holes. That is a Version 6, but the same idea would work on V7.
1 Like
For the Nano convertor plate (to use an Arduino Nano and separate motor controllers) the STL in the build docs for V7.0.0-alpha2 has the Nano in the wrong place.
See: OFM summer build - #4 by WilliamW
This is corrected in the main repository, but not on the Alpha-2 build. The simplest way around it is to use the convertor plate STL from V7.0.0-alpha1, in /models from https://build.openflexure.org/openflexure-microscope/openflexure-microscope-v7.0.0-alpha1.zip
Hi everyone. I’m curious if the link to the assembly instructions will be updated on the OpenFlexure webpage soon. I realize only users from this forum or those who have been following the project are aware of this release. New users may be confused with STLs and instructions because the STL configurator doesn’t mention versions or recommend which version is better for specific components (e.g., webcam). I recently helped a PhD student (no mechanics and electronics experience) build the v7; she could access the assembly instructions only because her supervisor had the link.
I hope this feedback can help us as a community and be aware of this step before the release on the webpage.
The idea is that the web site has the version that is known to work and (should) not need extra help in understanding the build instructions. V7 Alpha2 is not quite there yet, there are parts that are not built as STLs, and the instructions are not yet complete. As you say, V7 is only accessible to people who have found this forum, but I think that the V7-Alpha does still need this forum thread, and maybe also posting questions, to complete a build. As one example the nanoconvertor plate STL in the Alpha-2 is wrong as noted in the post above.
The plan is to correct the remaining issues and complete the instructions and options. This is then a Beta release, which will be on the web site.
Thanks, @WilliamW! I just wanted to know because we will offer a workshop in Chile next month, and I’m in charge of curating documentation for participants. I hope to share our experience in another thread.
1 Like
@r.w.bowman is moving version 7.0.0-Alpha2 along to complete what @j.stirling was driving forward, and reach V7.0.0-Beta.
If you have any comments or suggestions from your experience of making and using the Alpha2 please let us know here or make an Issue on the GitLab repository. Many of the previous comments from the forum have been addressed, but we may have missed some. If you want to take a look at where we are now, the instructions and STLs from the latest build are at Assembly Instructions (openflexure.gitlab.io) (I think that link will only work until 2nd Nov 2022). Outstanding questions and comments that we know about are in the issues list Issues · OpenFlexure · GitLab for the whole project and Issues · OpenFlexure / openflexure-microscope · GitLab for the microscope hardware and instructions.