After I finished a “regular” HighRes-OFM, my wife (working as a biohacker, aka. bio-informatics software-developer and is a former pathologist) insisted to build herself an upright OFM, but also in HighRes. The build-instructions were a mix and match of the low-res-upright and the regular high-res version, because there is no dedicated “high res upright” instruction set. That’s why she documented everything we did, so I will put that guide into a seperate post later on, so that it maybe can be converted into a new set of build-instructions for a v7-upright highres-variant.
This upright OFM is based on current v7-Parts and v3-alpha2-Server on a Pi4/8GB with some custom modifications (more on that later).
The Filaments used were:
- Prusament - PLA - Galaxy Purple - Prusament PLA Galaxy Purple 1kg | Original Prusa 3D-Drucker direkt von Josef Prusa
- Redline Filament - PLA - Matt Hellgrün (matte bright green) - PLA Matt Hellgrün - REDLINE FILAMENT
- Redline Filament - PLA - Matt Graphitschwarz (matte graphite black) - PLA Matt Graphitschwarz - REDLINE FILAMENT
…all printed on a Prusa CoreOne.
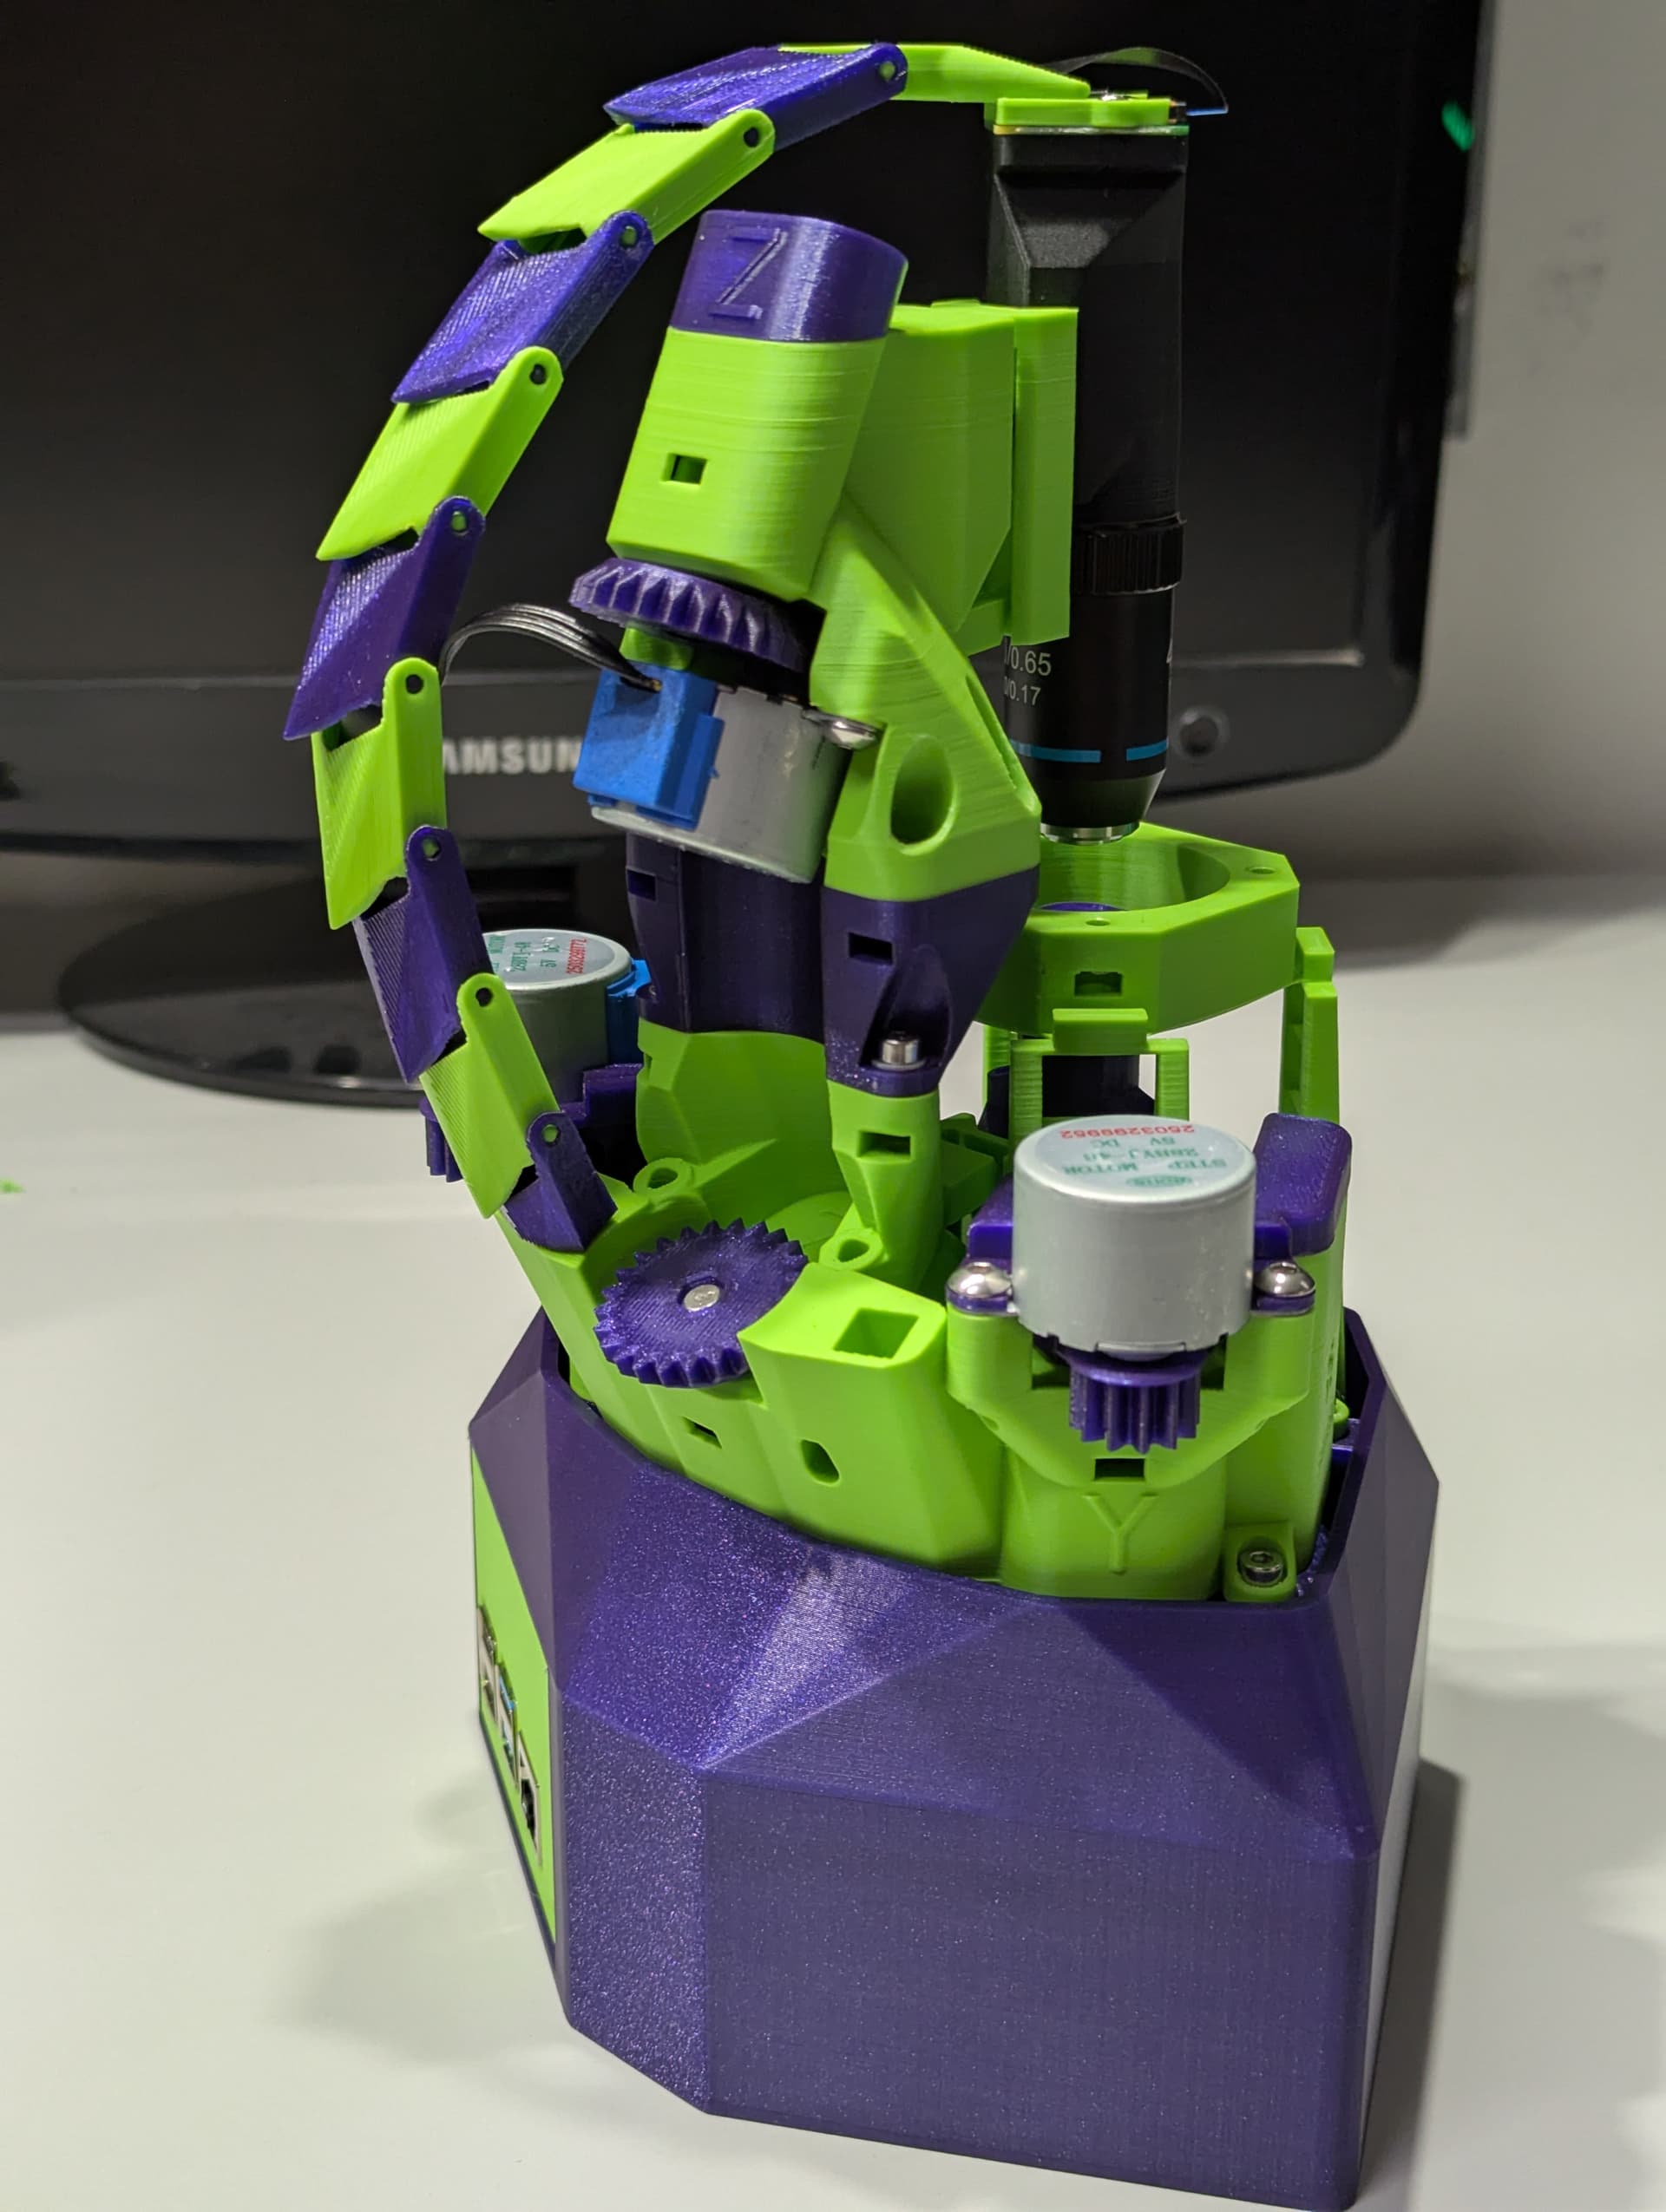
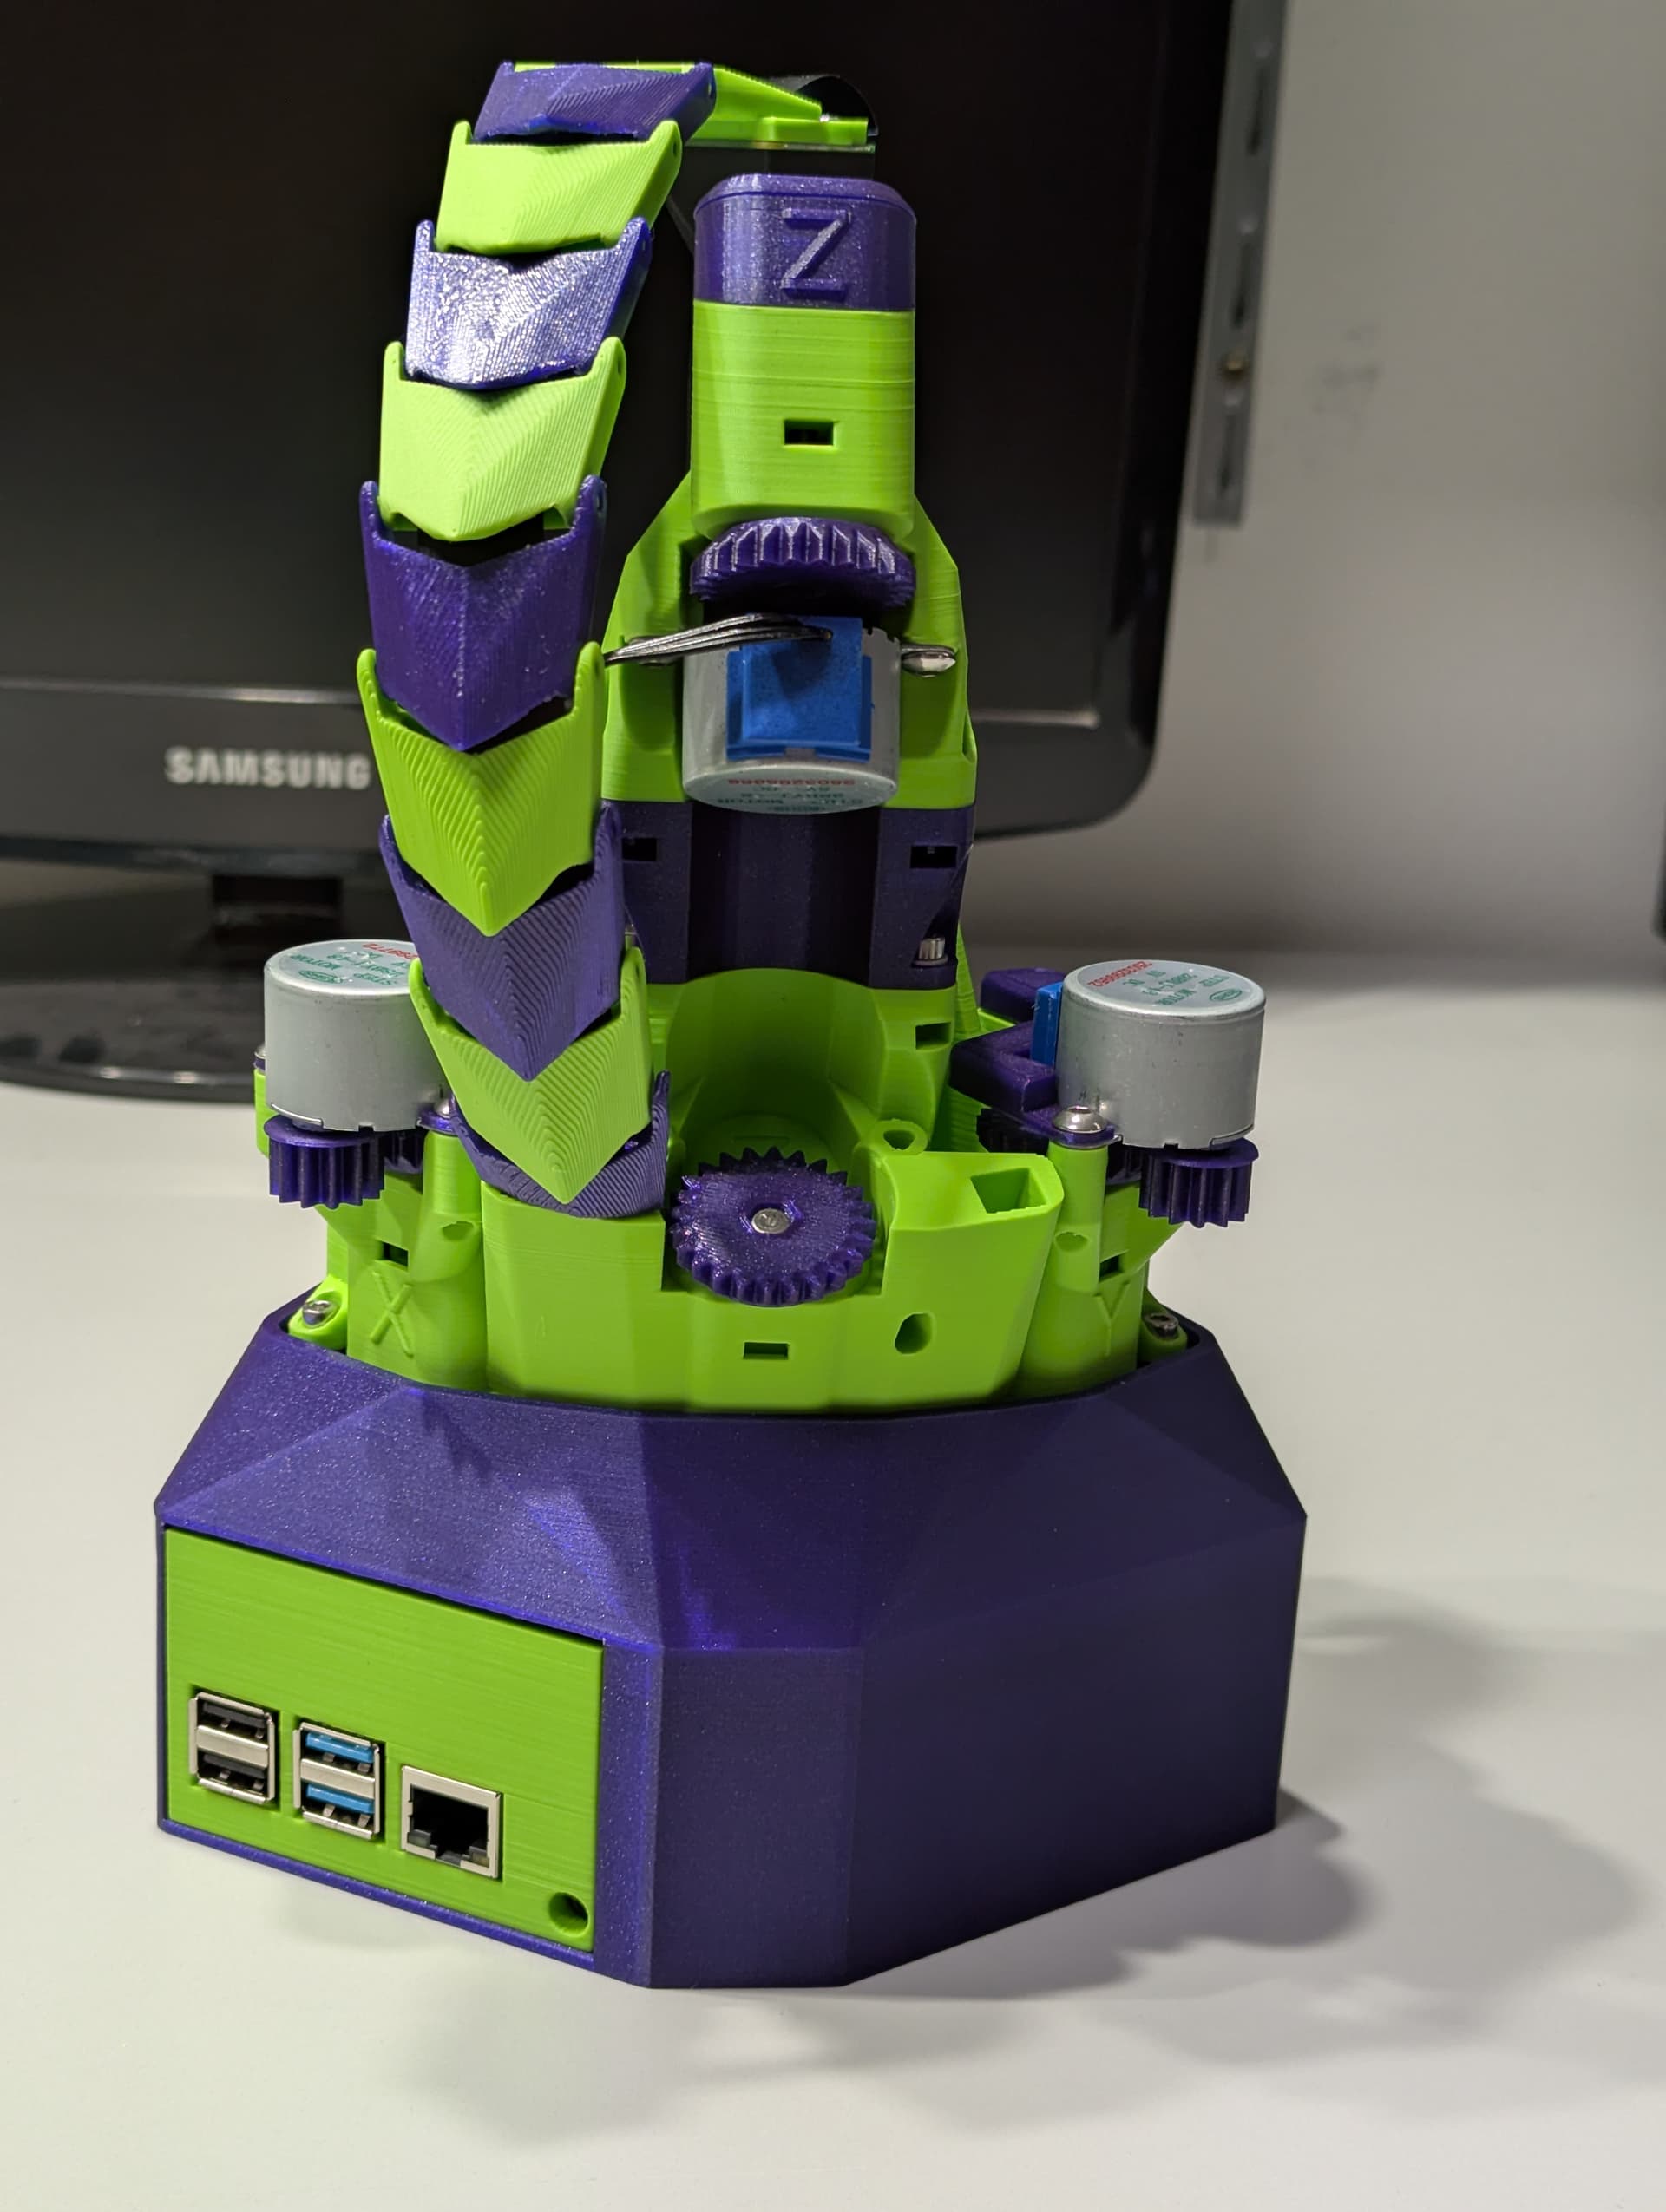
Let me start with some beauty shots:
Front with color-matched slide-holders:
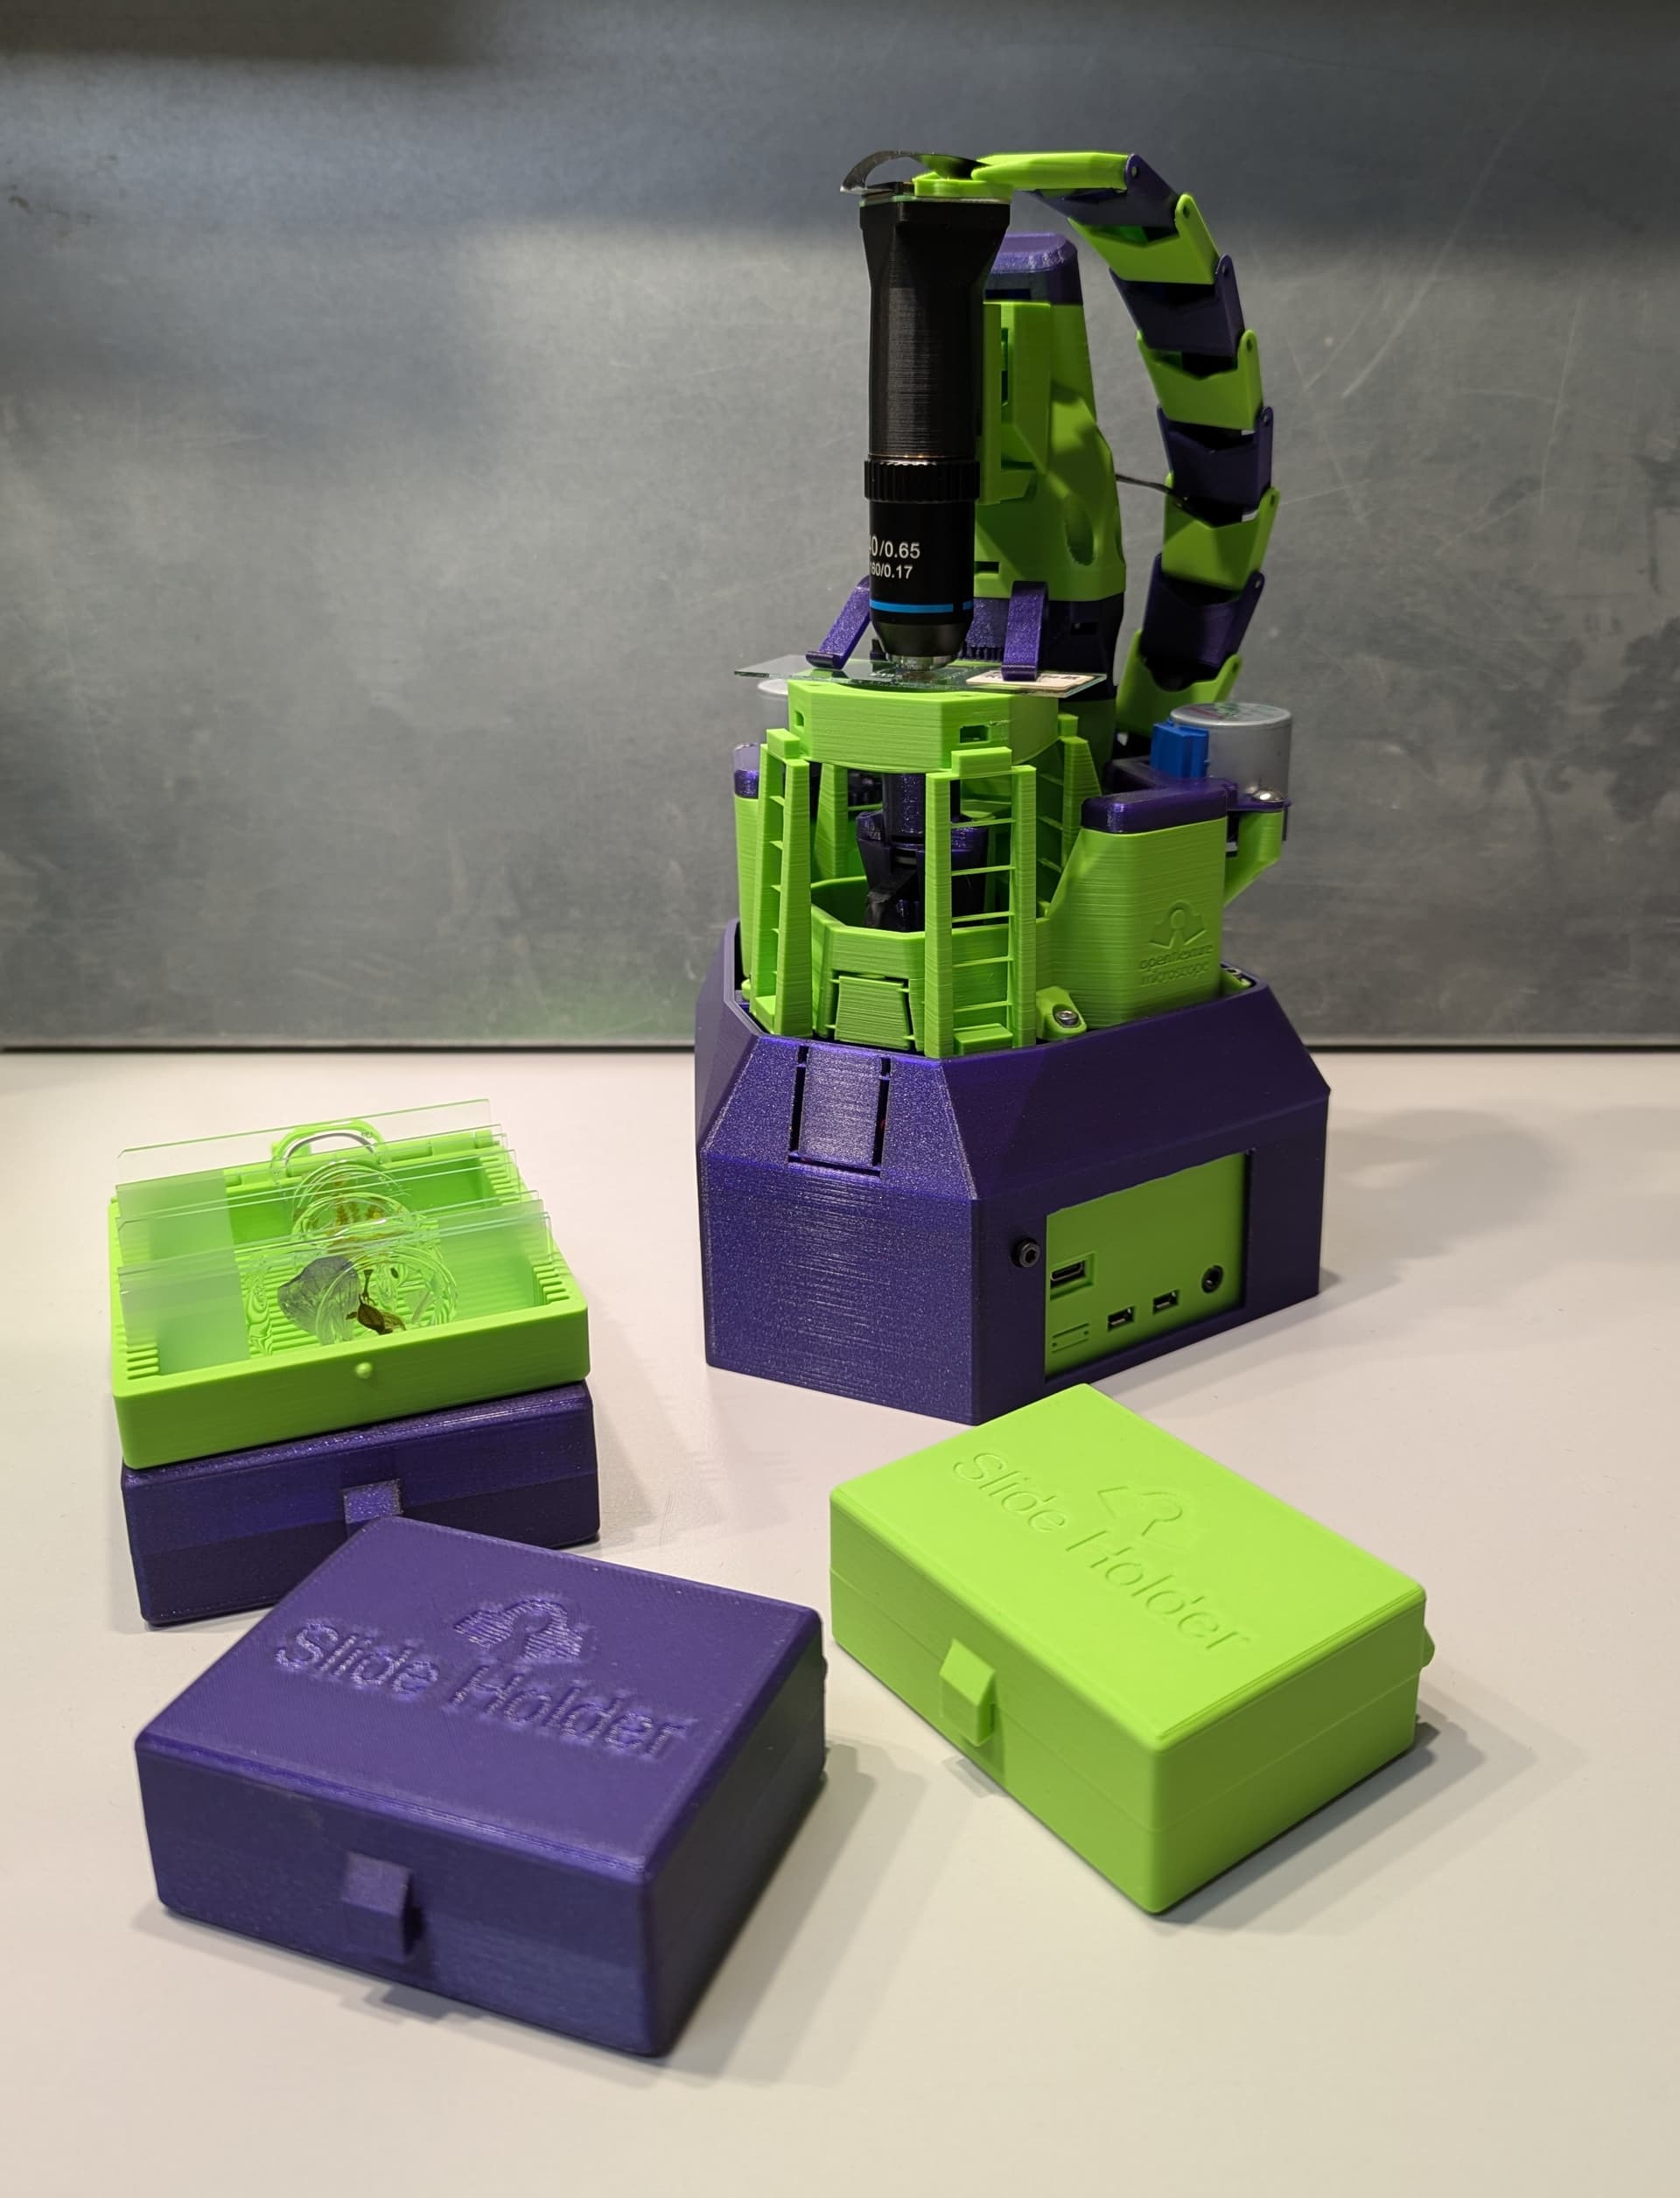
Side-View:
Backside:

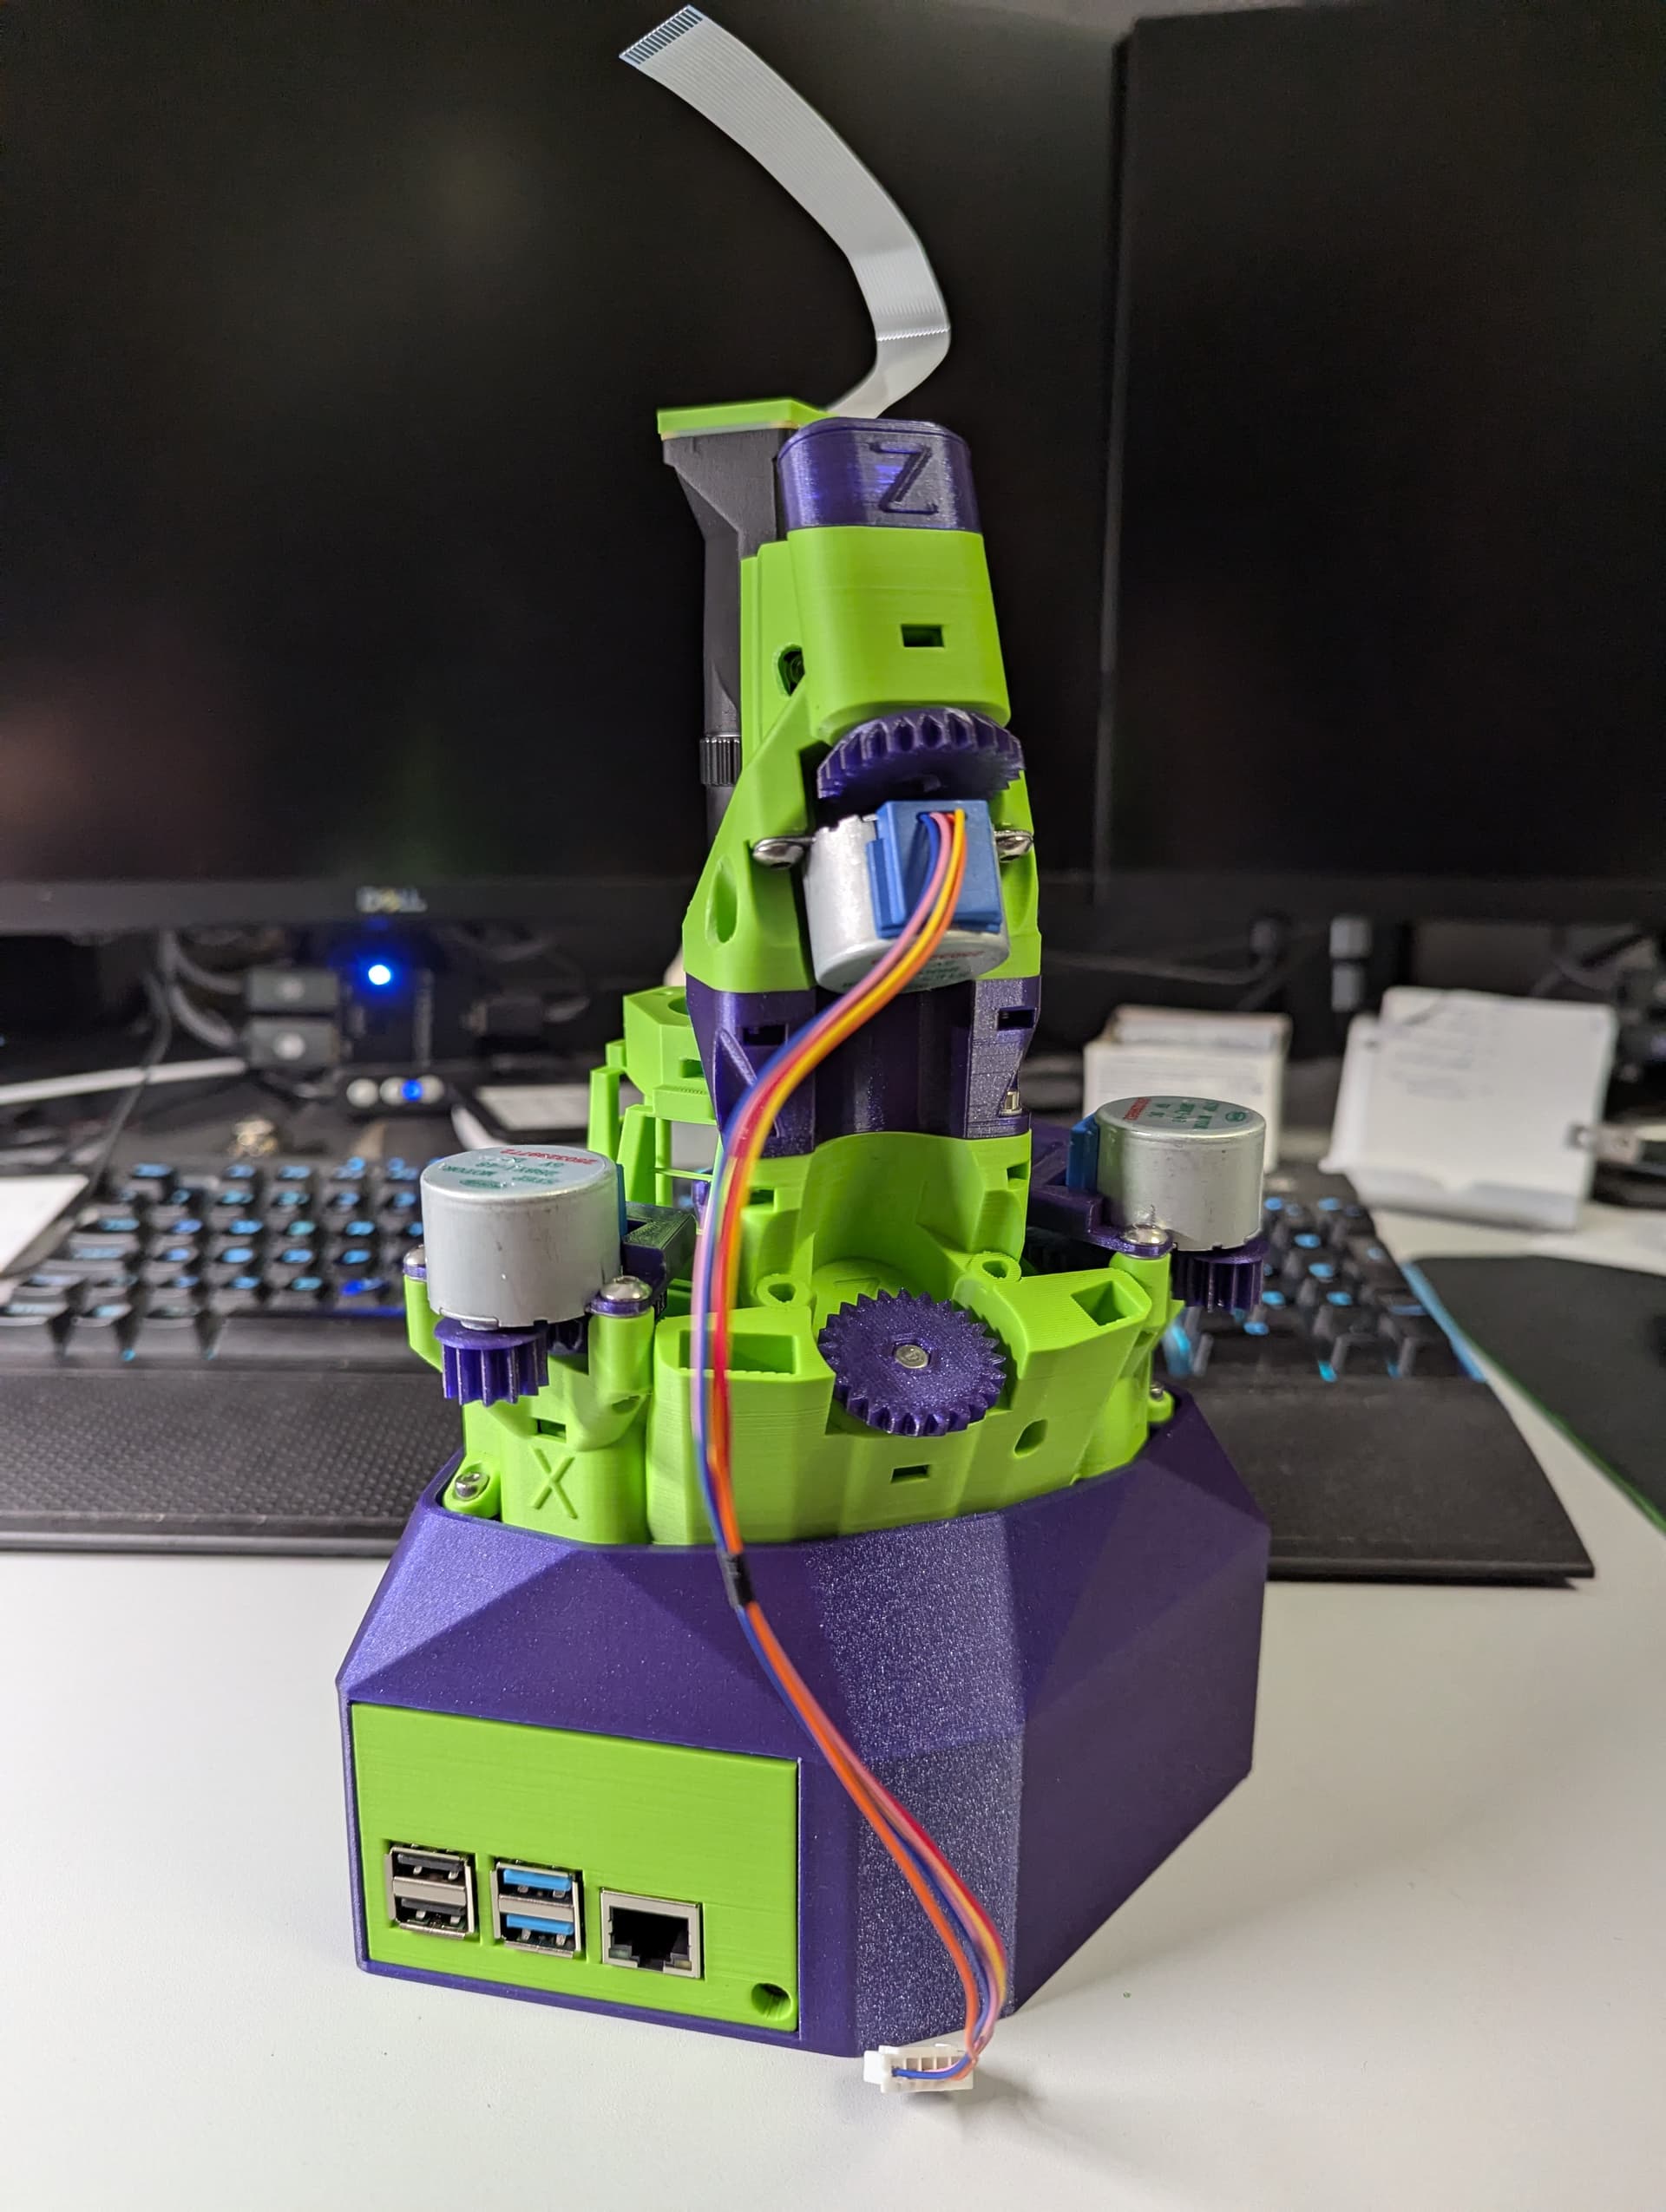
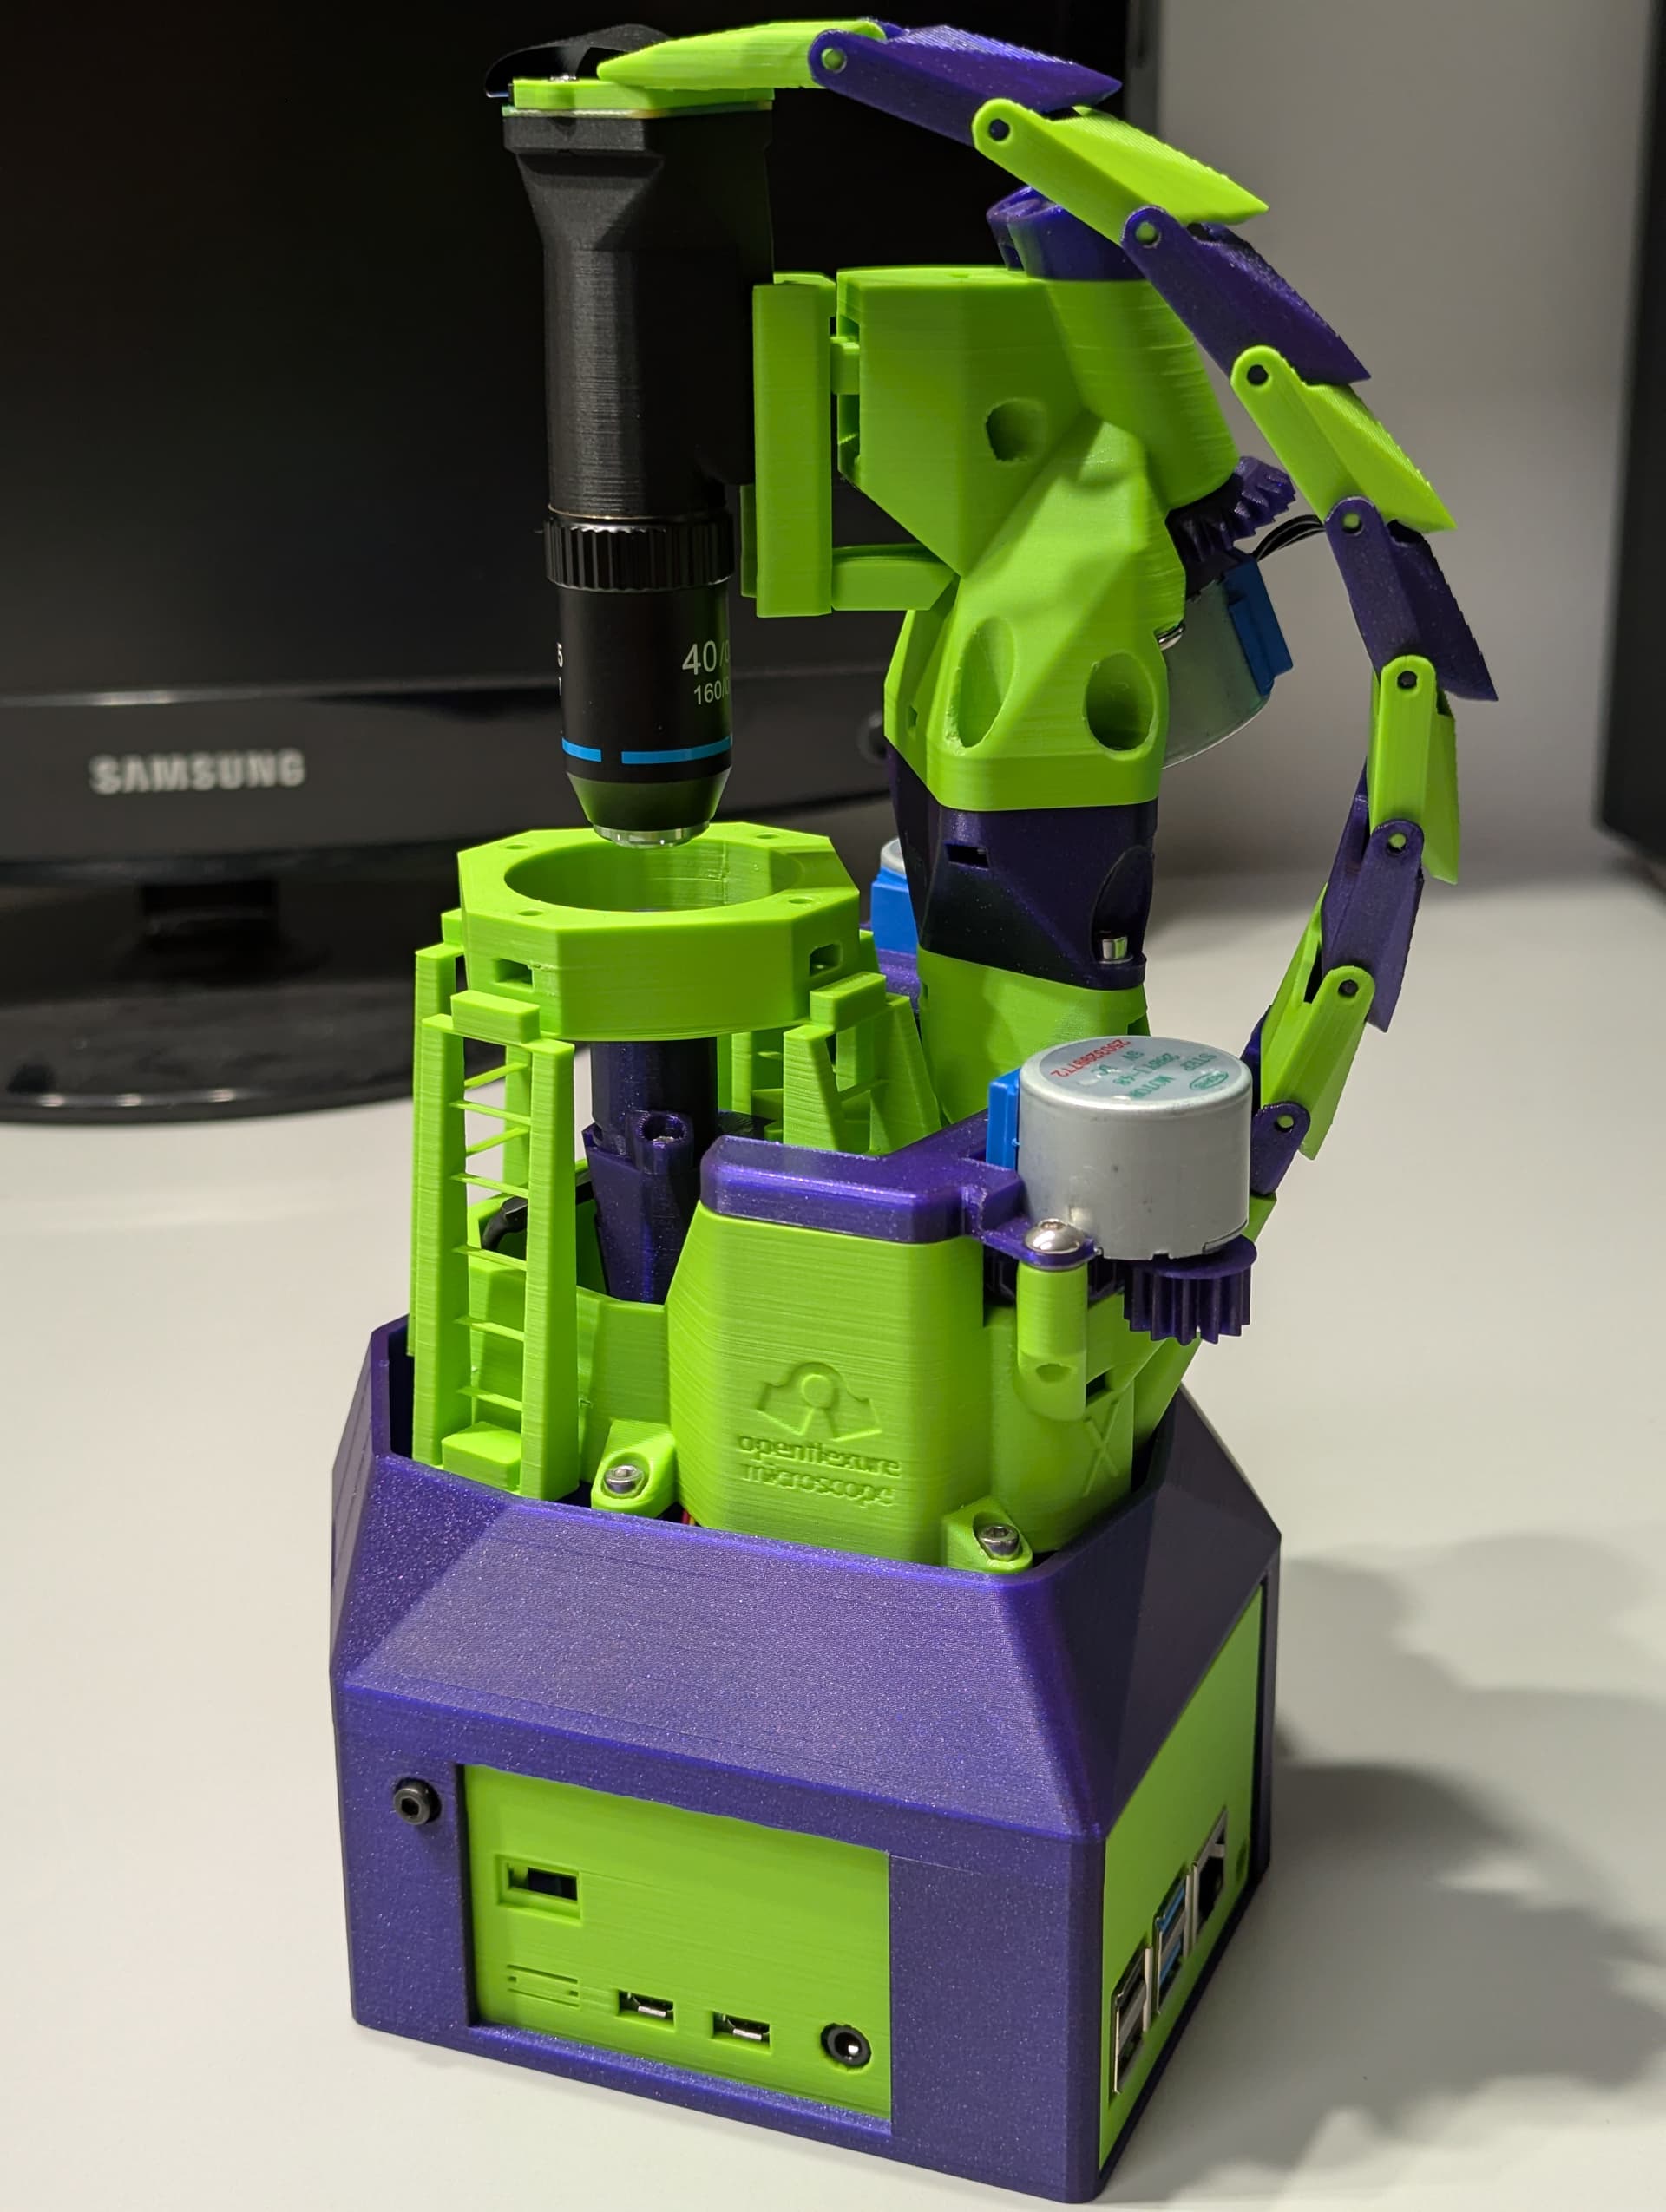
As you can see, the OFM has a custom drag-chain in some “scale”-like or “spine”-optic. My wife found it ugly to have loose cables hanging around (especially different-colored ones). I suggested, that a drag-chain may be an option, so she started modeling one, and I think it came out great. Because this was more art than CAD, the resulting OpenScad-file has become a little creative, becaust of all those wild angles, but I can share the models if desired. I personally think it looks very cool. To hide the cables even more, we used some kind of automotive liquid rubber spray to paint the PiCam-cable and the z-motor-wires black, so that they don’t shine bright through the dragchain. All in all, this has become a gorgeous looking device and was well worth the effort in my opinion. Even though I personally still like the regular arrangement over the upright one, the drag-chain makes all the difference here ![]() The “Joker”-like colortheme is also very appealing. Usually I would find the green too bright, but with the prusa galaxy purple it is a very cool and vibrant color-combination.
The “Joker”-like colortheme is also very appealing. Usually I would find the green too bright, but with the prusa galaxy purple it is a very cool and vibrant color-combination.
Build-Log
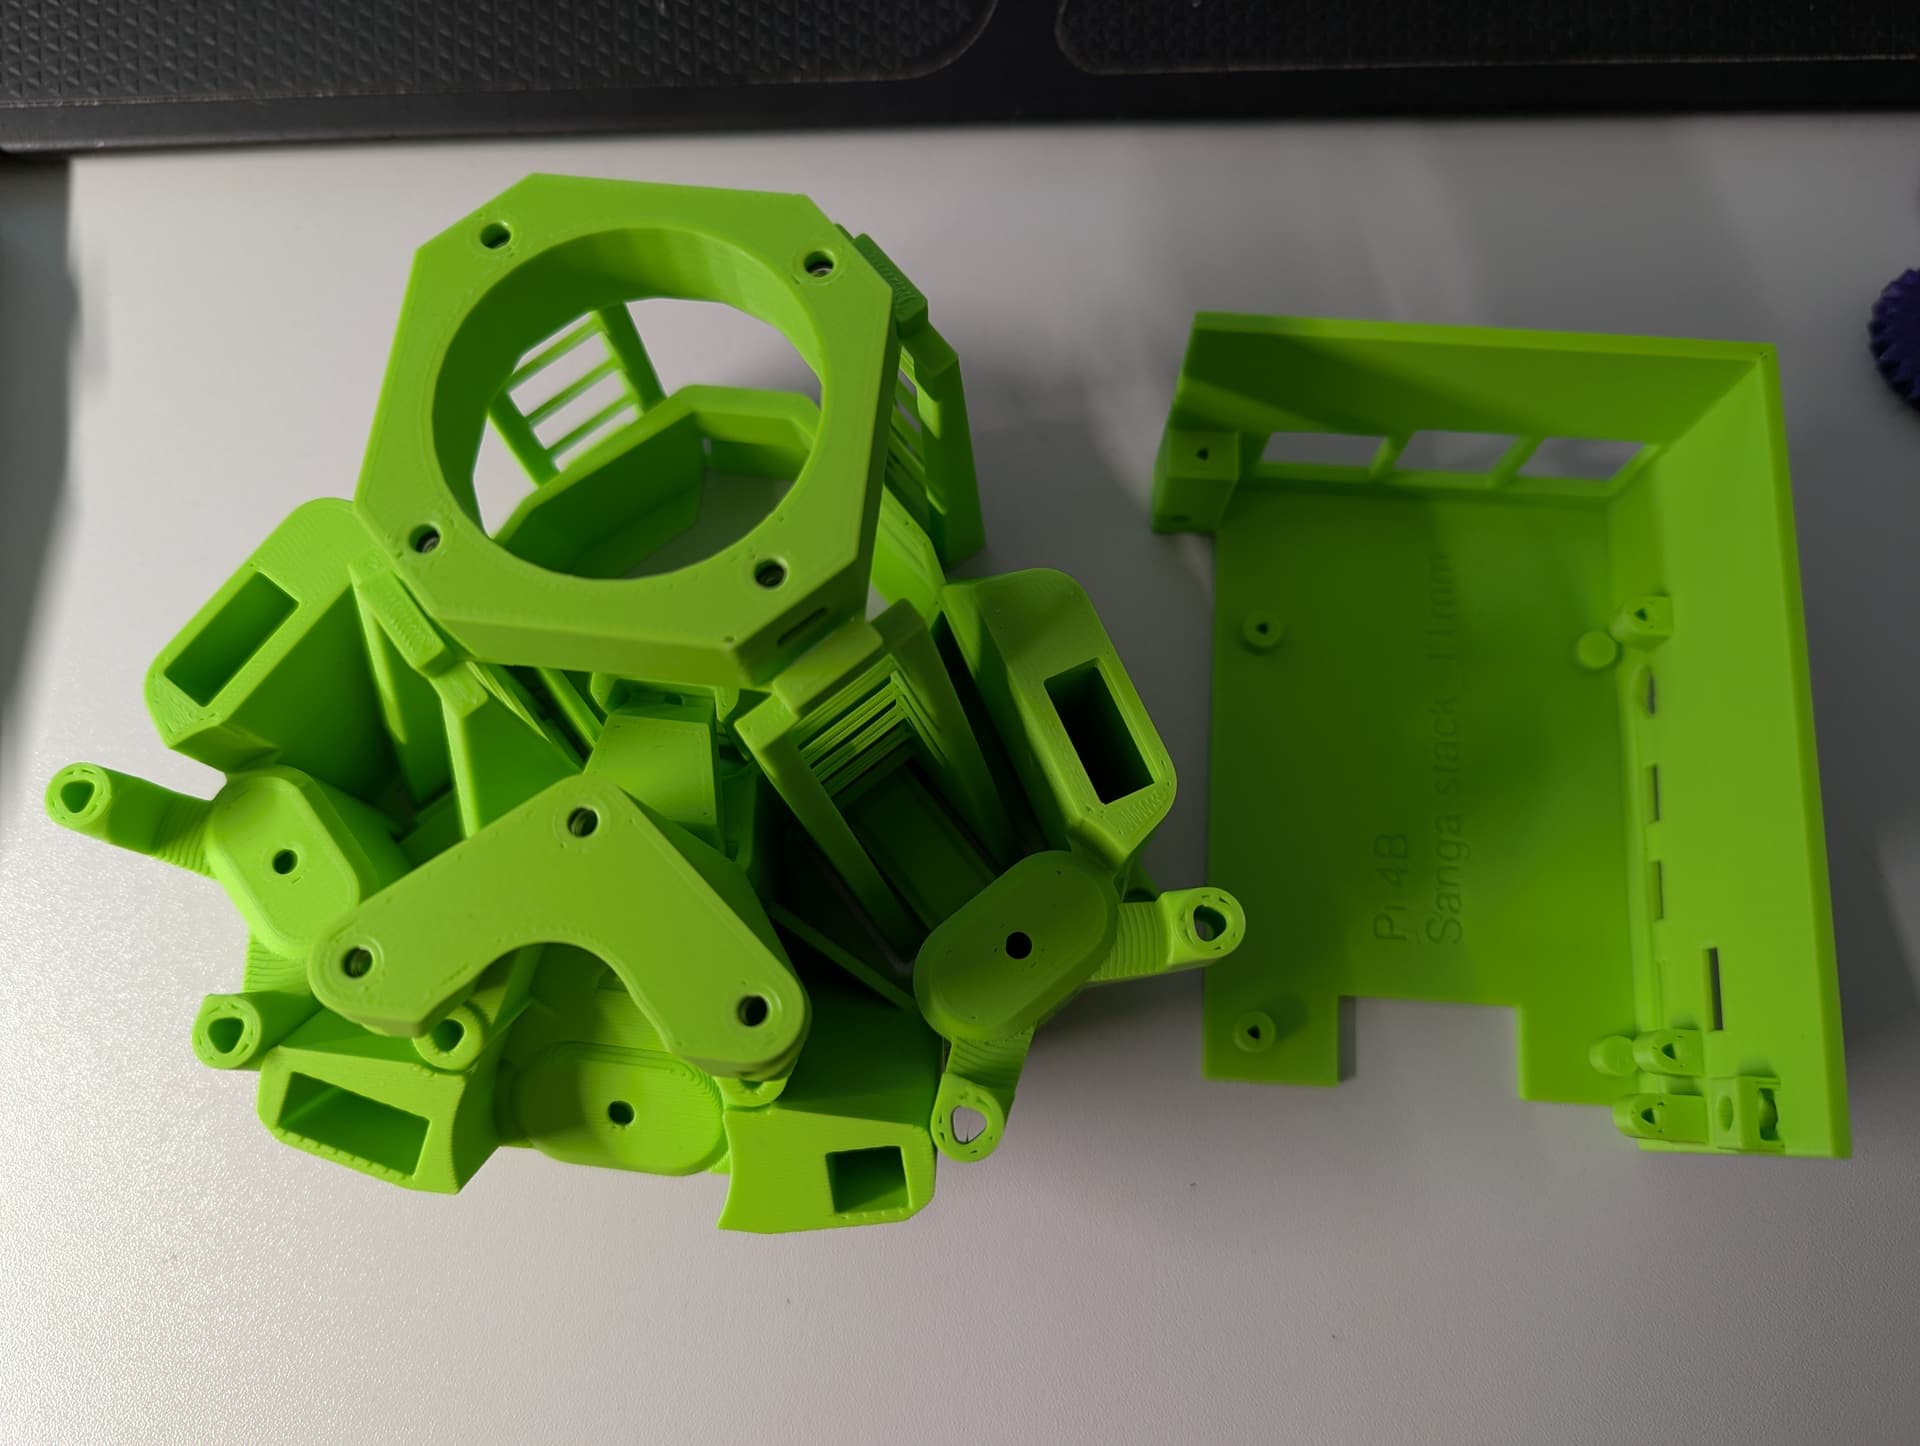
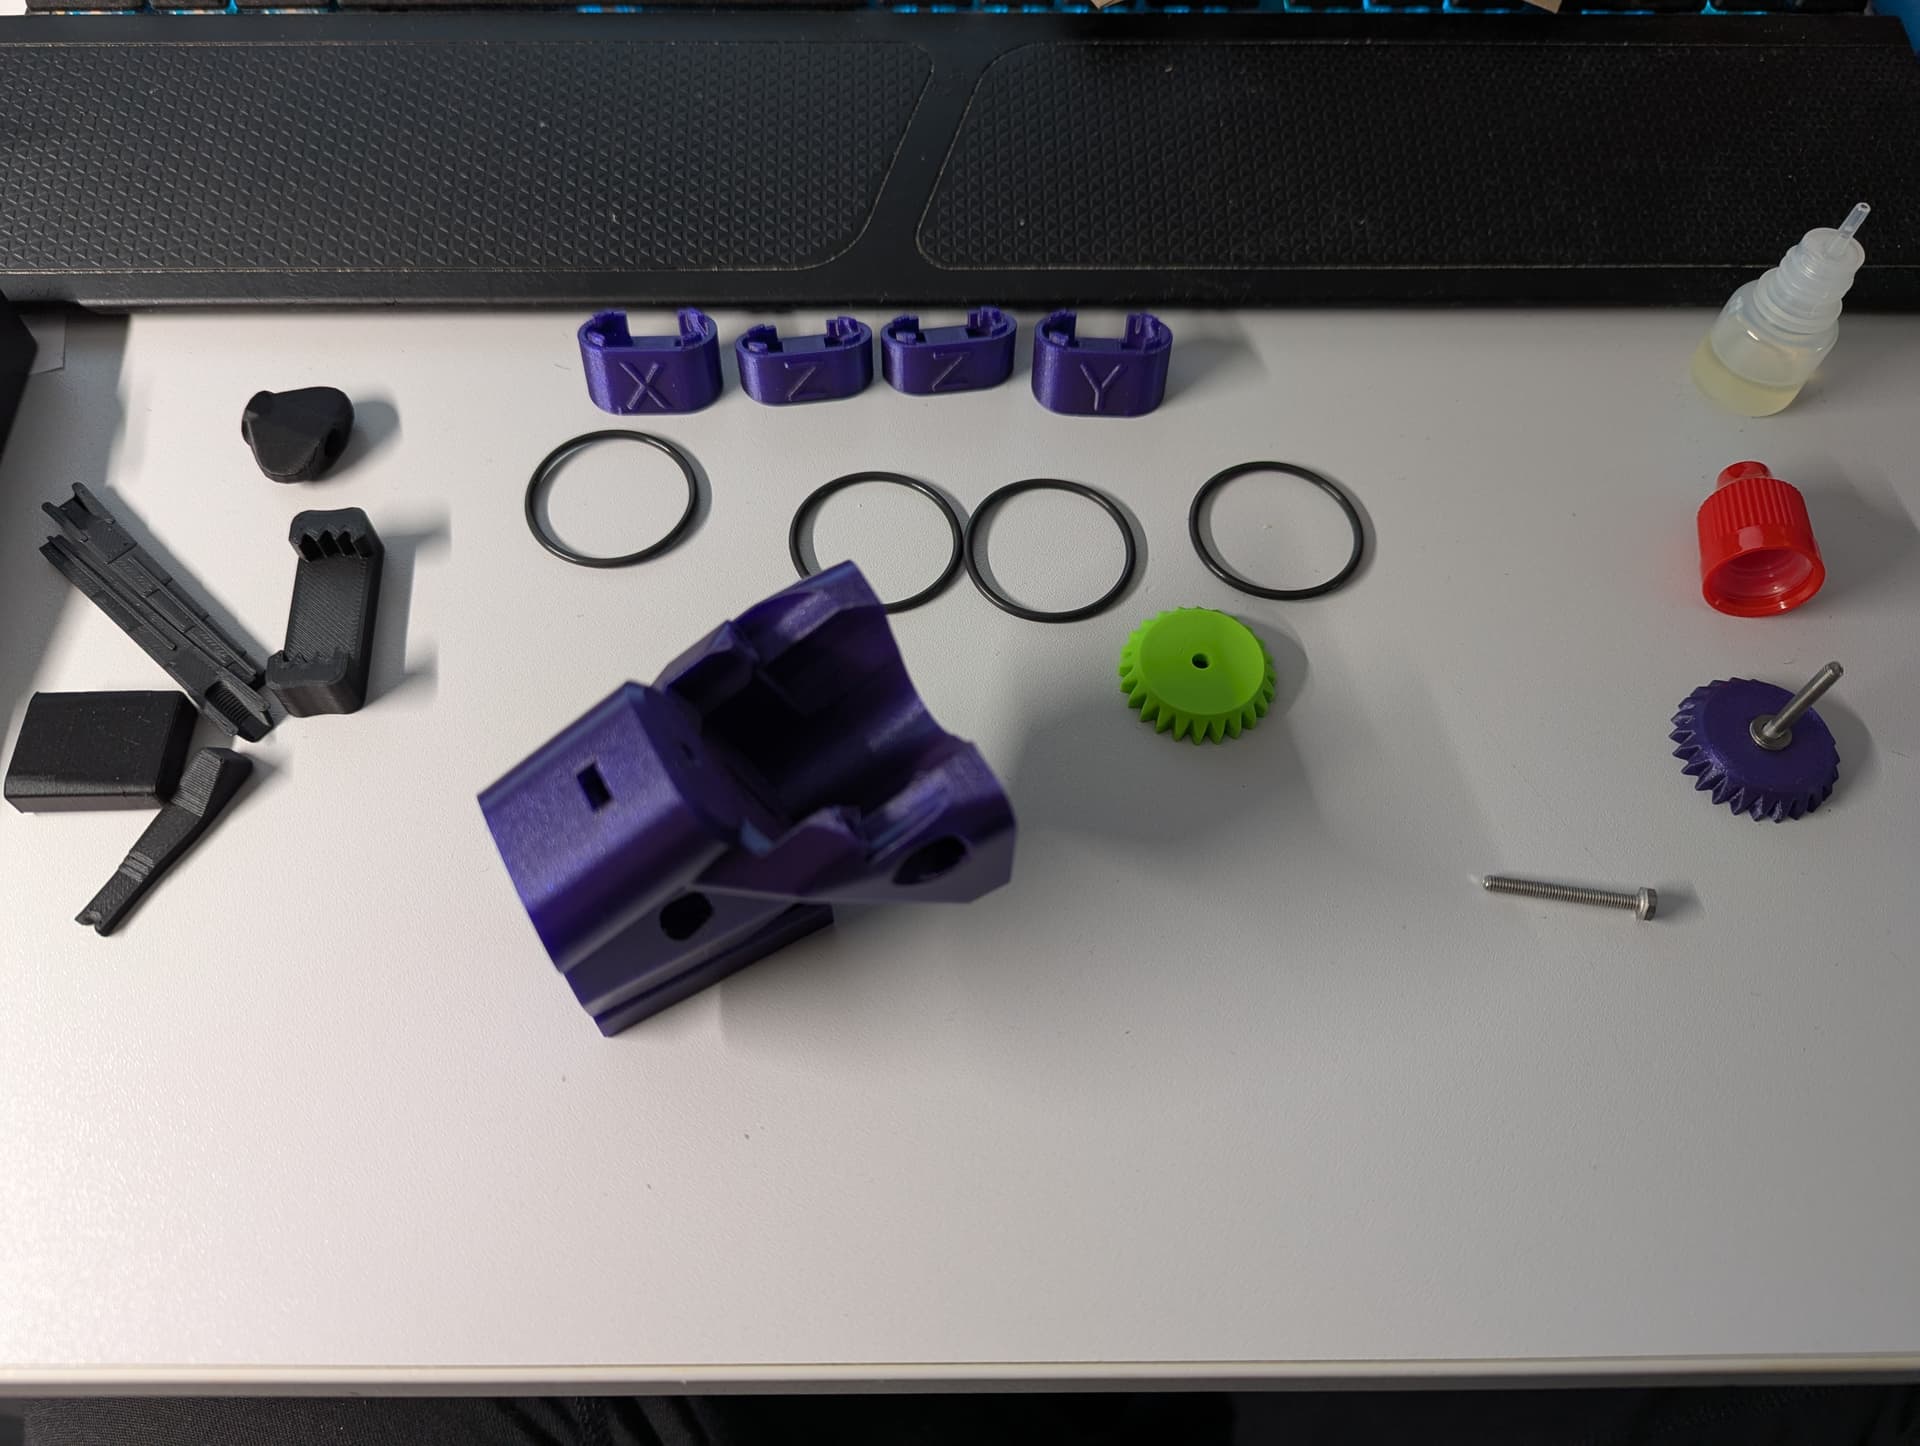
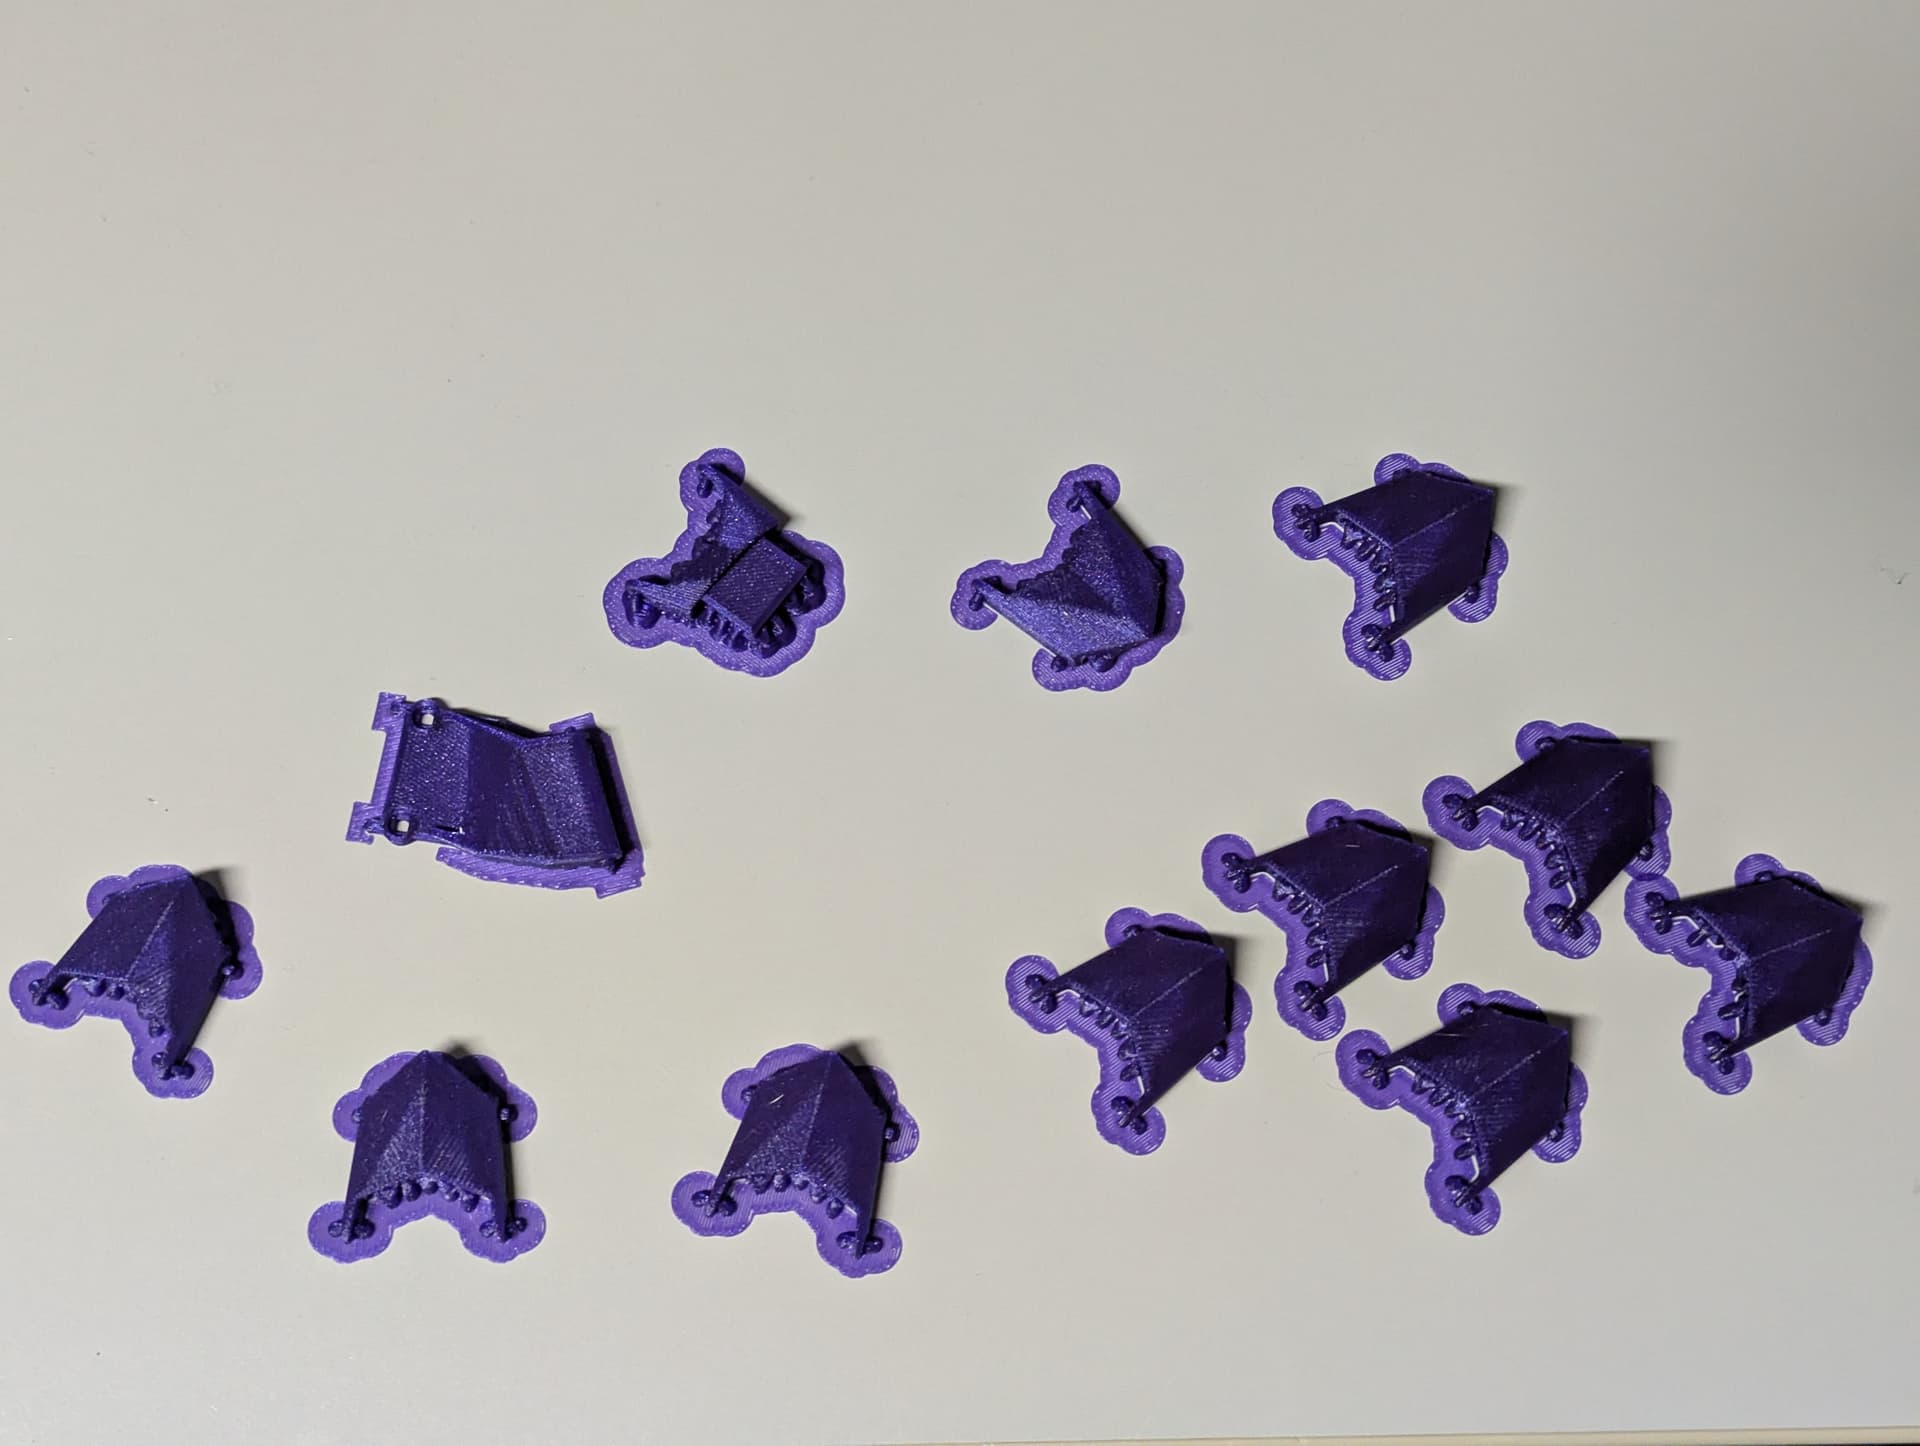
Parts
We basically printed almost all non-black-parts in both colors to be able to decide later on, which combination we liked best. this was a good decision, because we swapped opinions on this multiple times. Because of the build-instructions were not really clear on what is needed for an upright-highres-version, some parts were actually unneded, but we figured it out in the end.


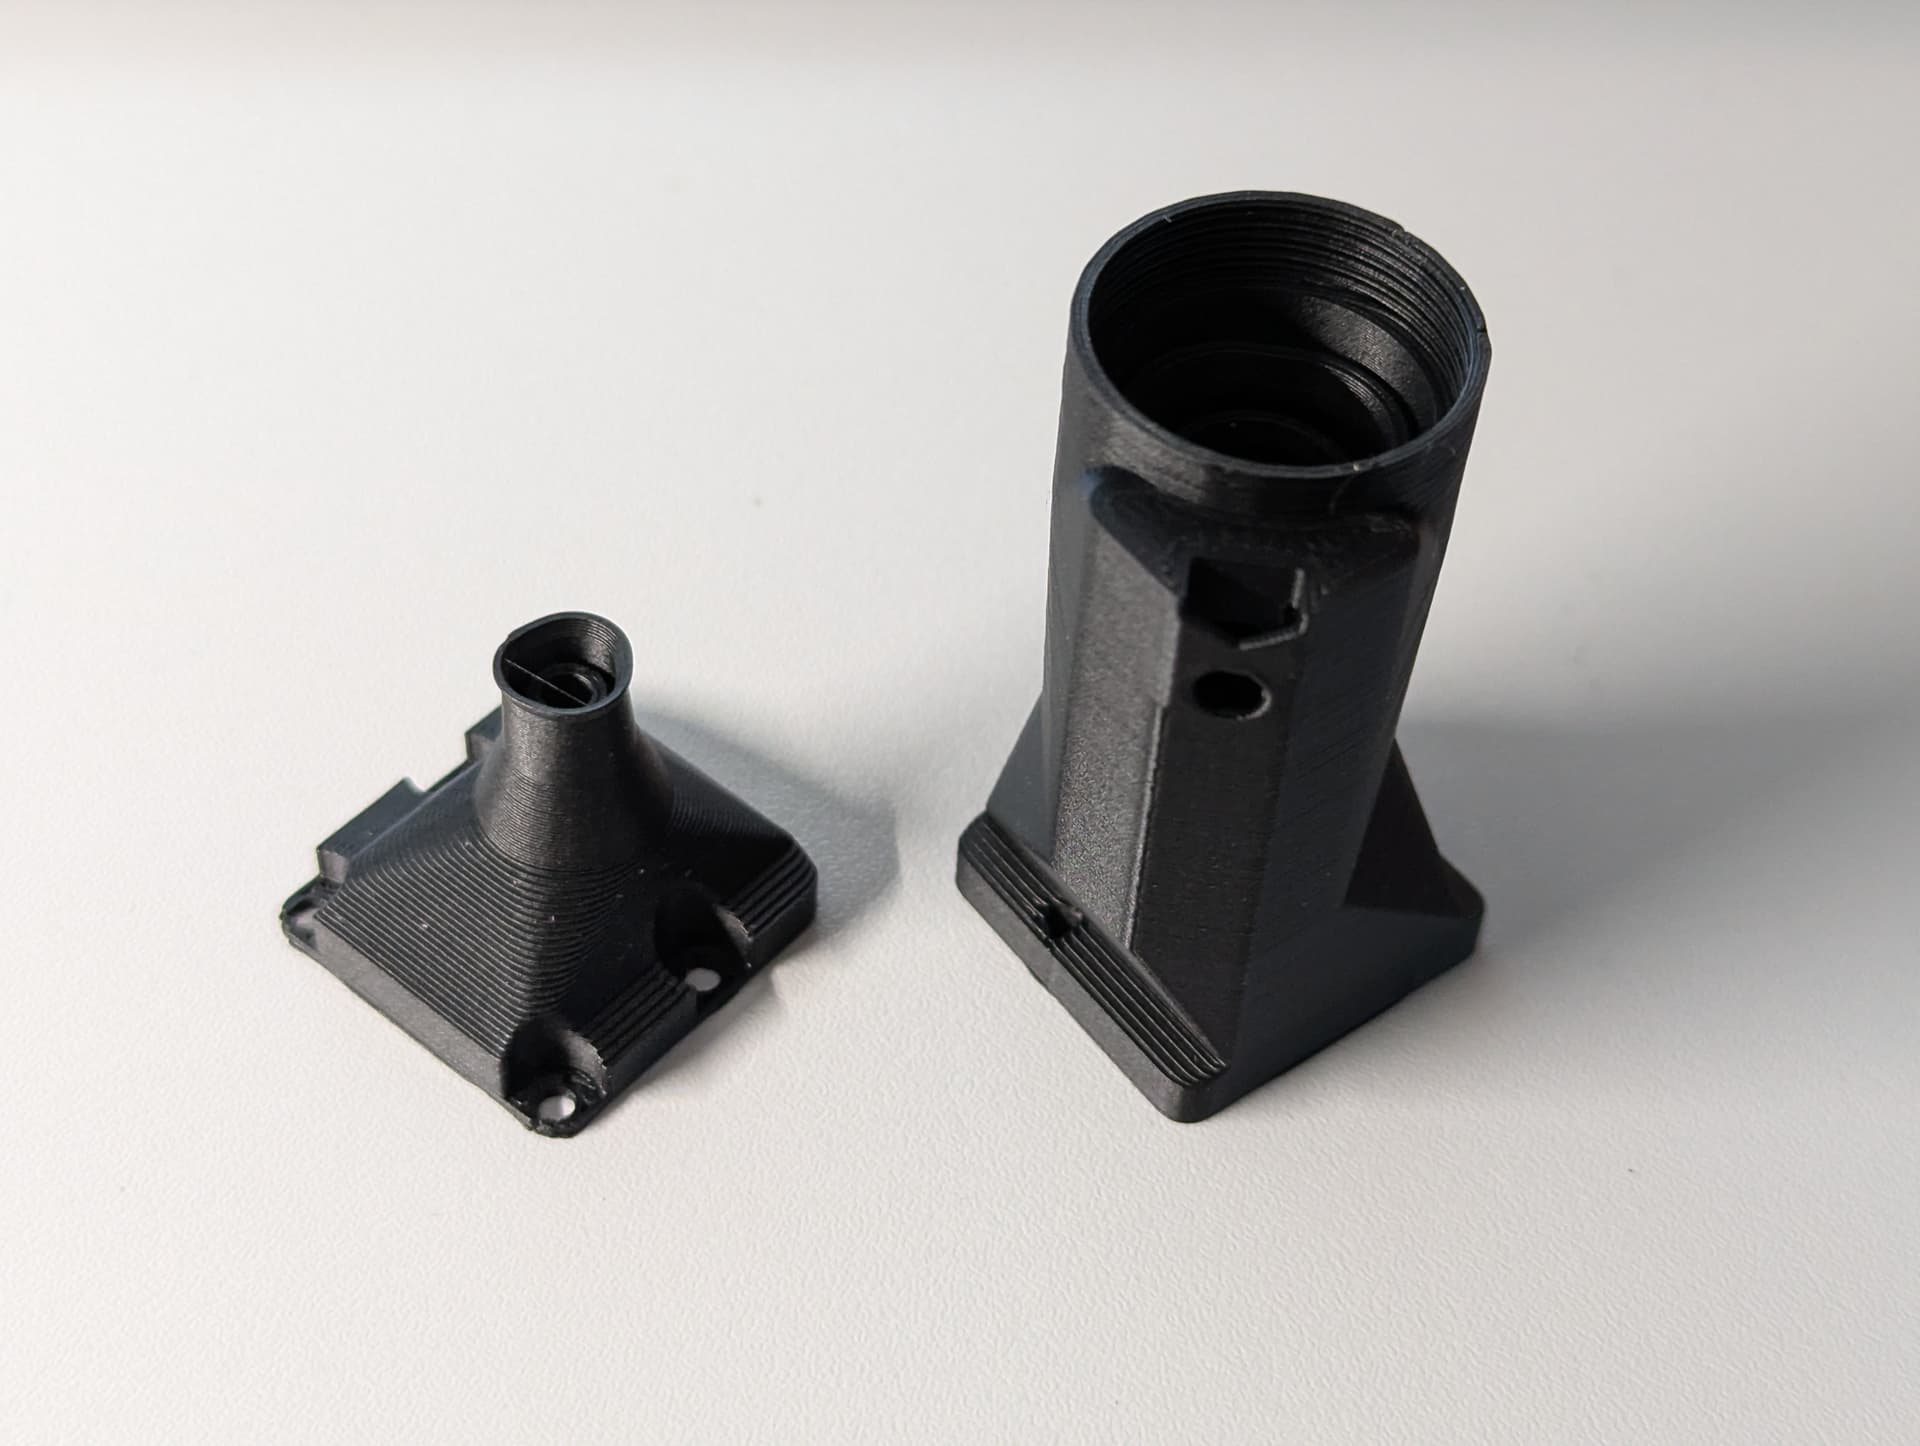
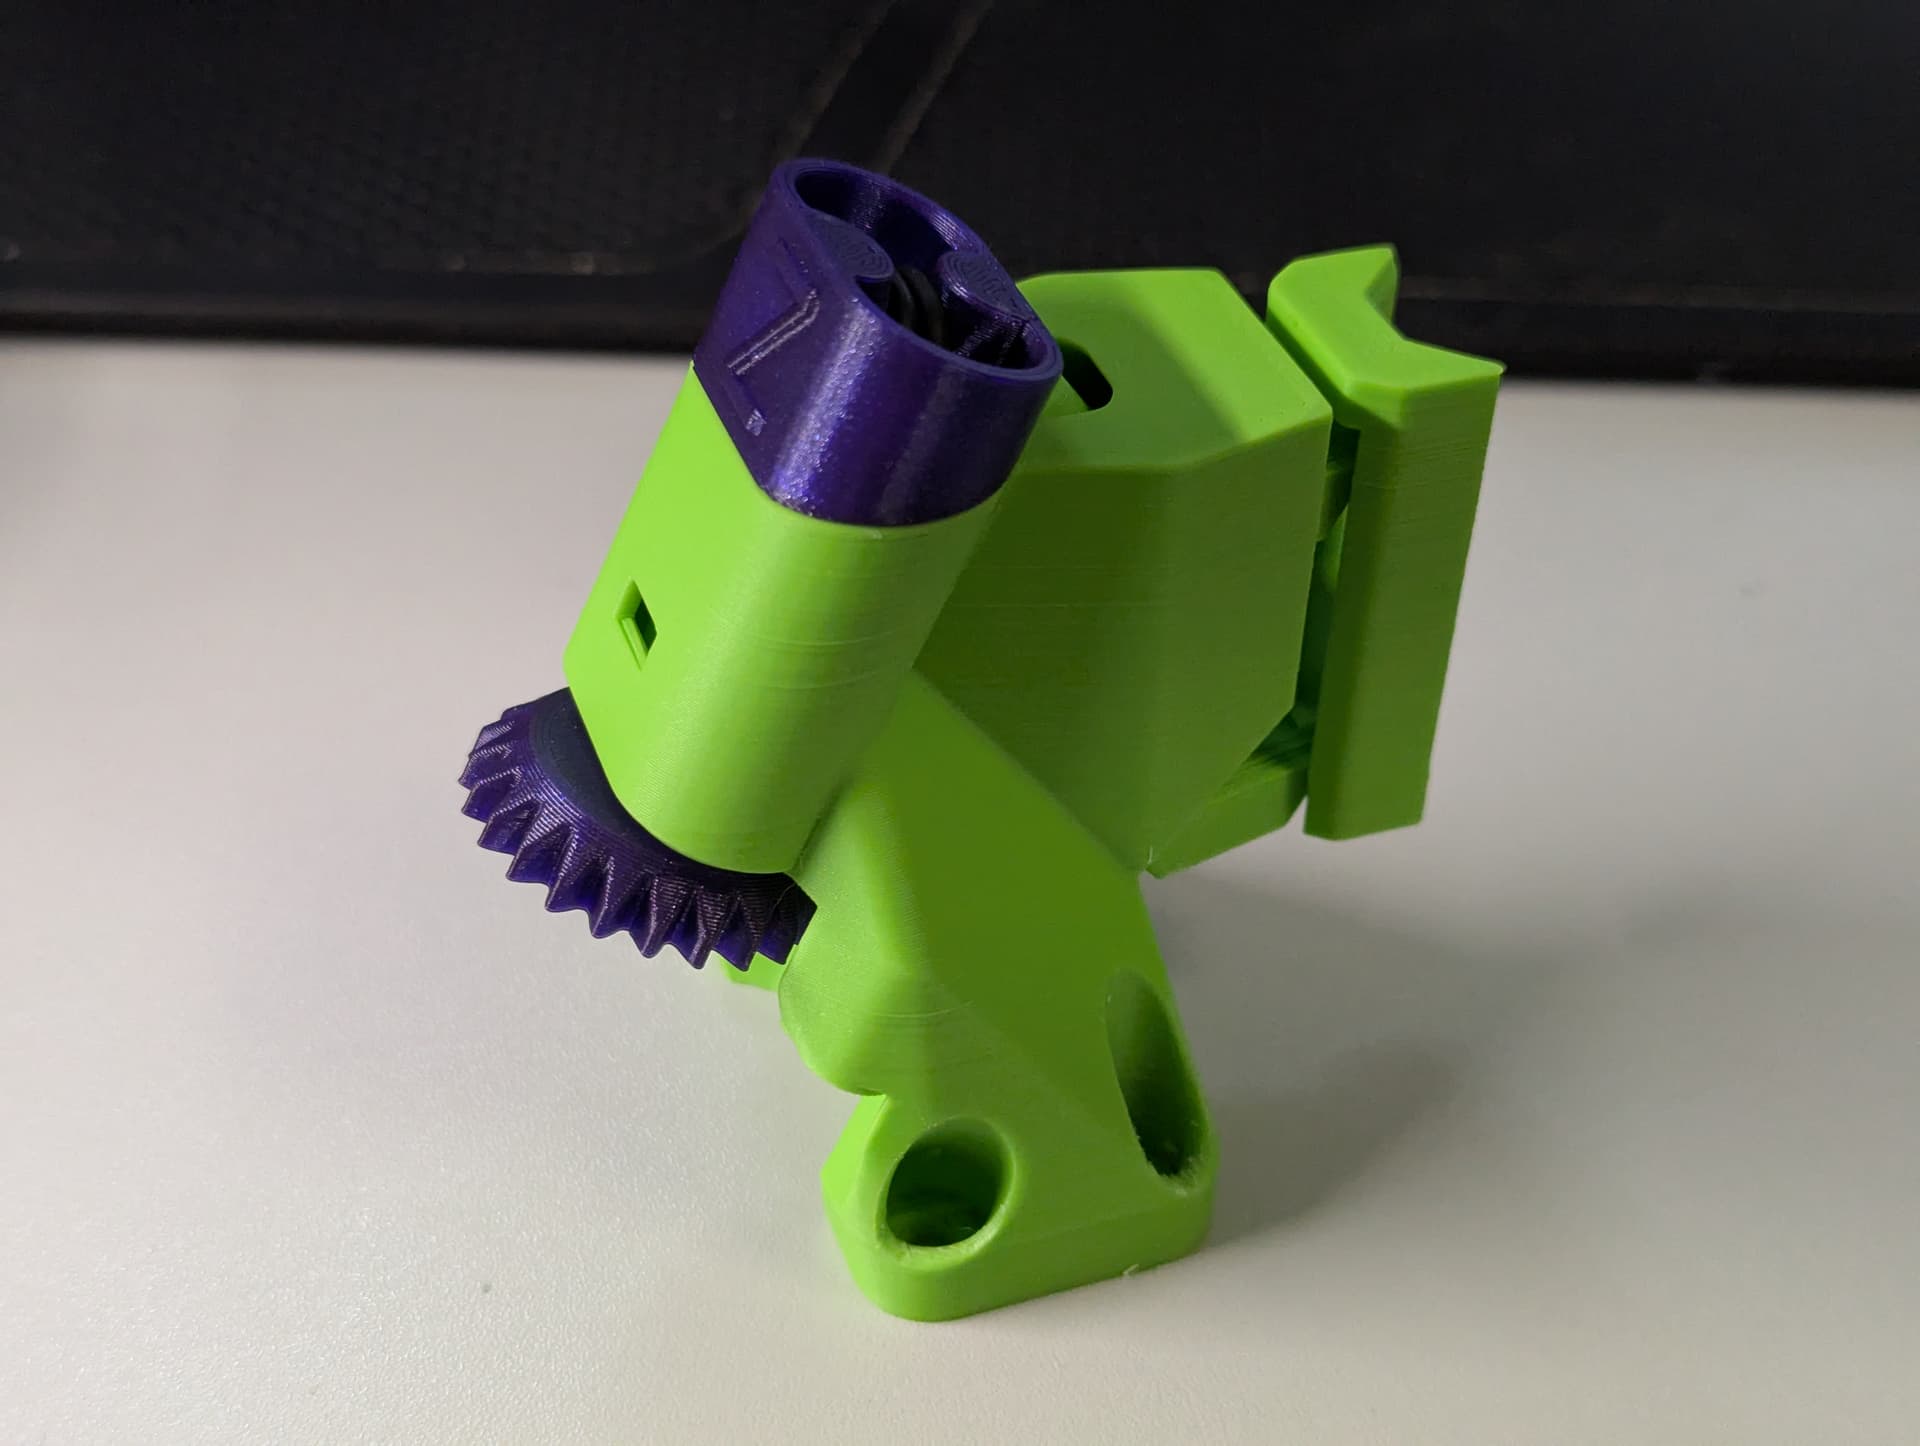
Assembly, part I
After printing everything we fitted some parts together to get an idea which colors worked best together on which part.

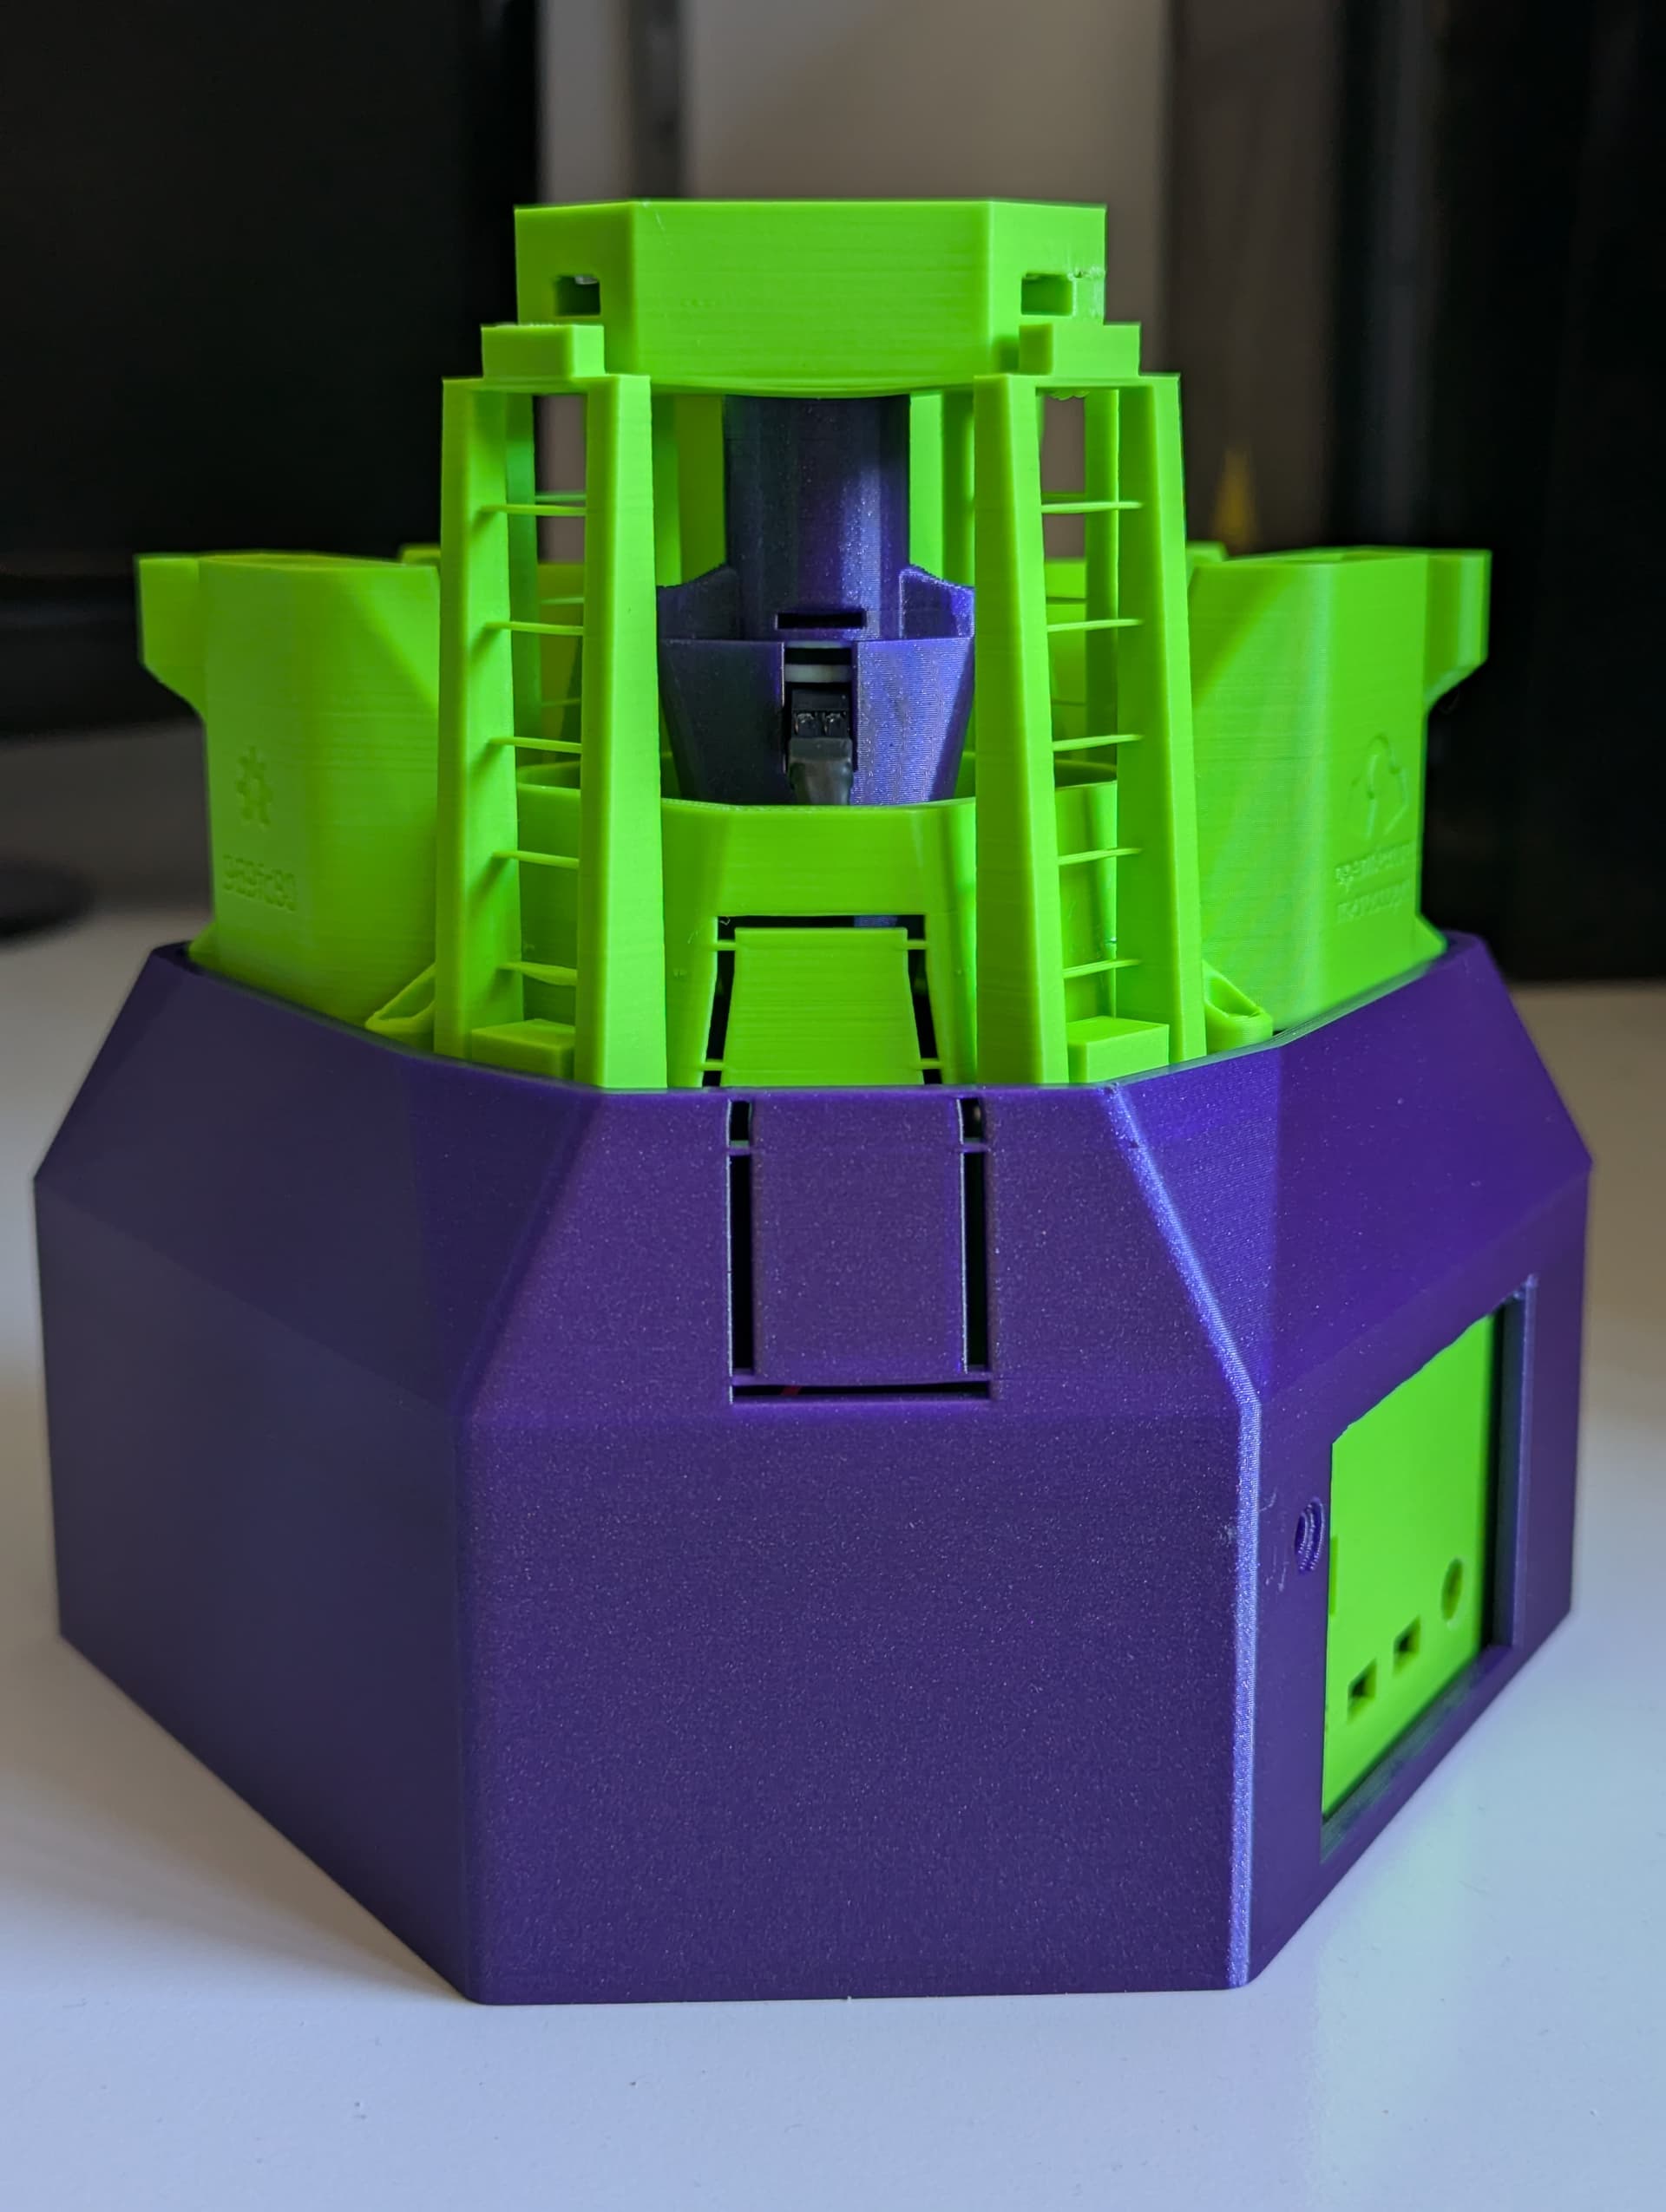
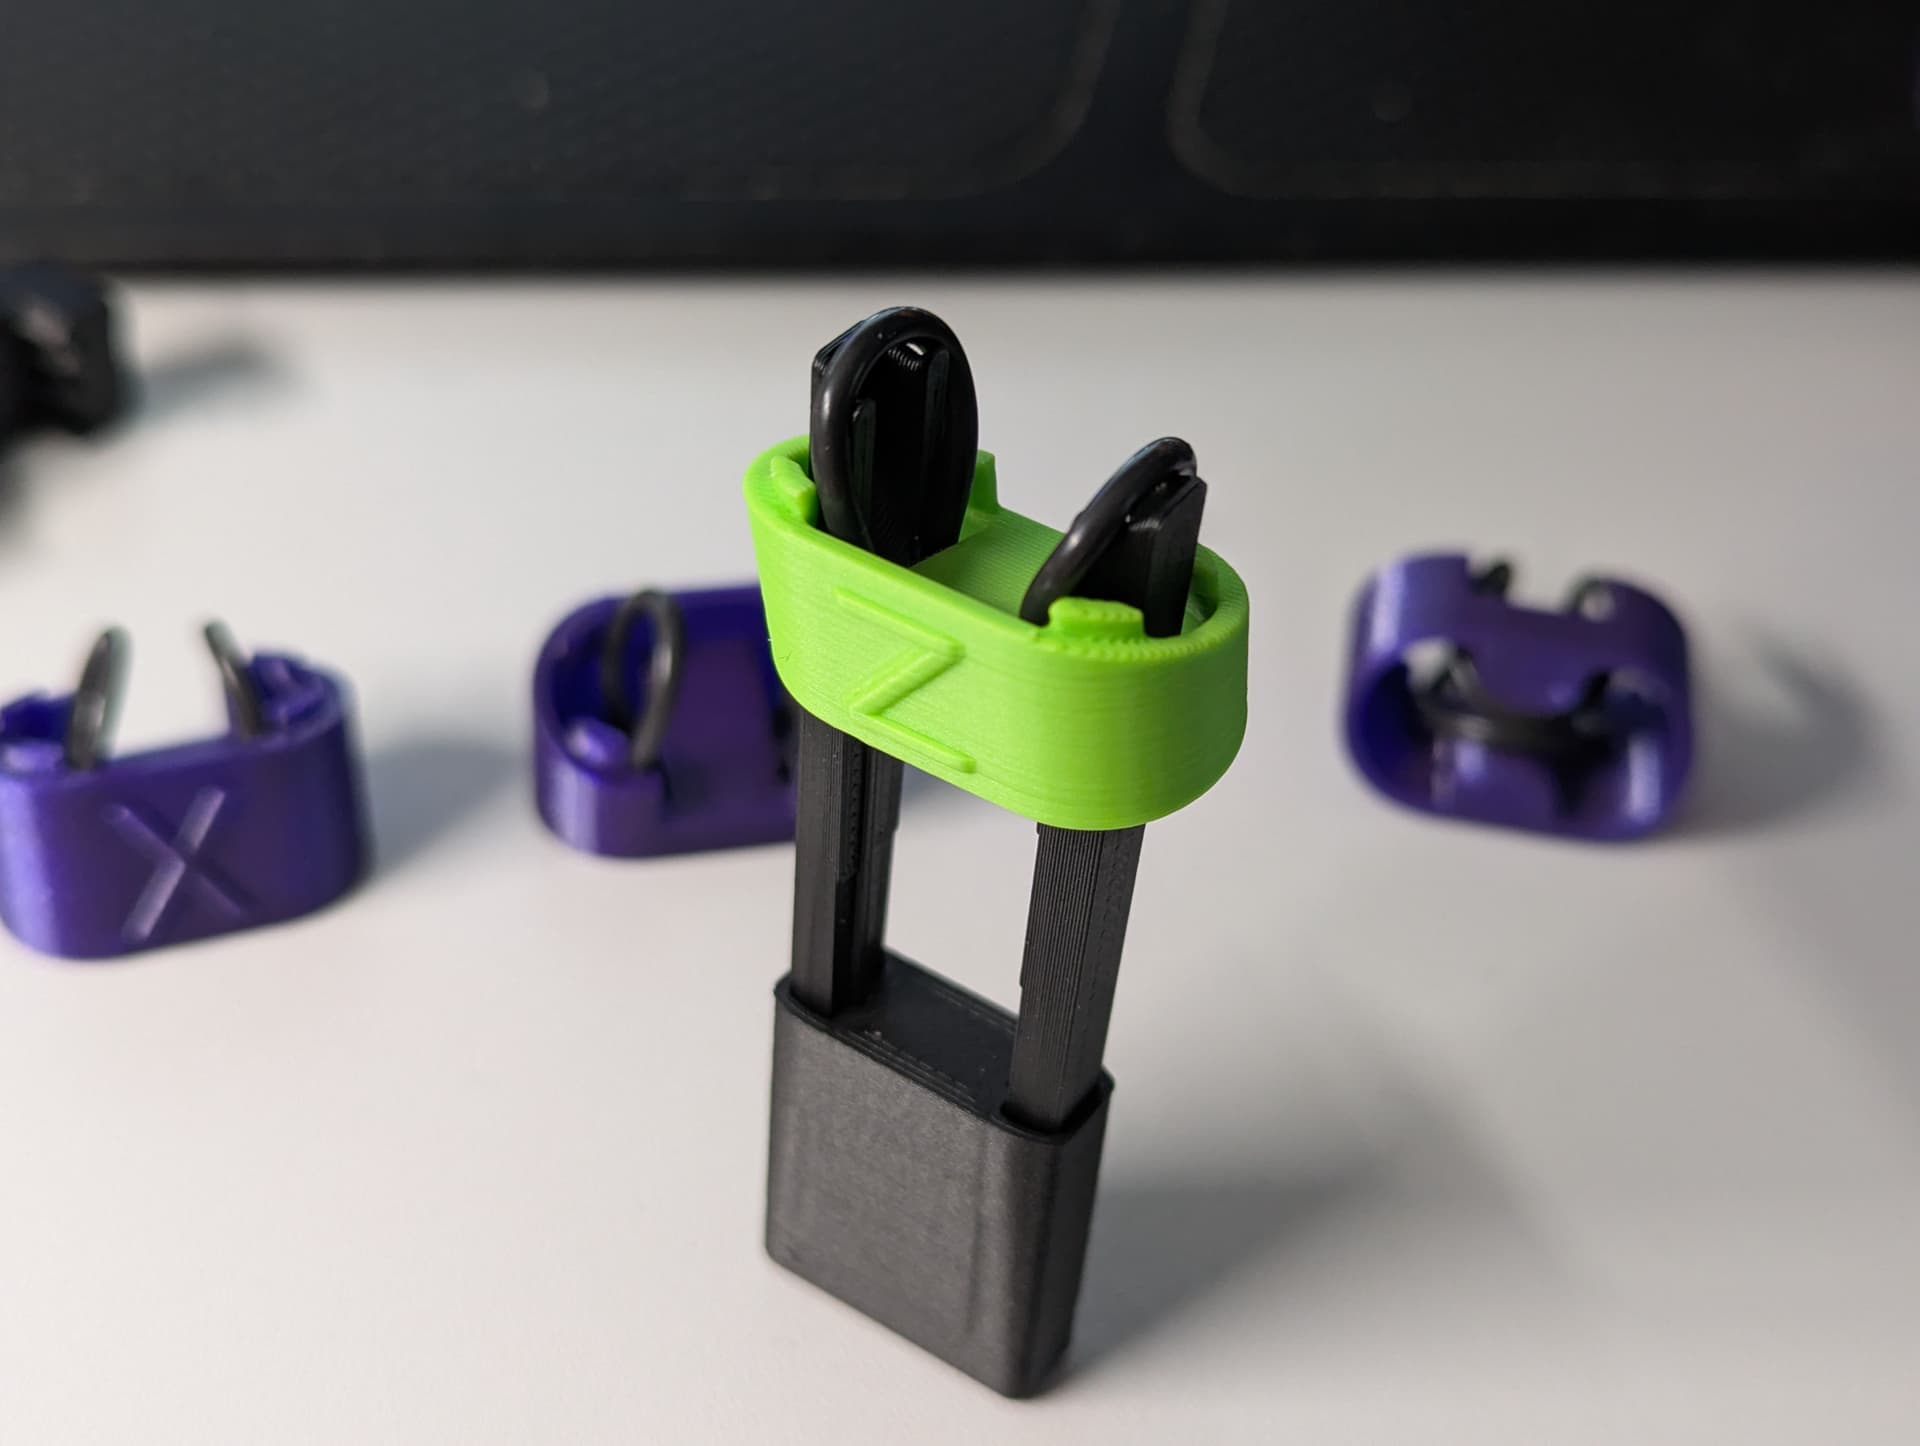
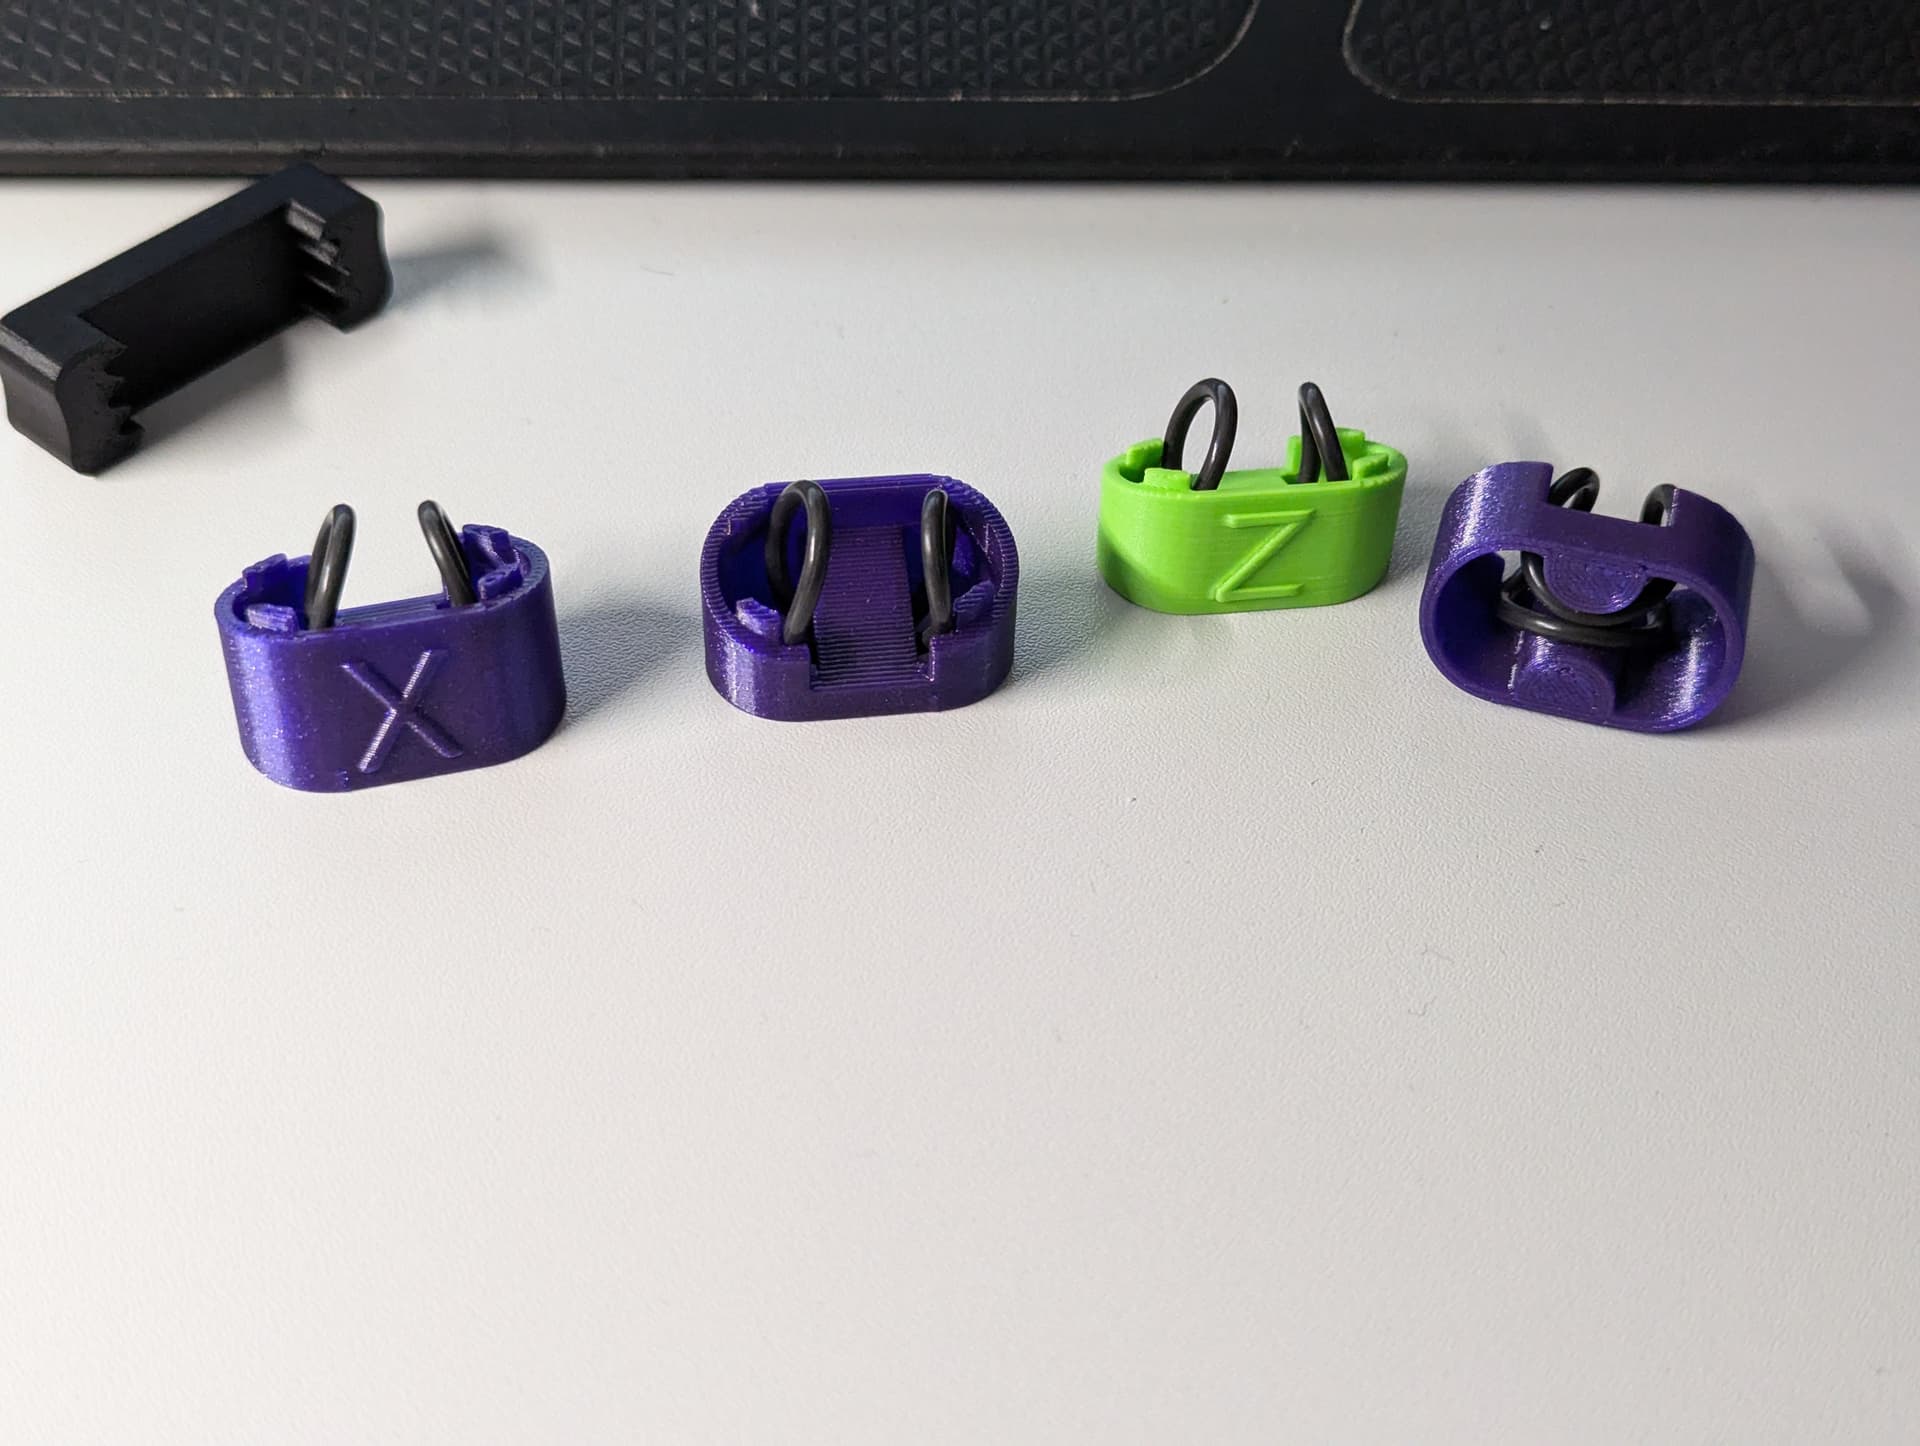
Assembly, part II
Fitting everything together already looks quite stunning, however, the motorcable and especially the white PiCam-Cable (wasn’t able to source a 40cm-cable in black locally) looked very off, so we discussed options to make it visually more appealing.

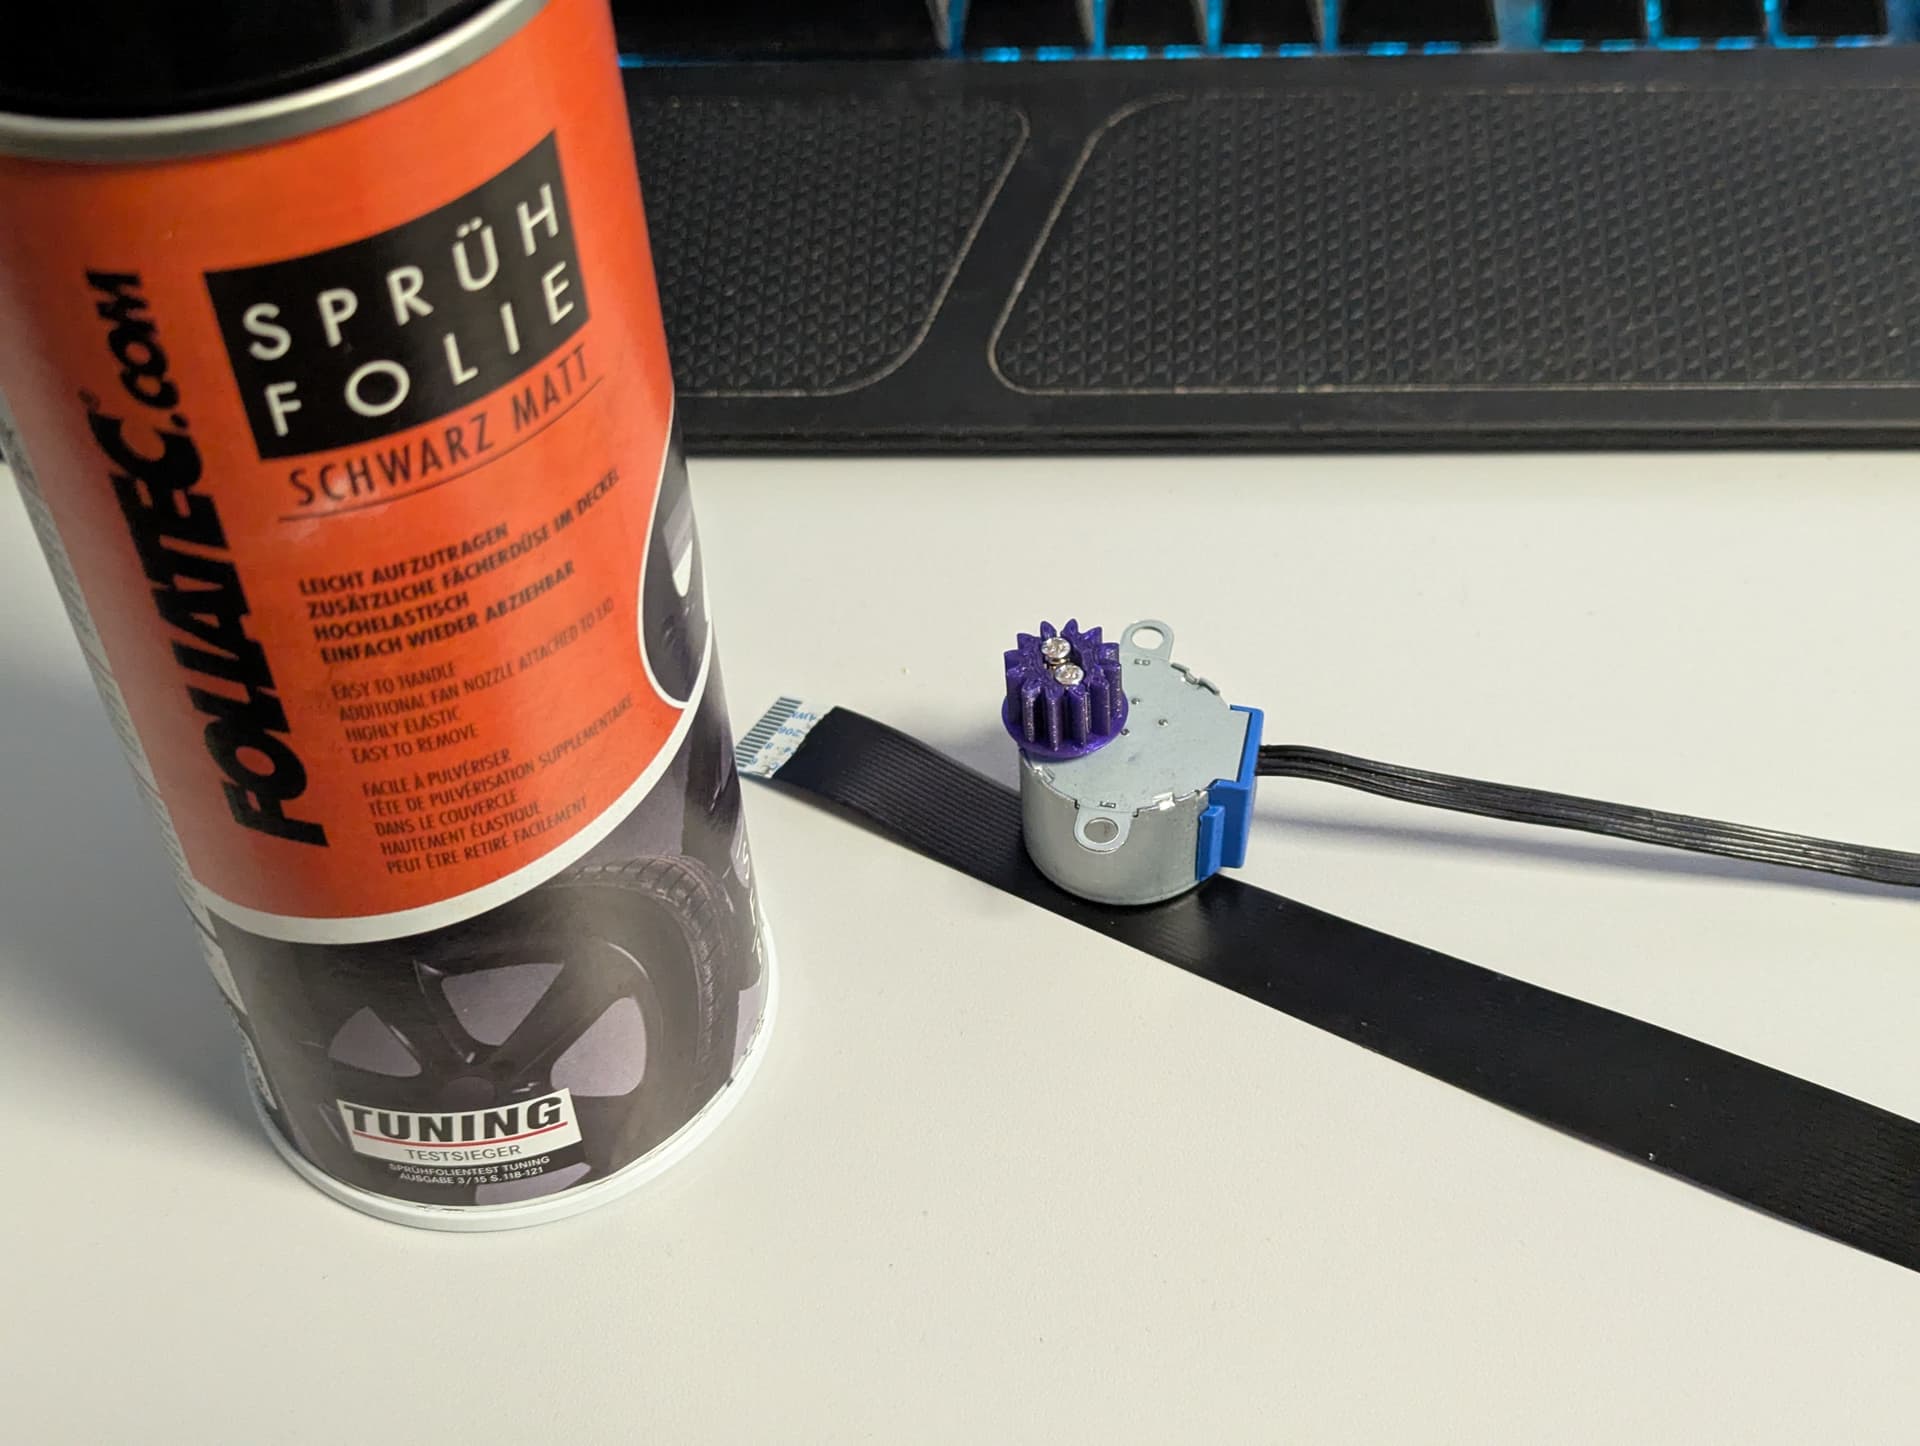
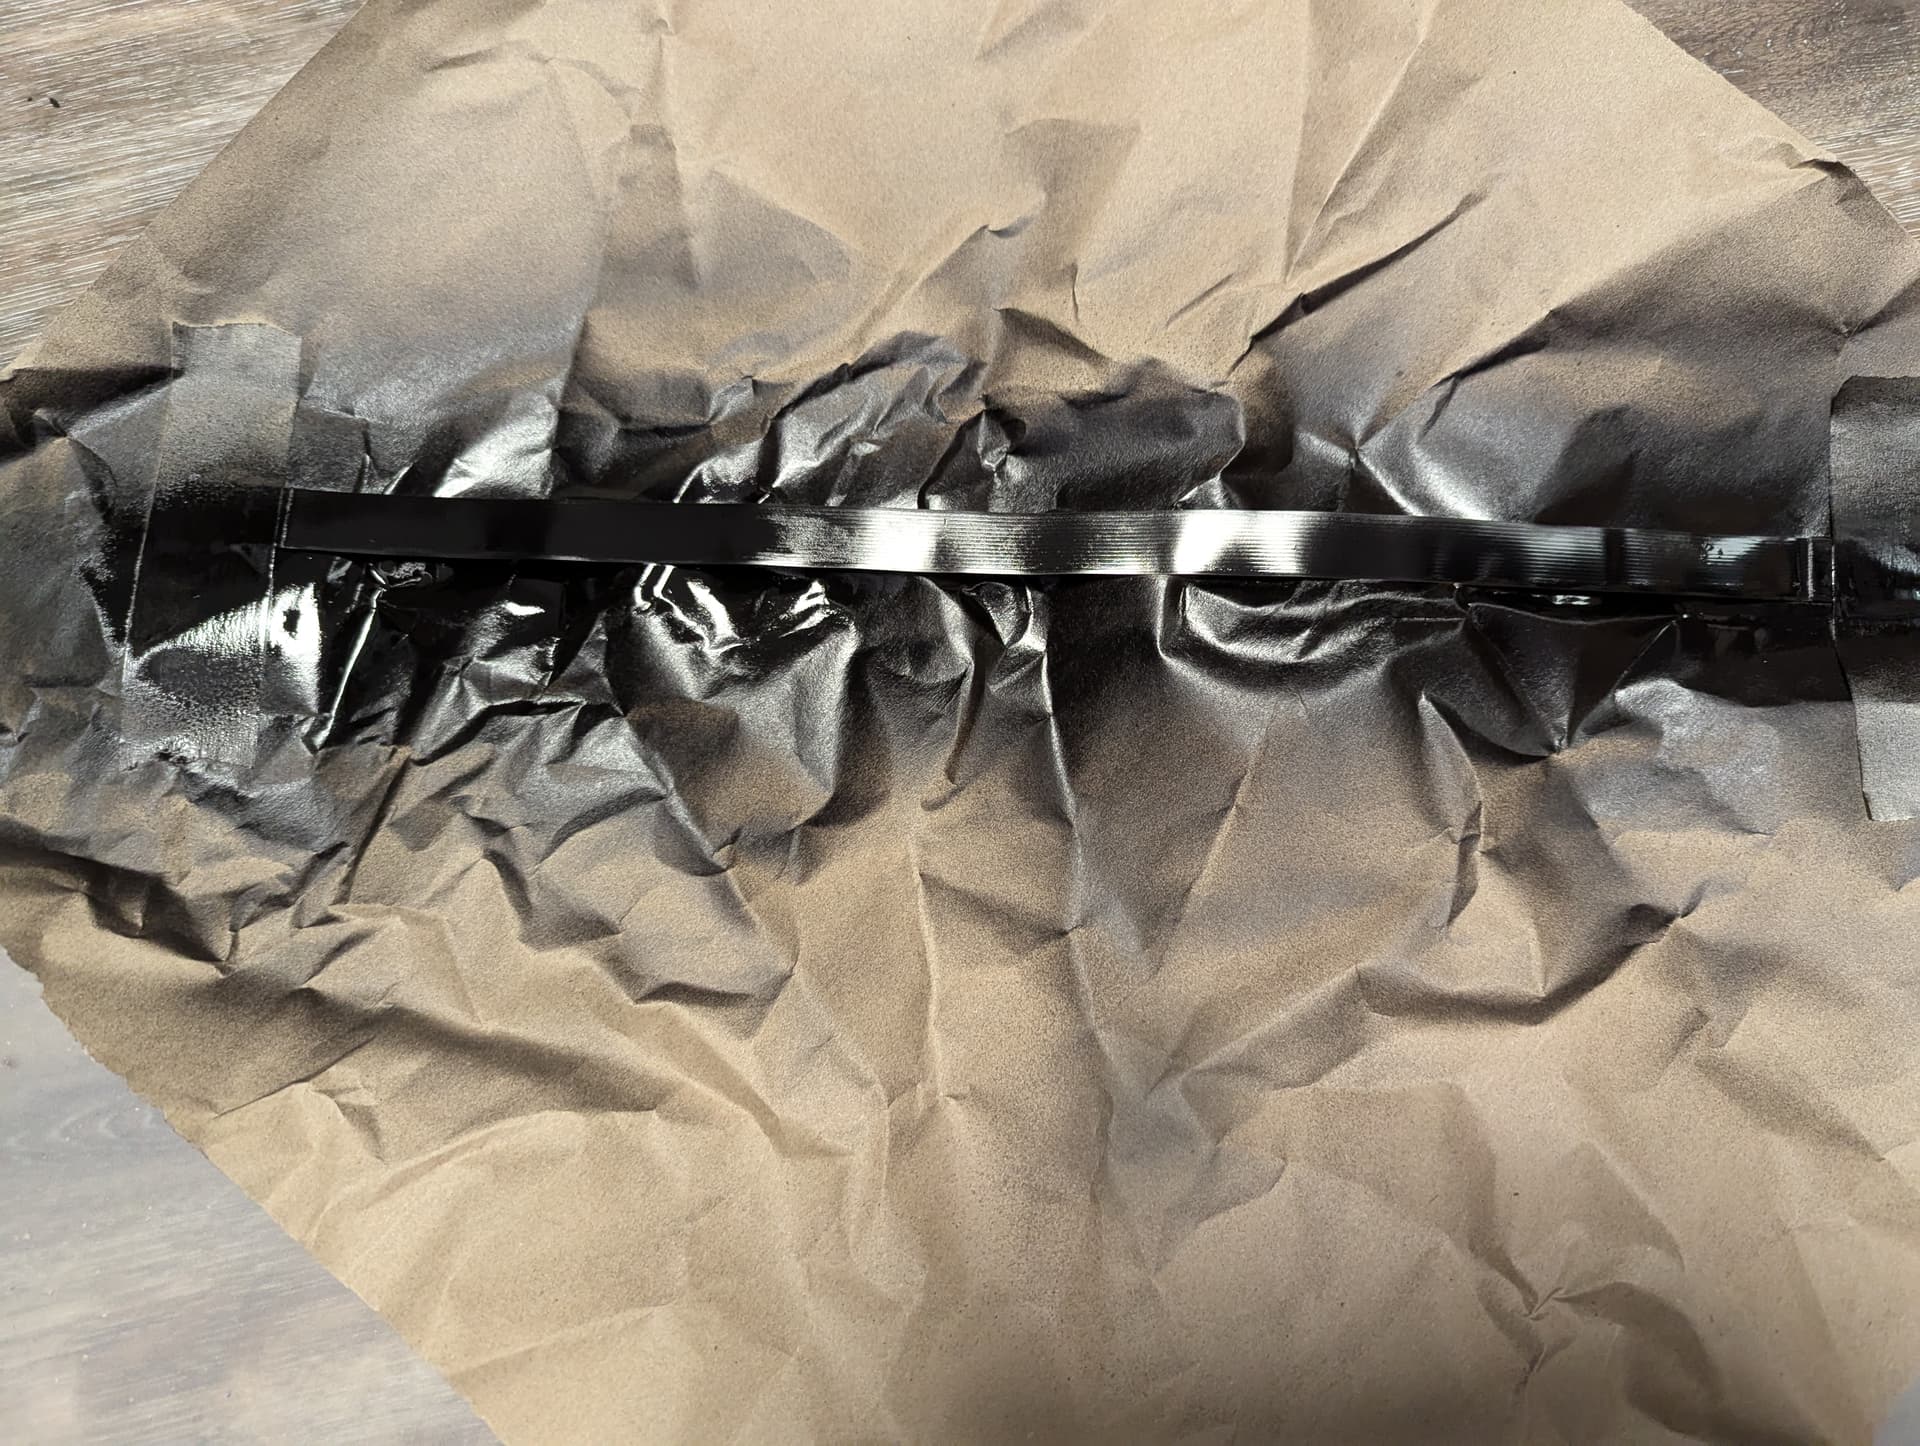
Blacking out cables
First task was to make the exposed cables black somehow. Painting them black with a sharpie would wear off pretty fast. heat-shrink-tubing would not work great on flat ribbon-cables. We have had some automitive rubber-spray from a previous project leftover, so we tried that. The cables remain a bit tacky, but otherwise that worked great. Tape off the contacts, and give it a shot. if pulled straight, you can even glue the single conductors of the motor wire into a flat ribbon-cable.

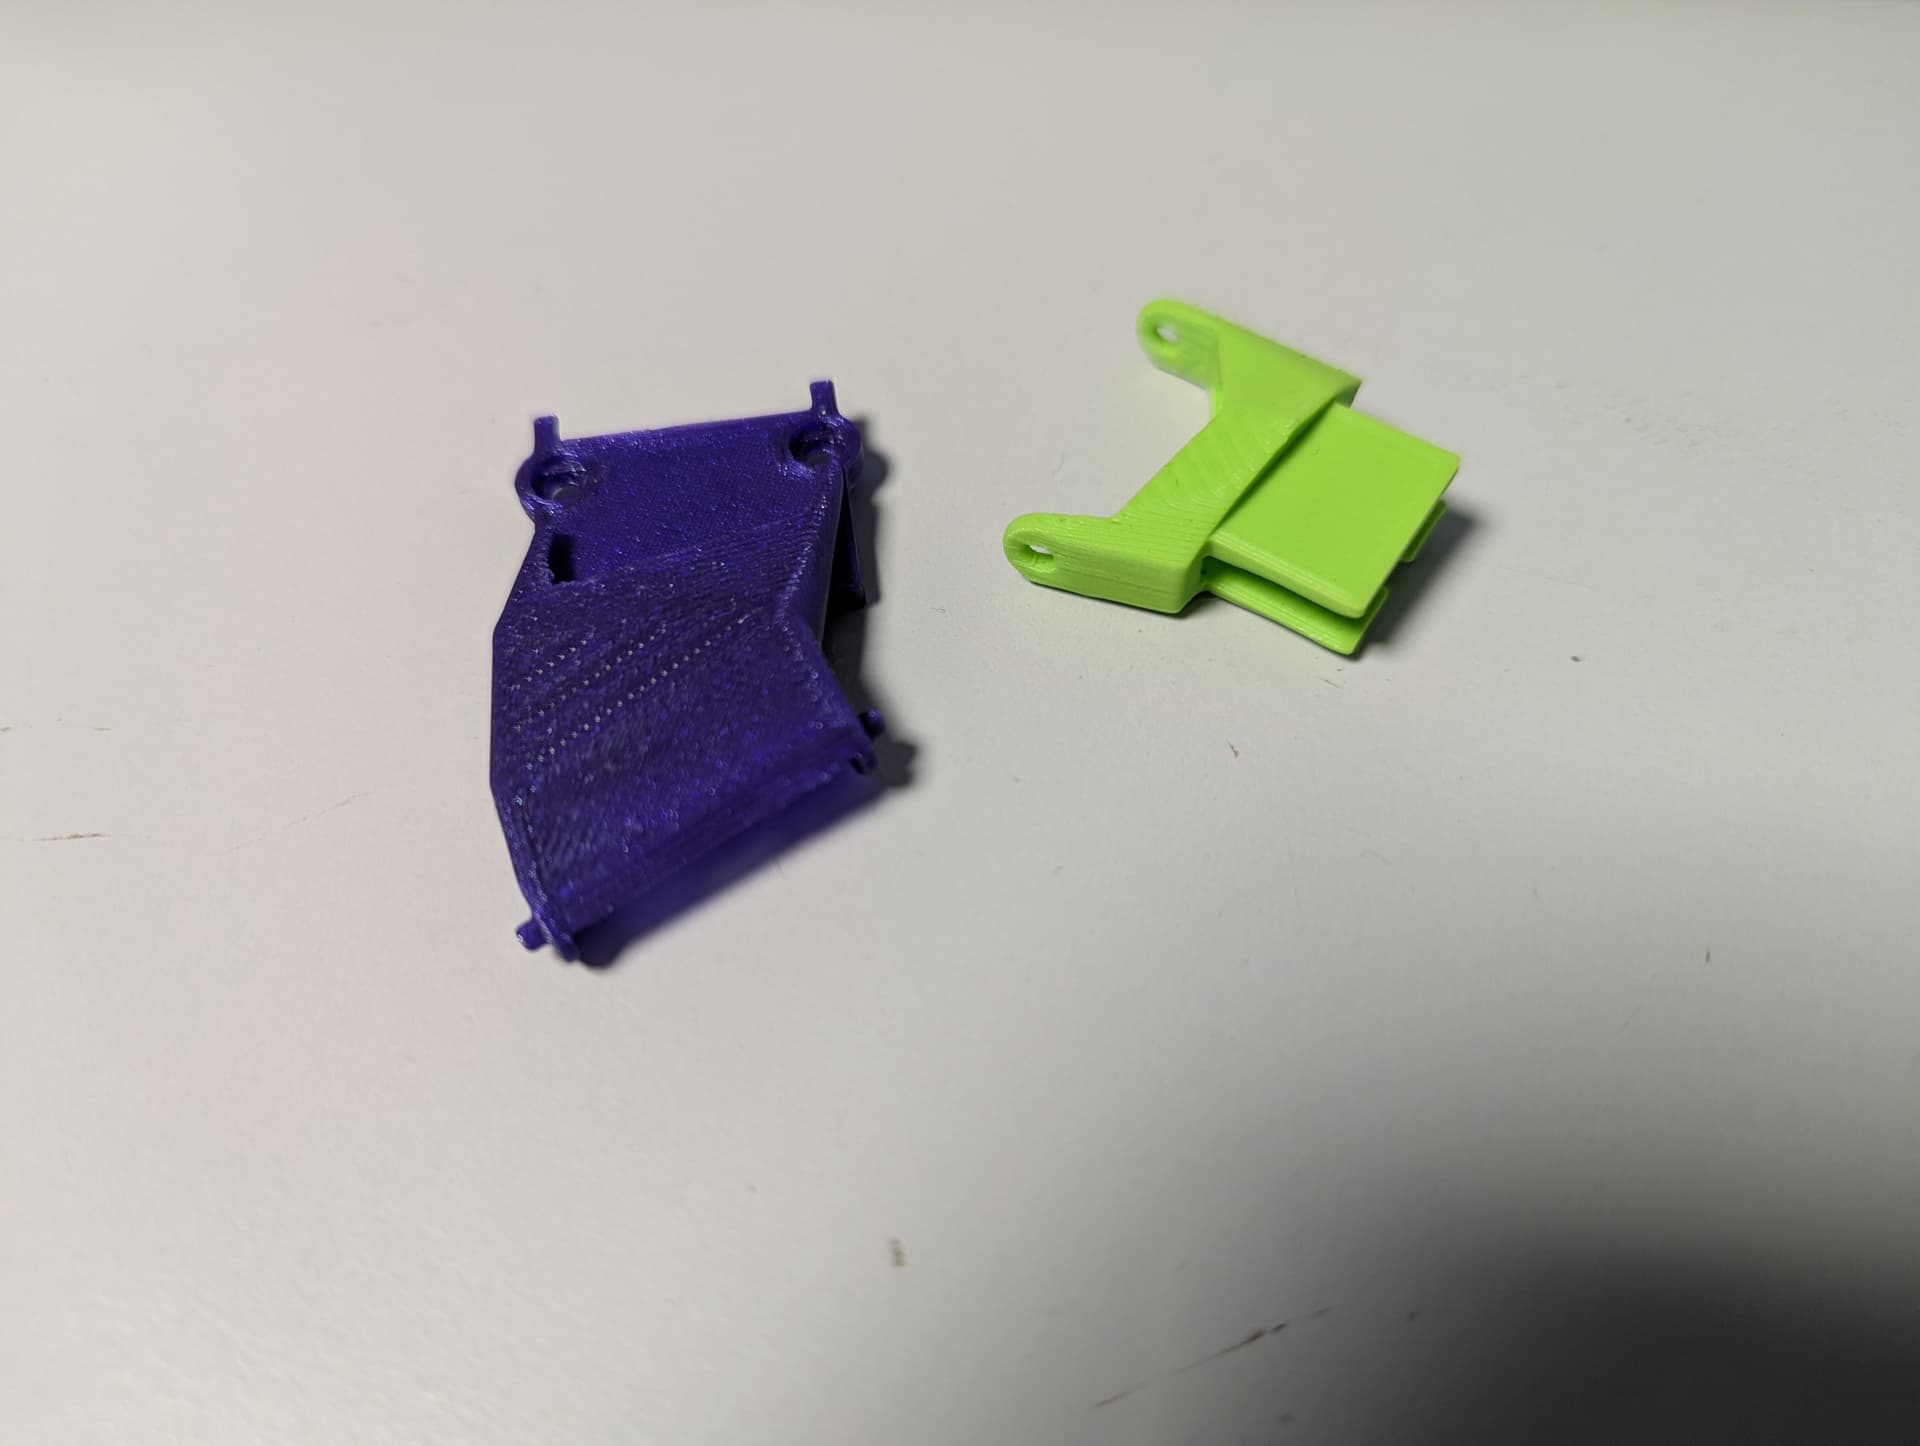
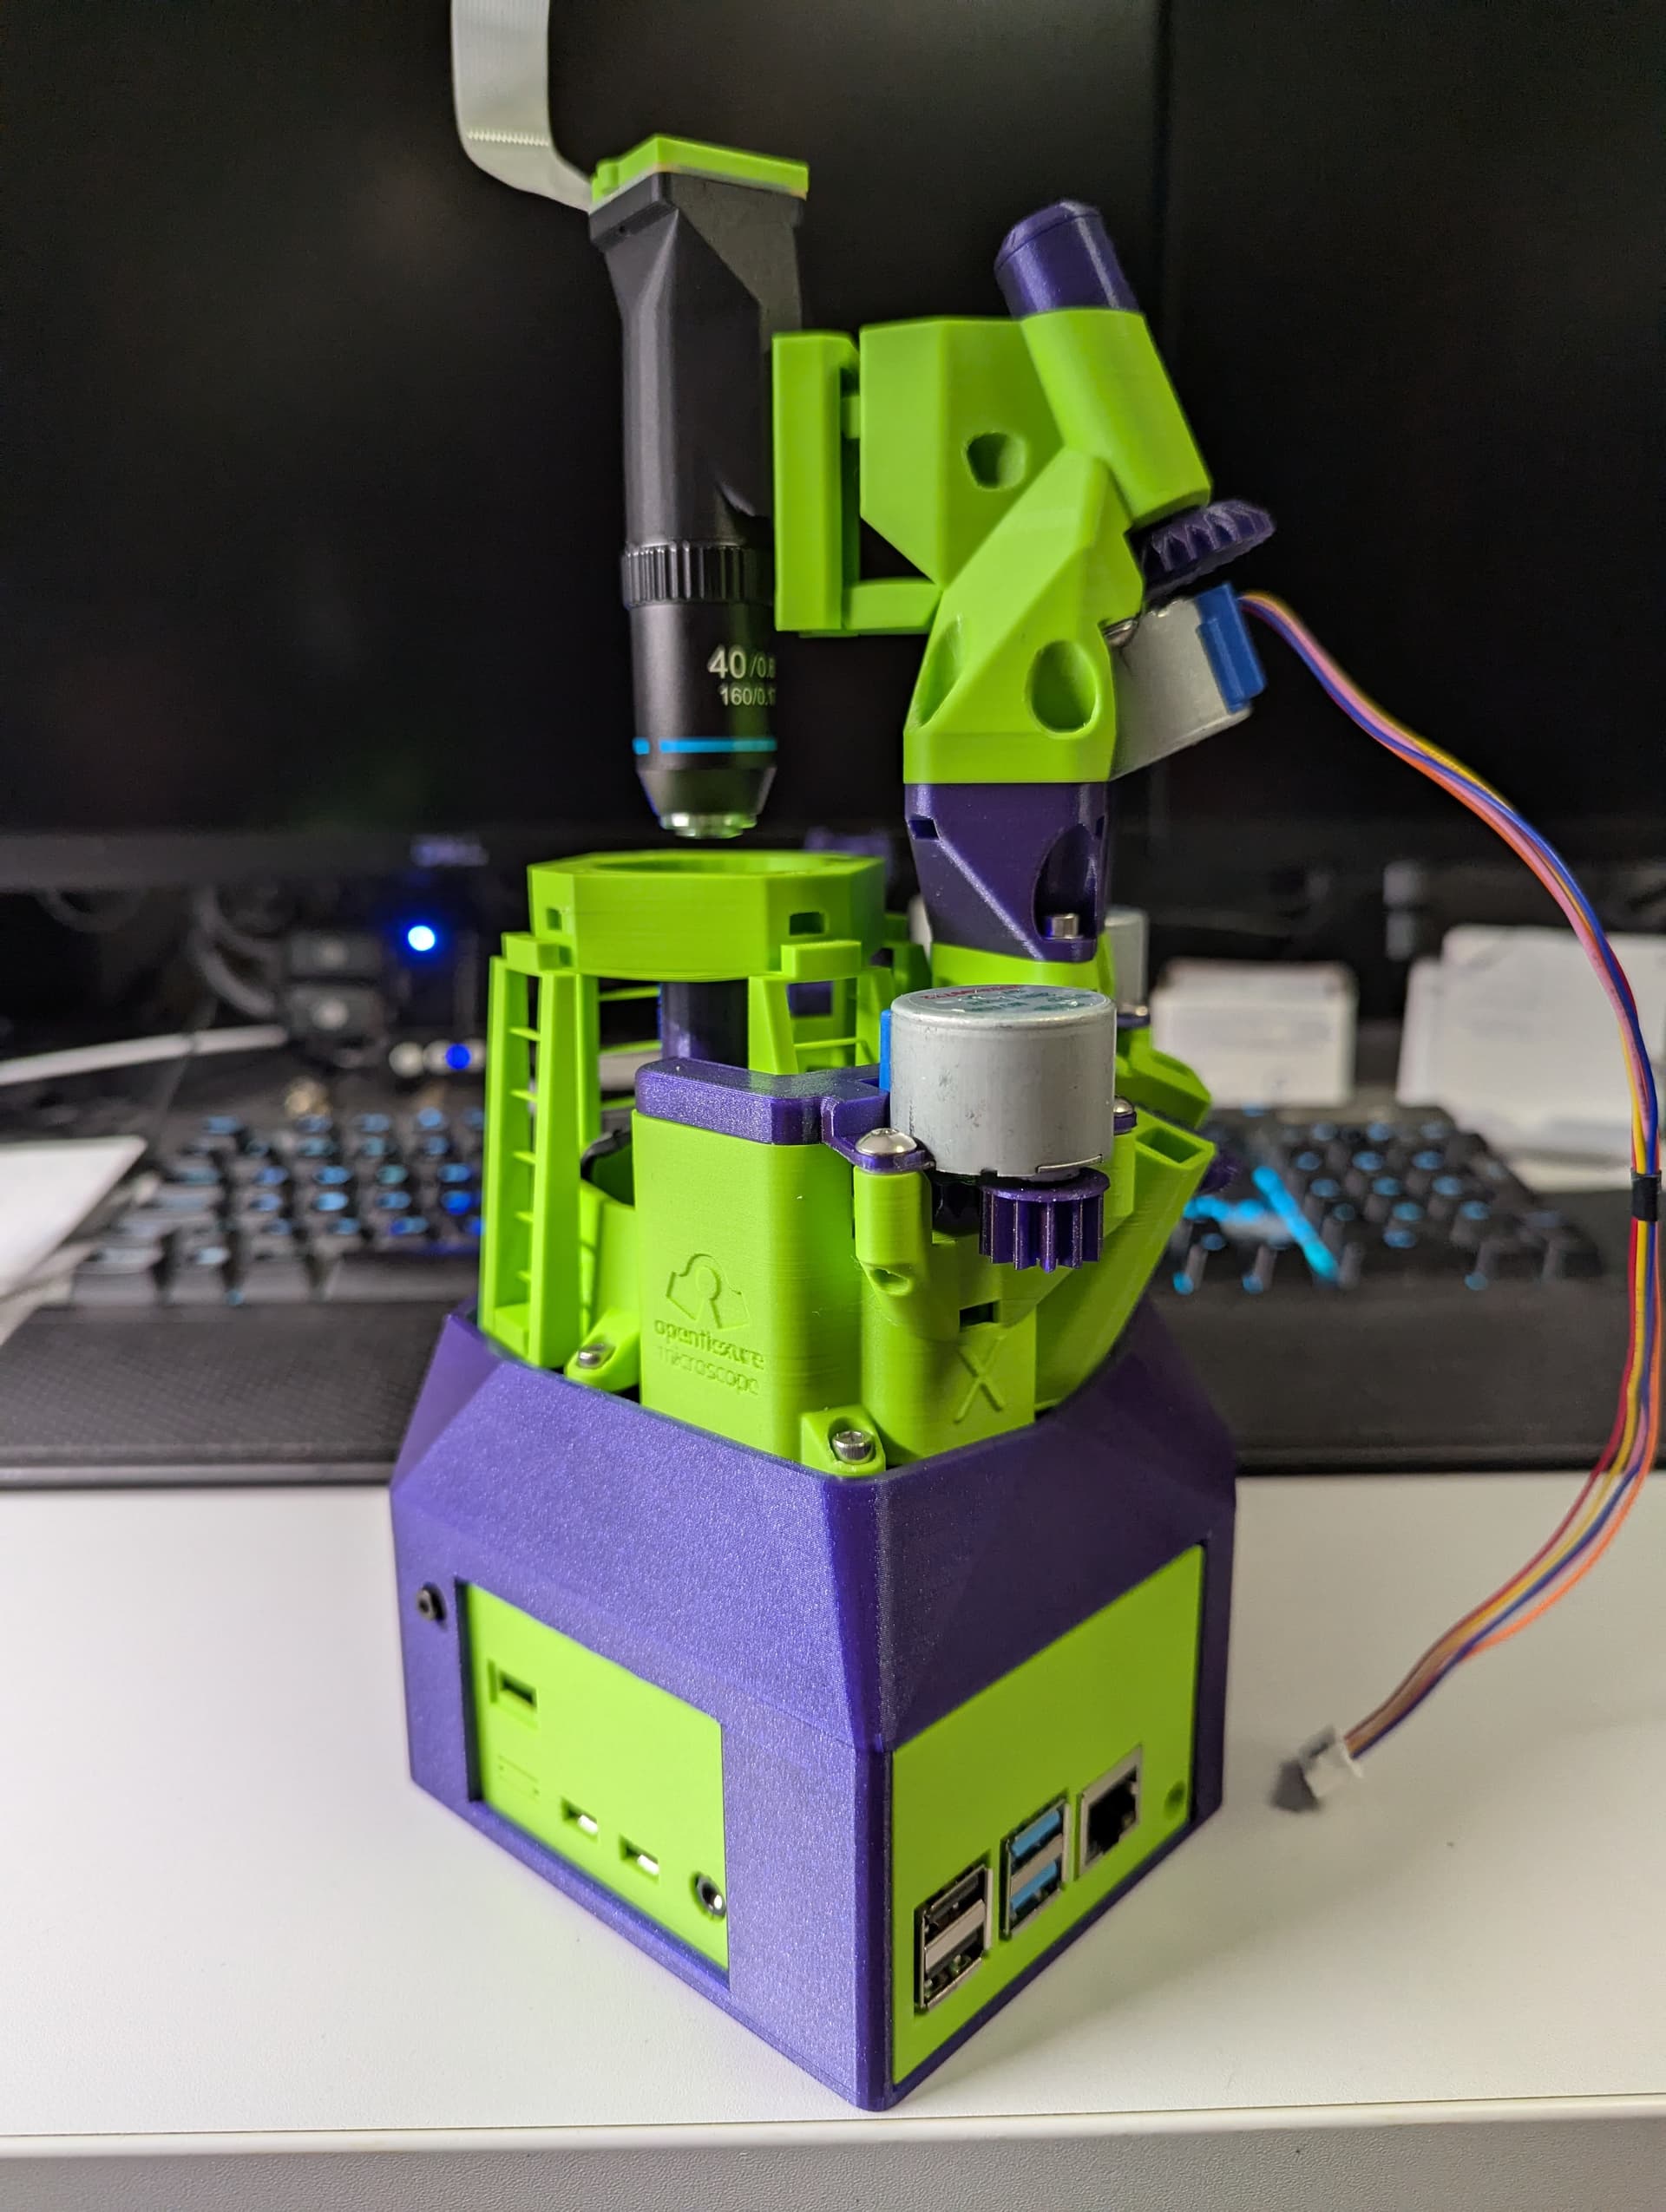
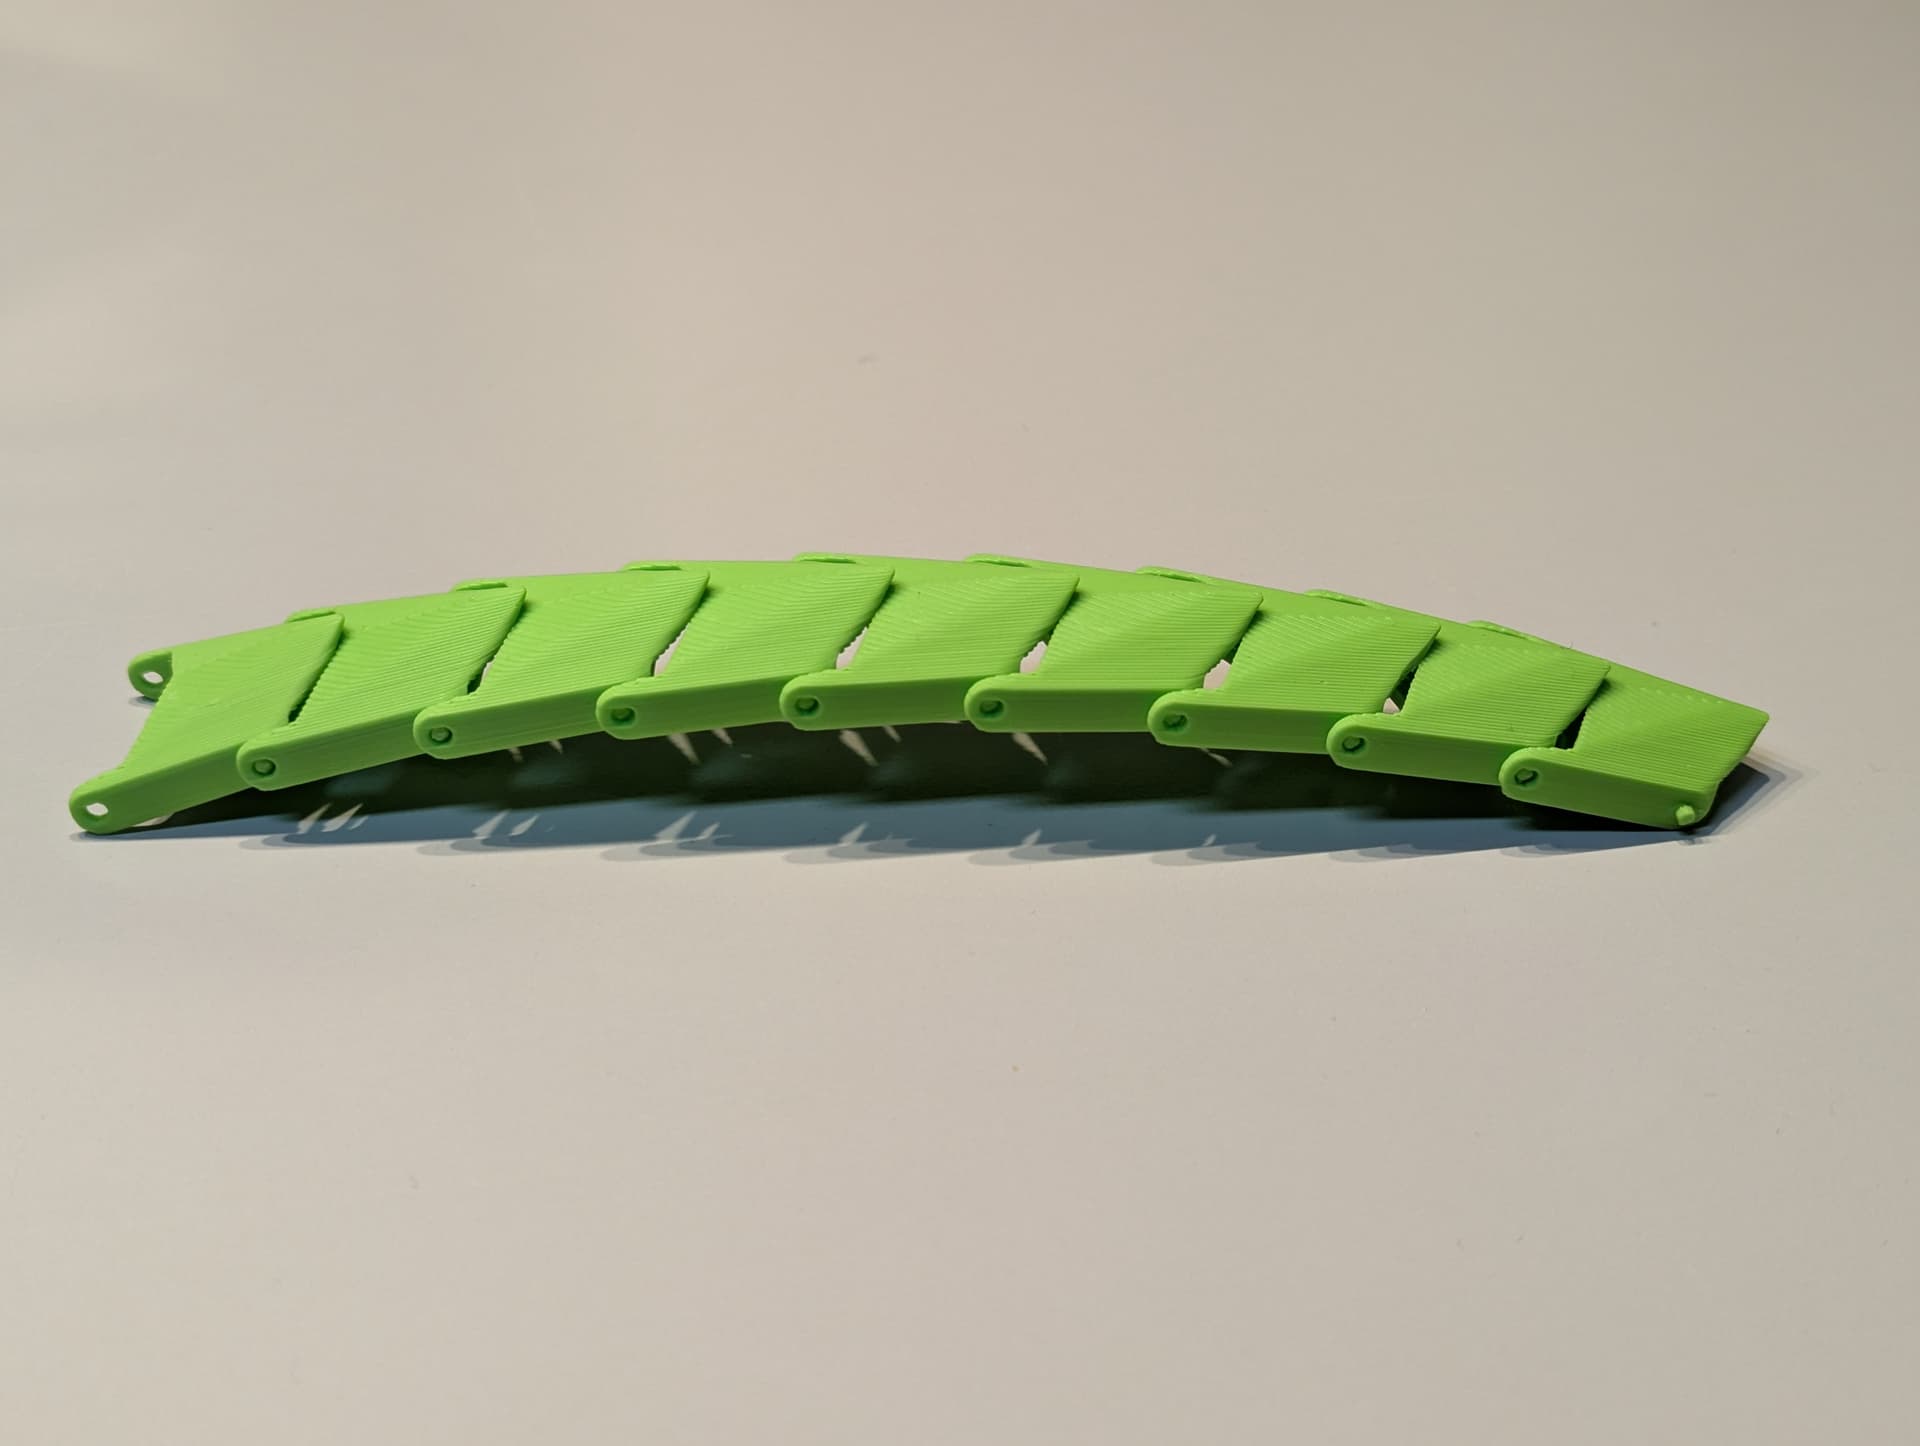
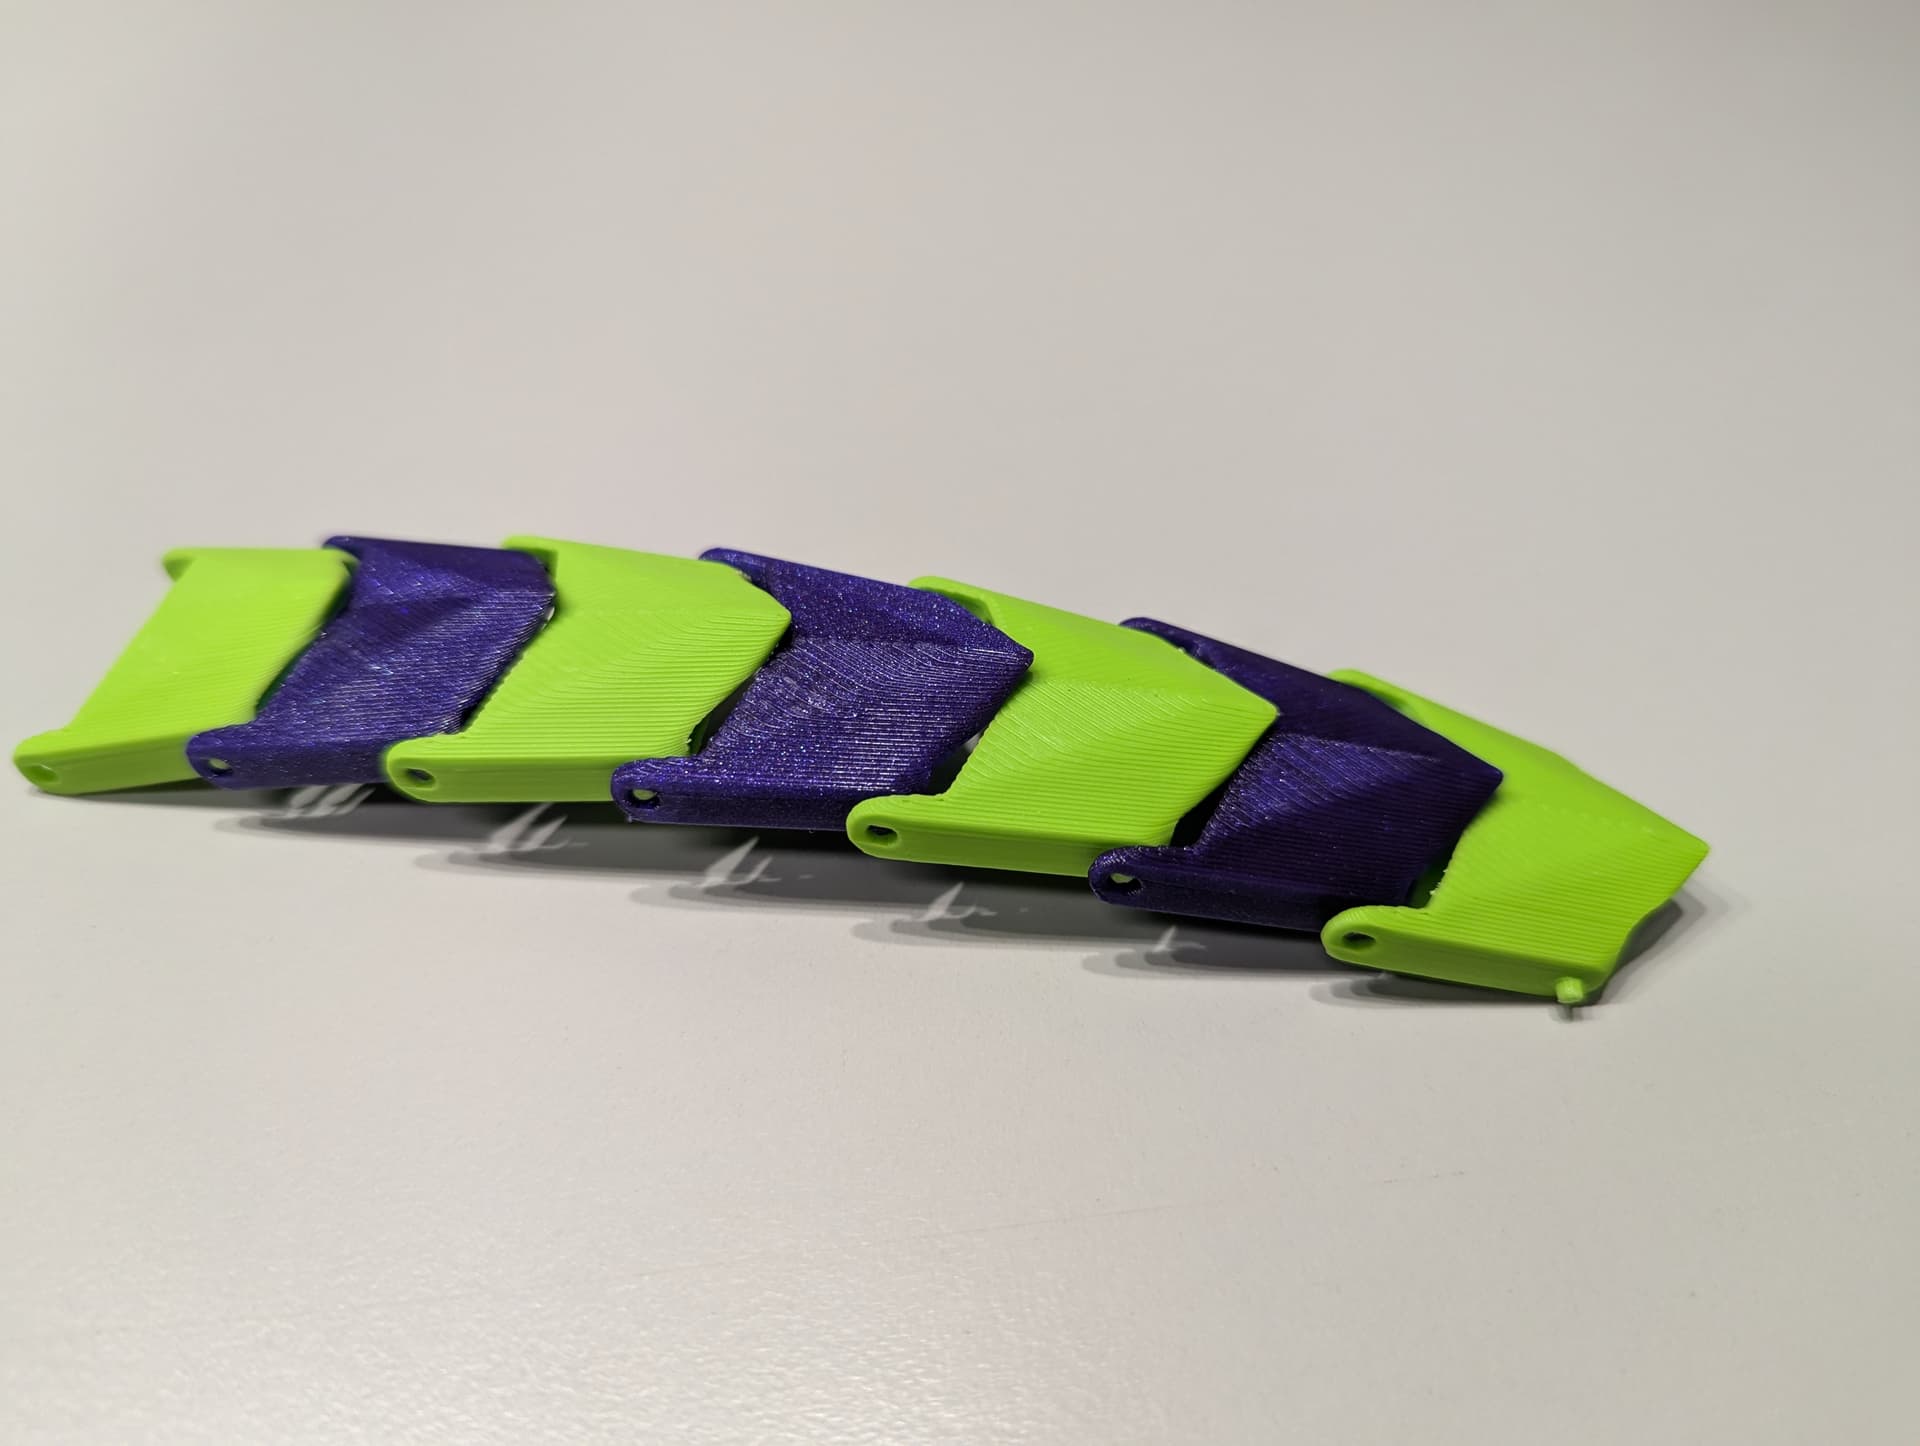
Dragchain
So, now the cables are black, but that’s not quite sufficient. The best option seemed to be a dragchain from the cable-channel of the upper body-part to the cam on top. Beside the regular dragchain-pieces, the start and end-pieces had to be modeled around the microscope to fit. Those were quite odd angles, but in the end she managed to pull it off without having the camera-cable beeing too much kinked. As a fortunate byproduct the dragchain winds itself quite elegantly like a spine around the motors and other moving parts while keeping enough distance to them to get seized up. In alternating colors the dragchain looks even cooler than in single-color. It easily took 20+ testprints to get this right, and the chain-parts unfortunately have to be printed with tree-supports to print successfully, but however, they transform the whole OFM visual apperance to another level.


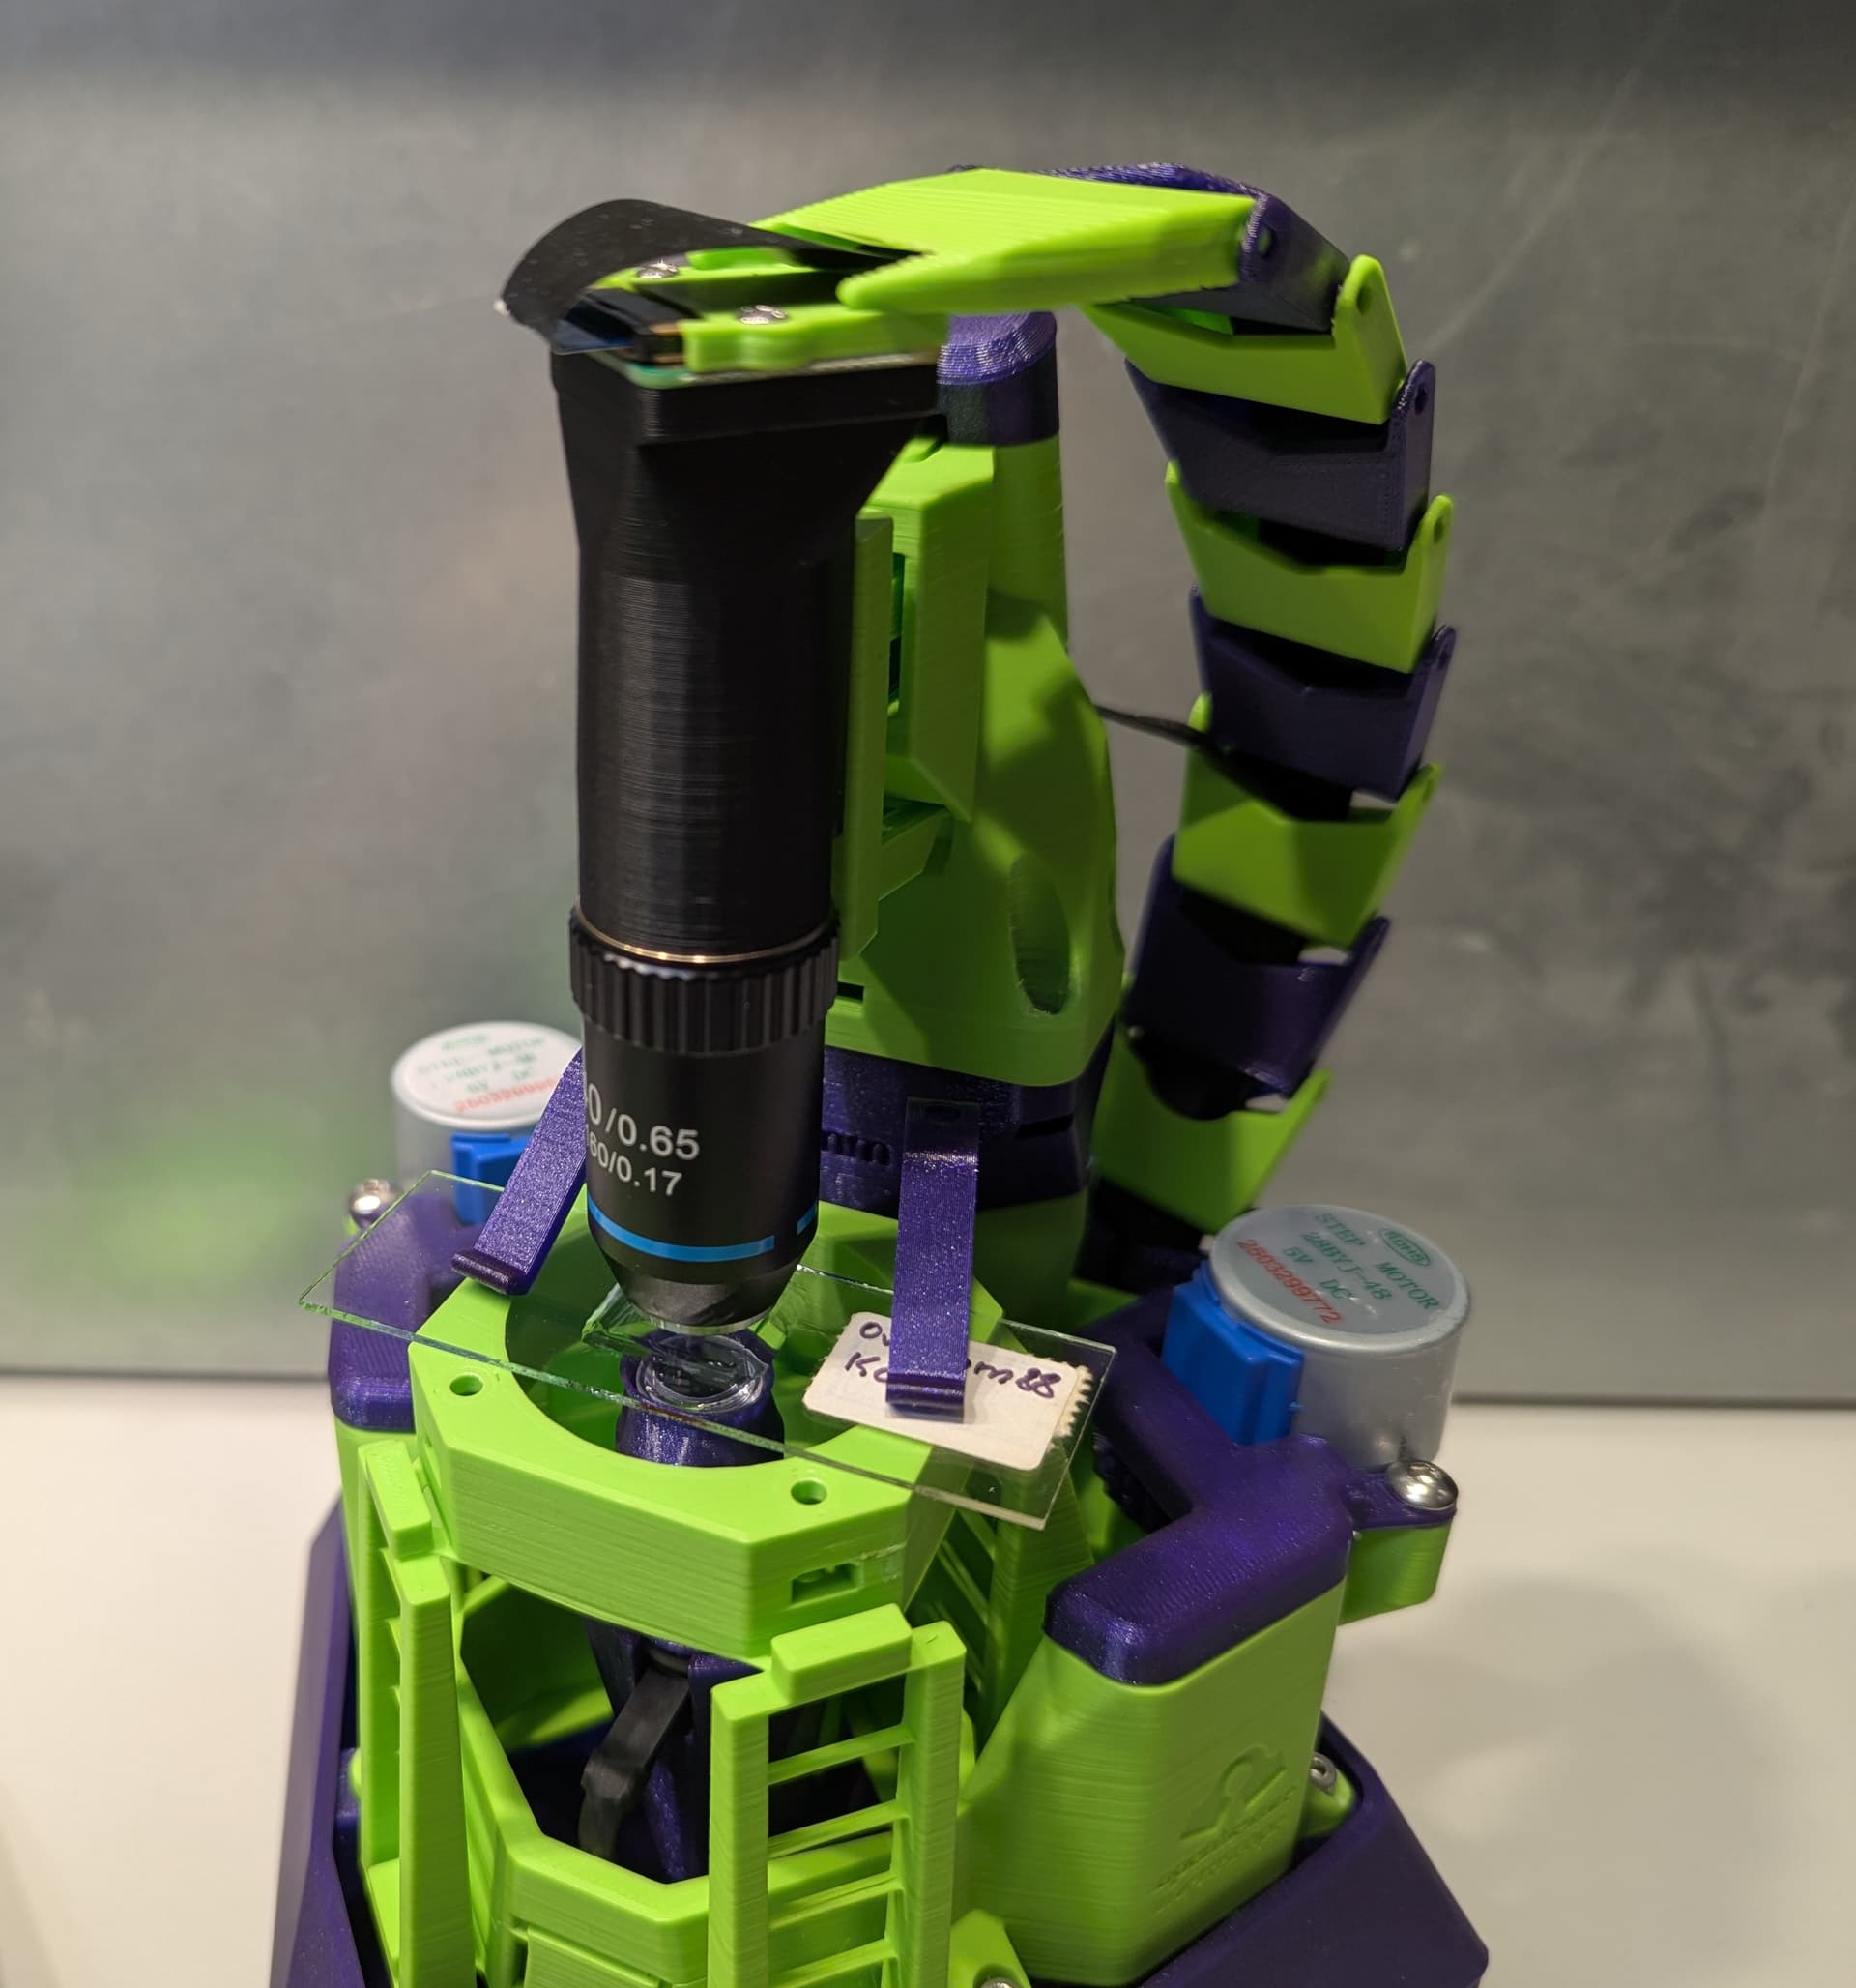
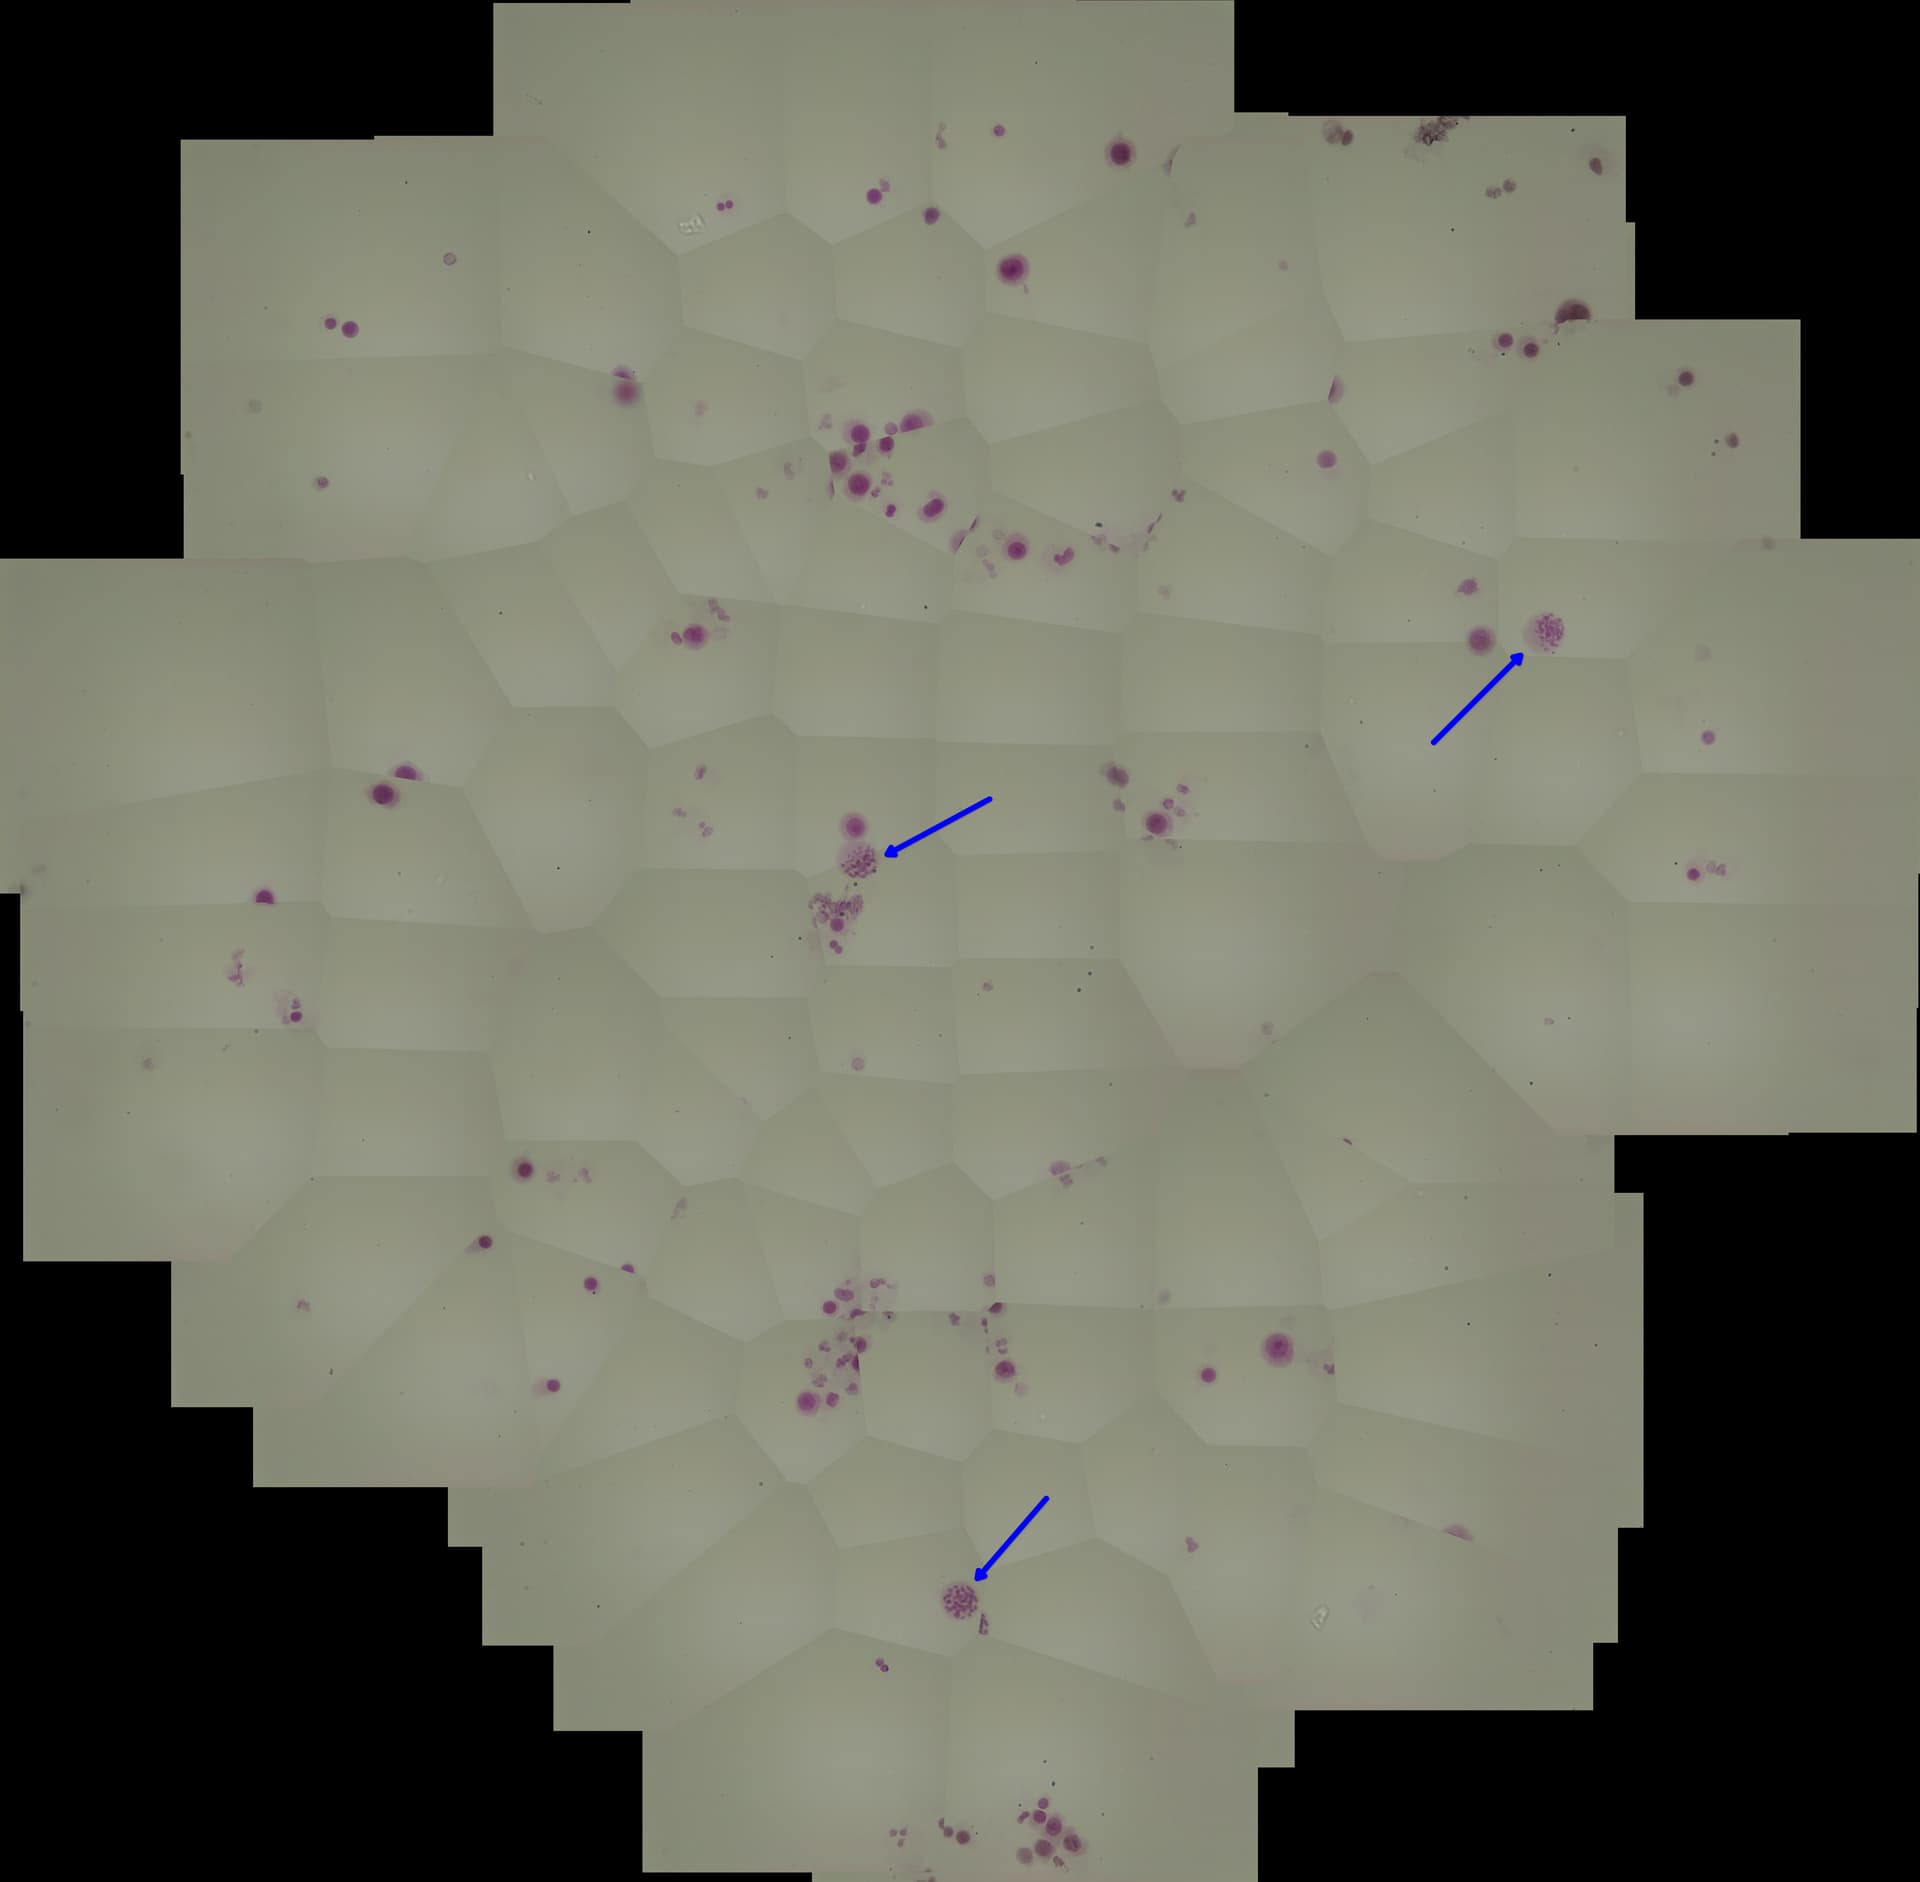
First fullsize scan
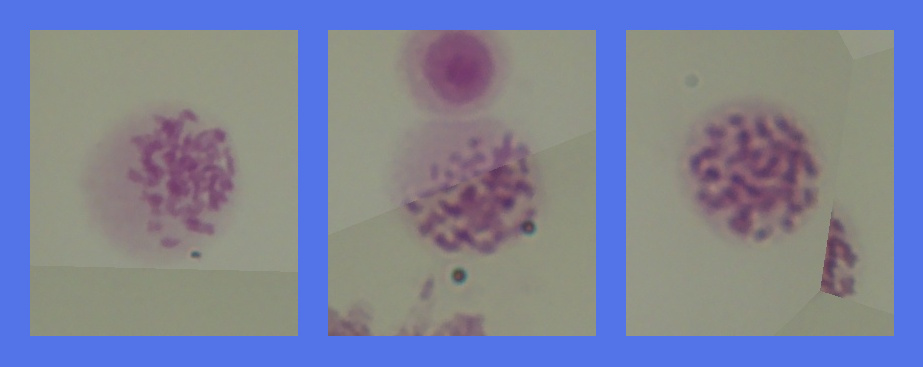
After fiddling around with motor-directions (they are swapped on an upright-scope), and swapping the x and y motorcables (until this is properly configurable in the v3-server), the OFM can pull off scans with a 60x-objective when resting on a stable surface. We’ll soon try 100x, because for our first “target” we choose something rather unusual, because we managed to get our hands onto some human chromosome-smearslides. For now we tried that with a 60x objective and high overlap values and abysmal high background-percentage-values (0.01%), but indeed you can see some chromosome-figures even in 60x in the slide, even though this has to be re-scanned with a 100x-objective for good results. While chromosomes are not as visually appealing as blood-cells, they do show what is possible with an OFM, so we’re still humble to have such cool opensource-tools at hand, to pull off analysis that a few years ago were unobtainable and very expensive, and not possible for hobbyists.
Stitched Image:

Highlighted Areas of interest:
Chromosomes in 100% resolution:
Settings used:

Please share you opinions ![]()