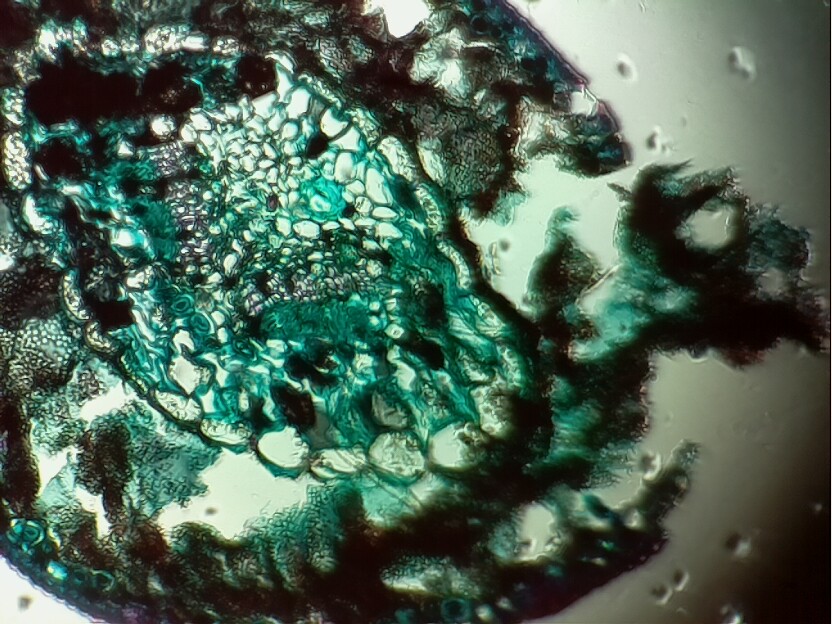
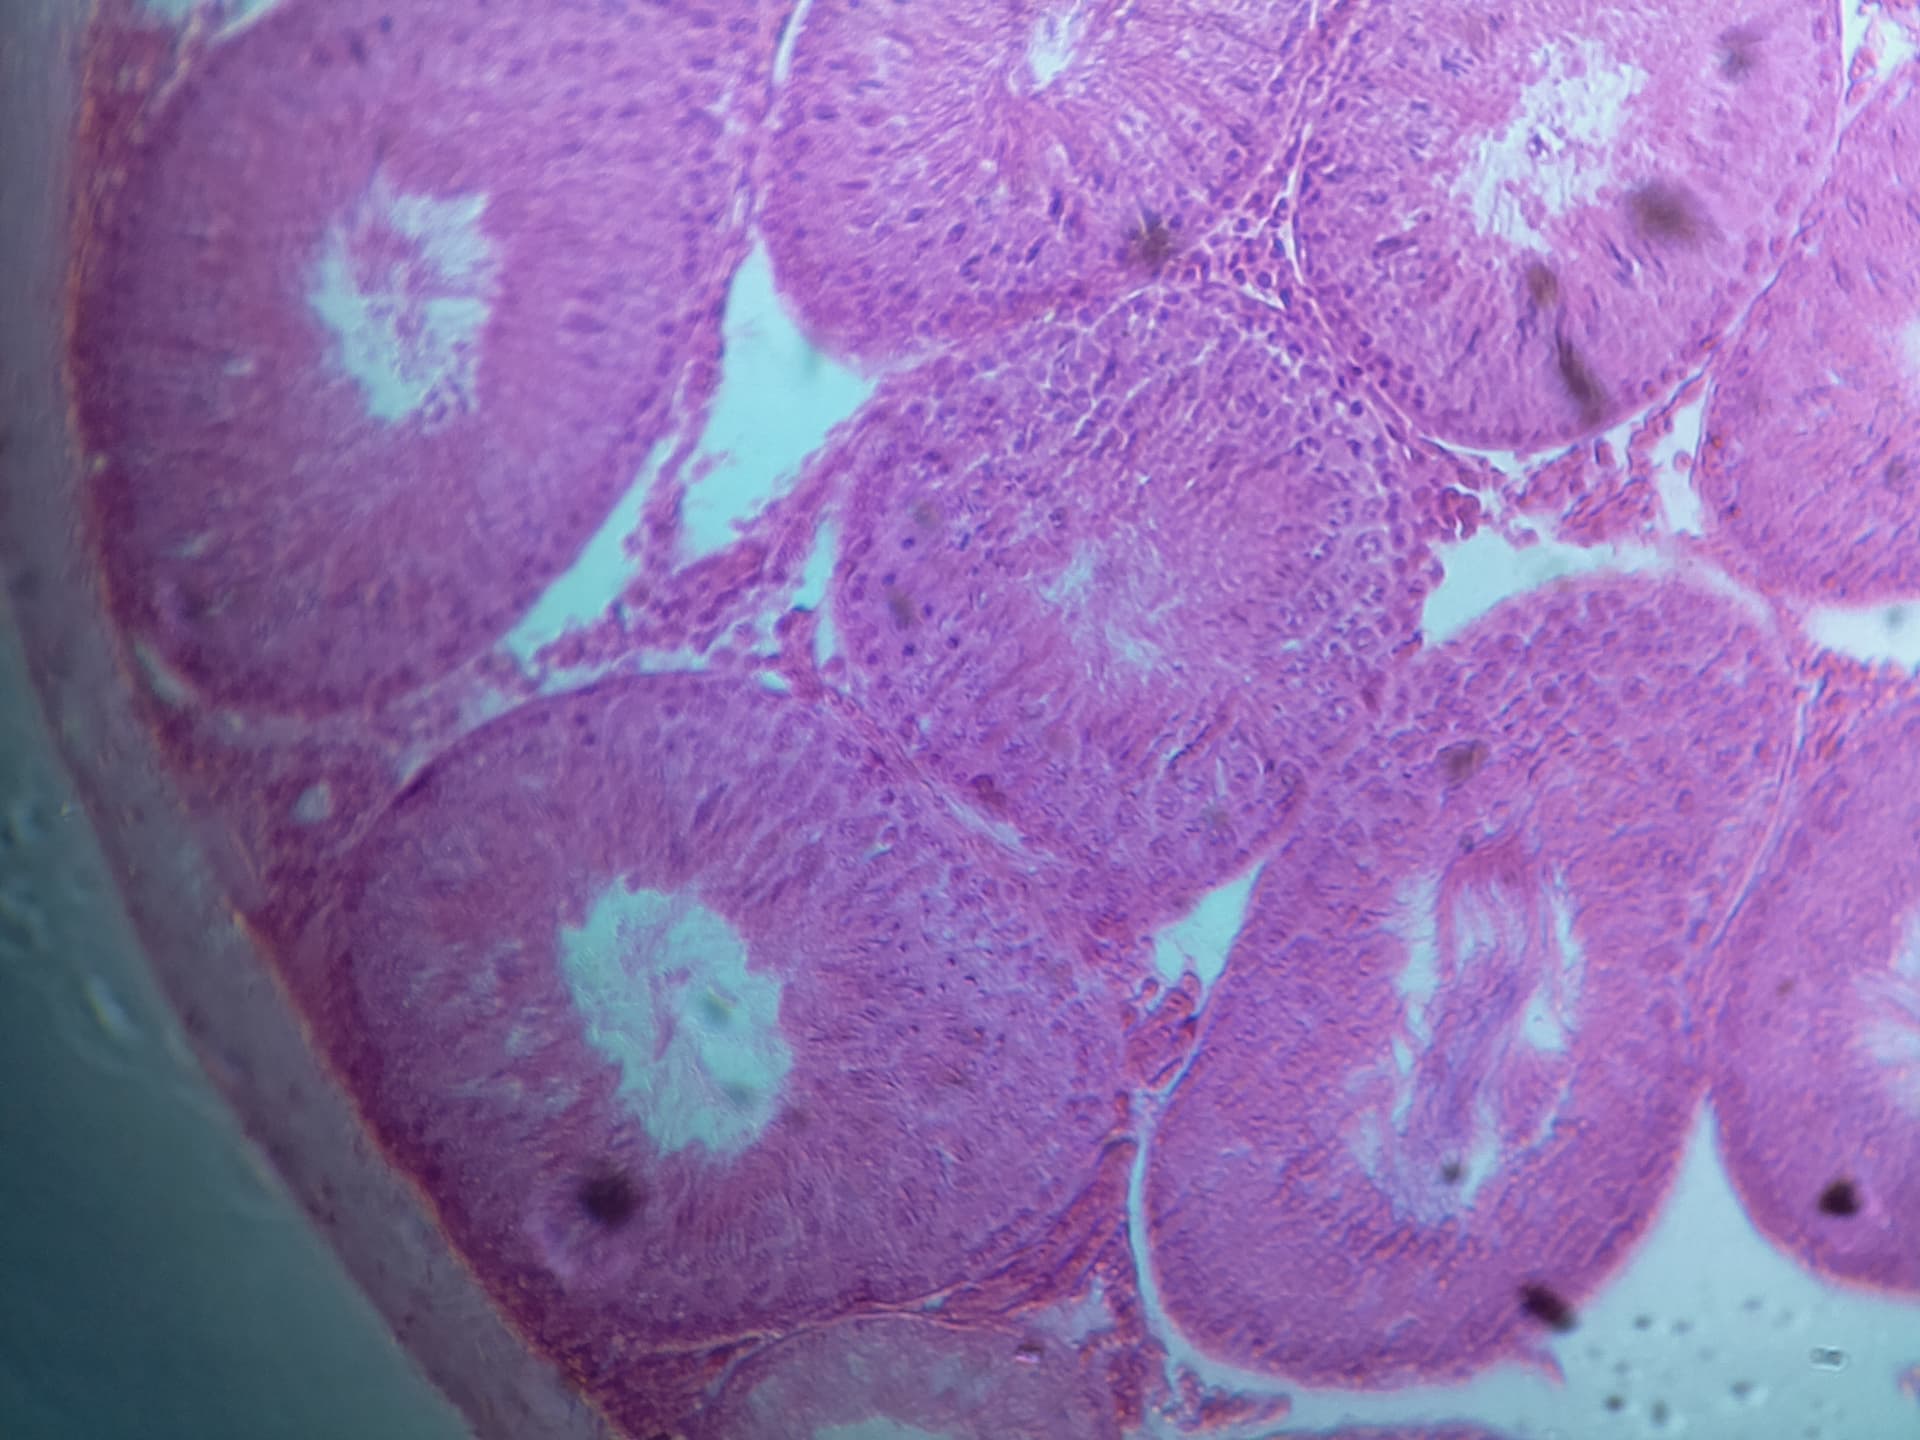
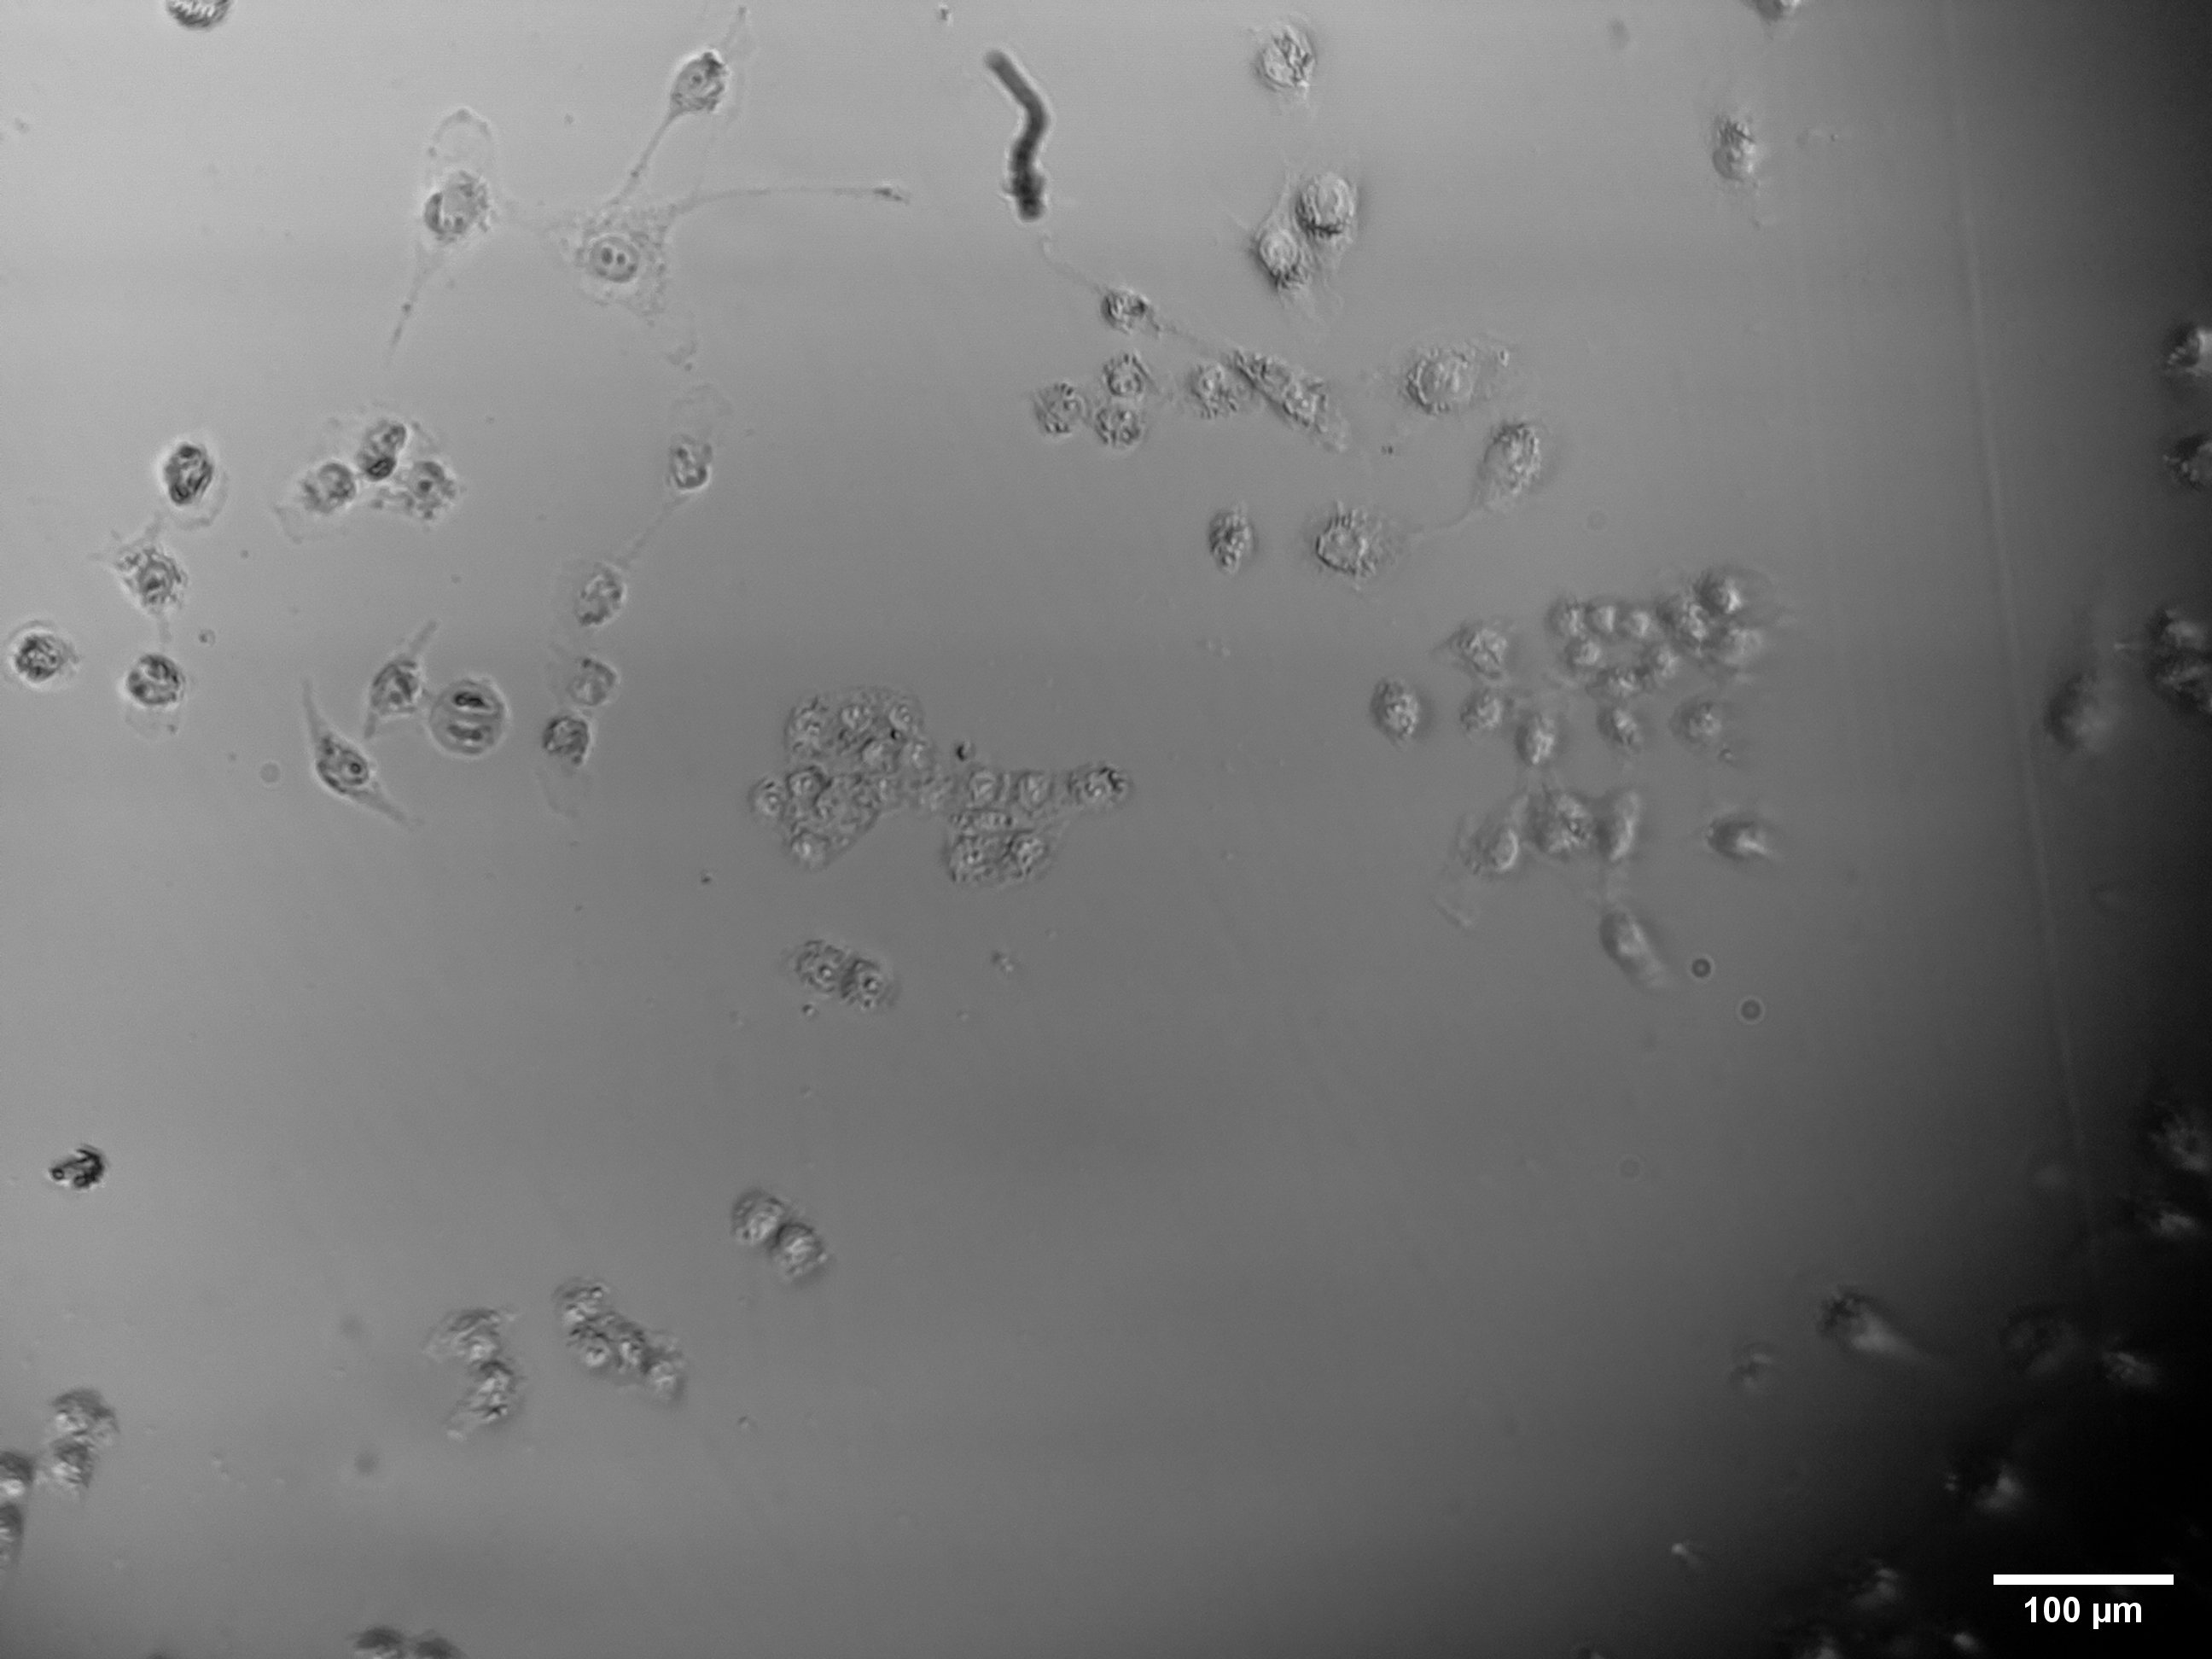
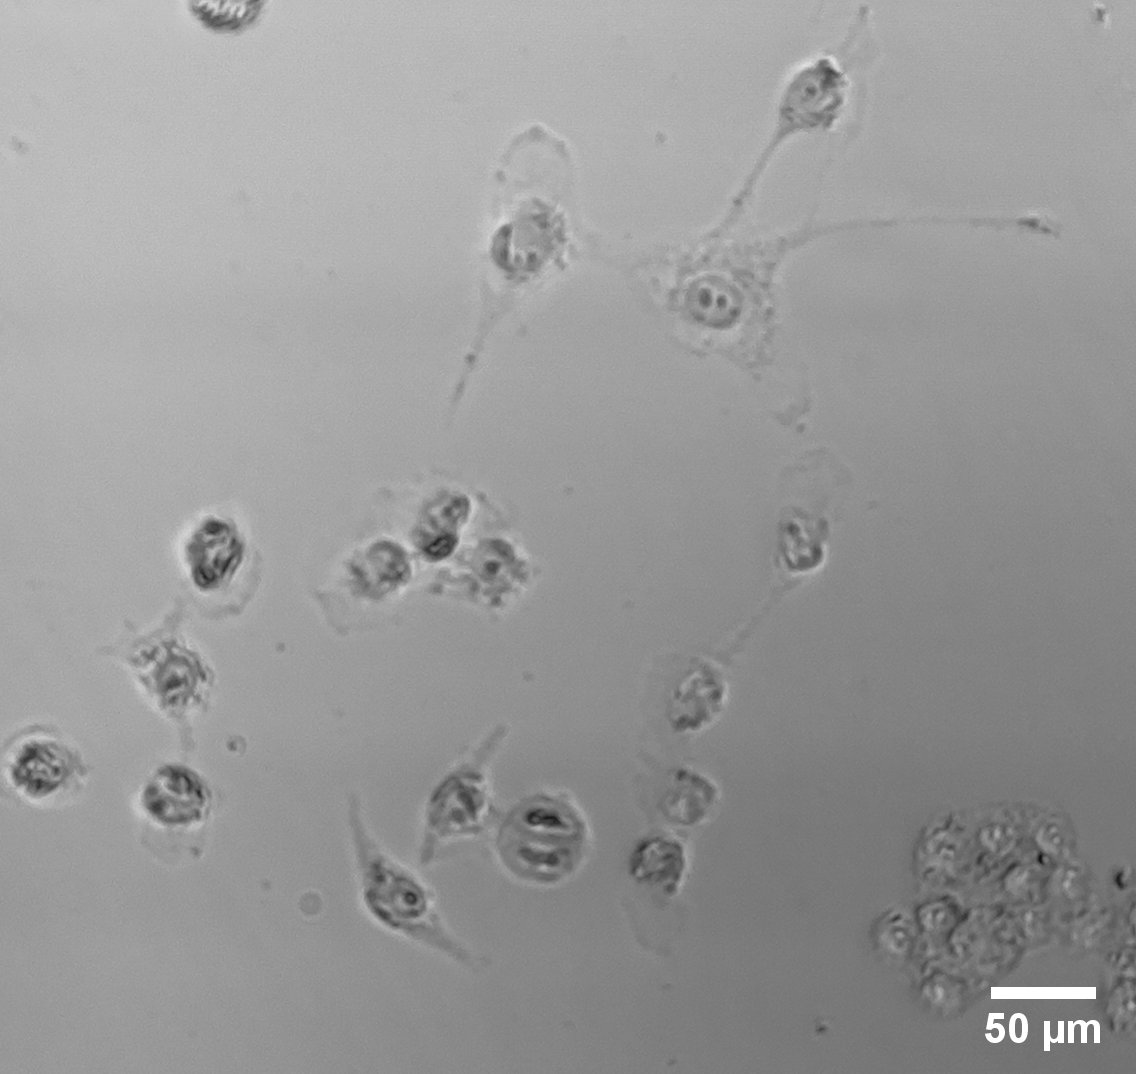
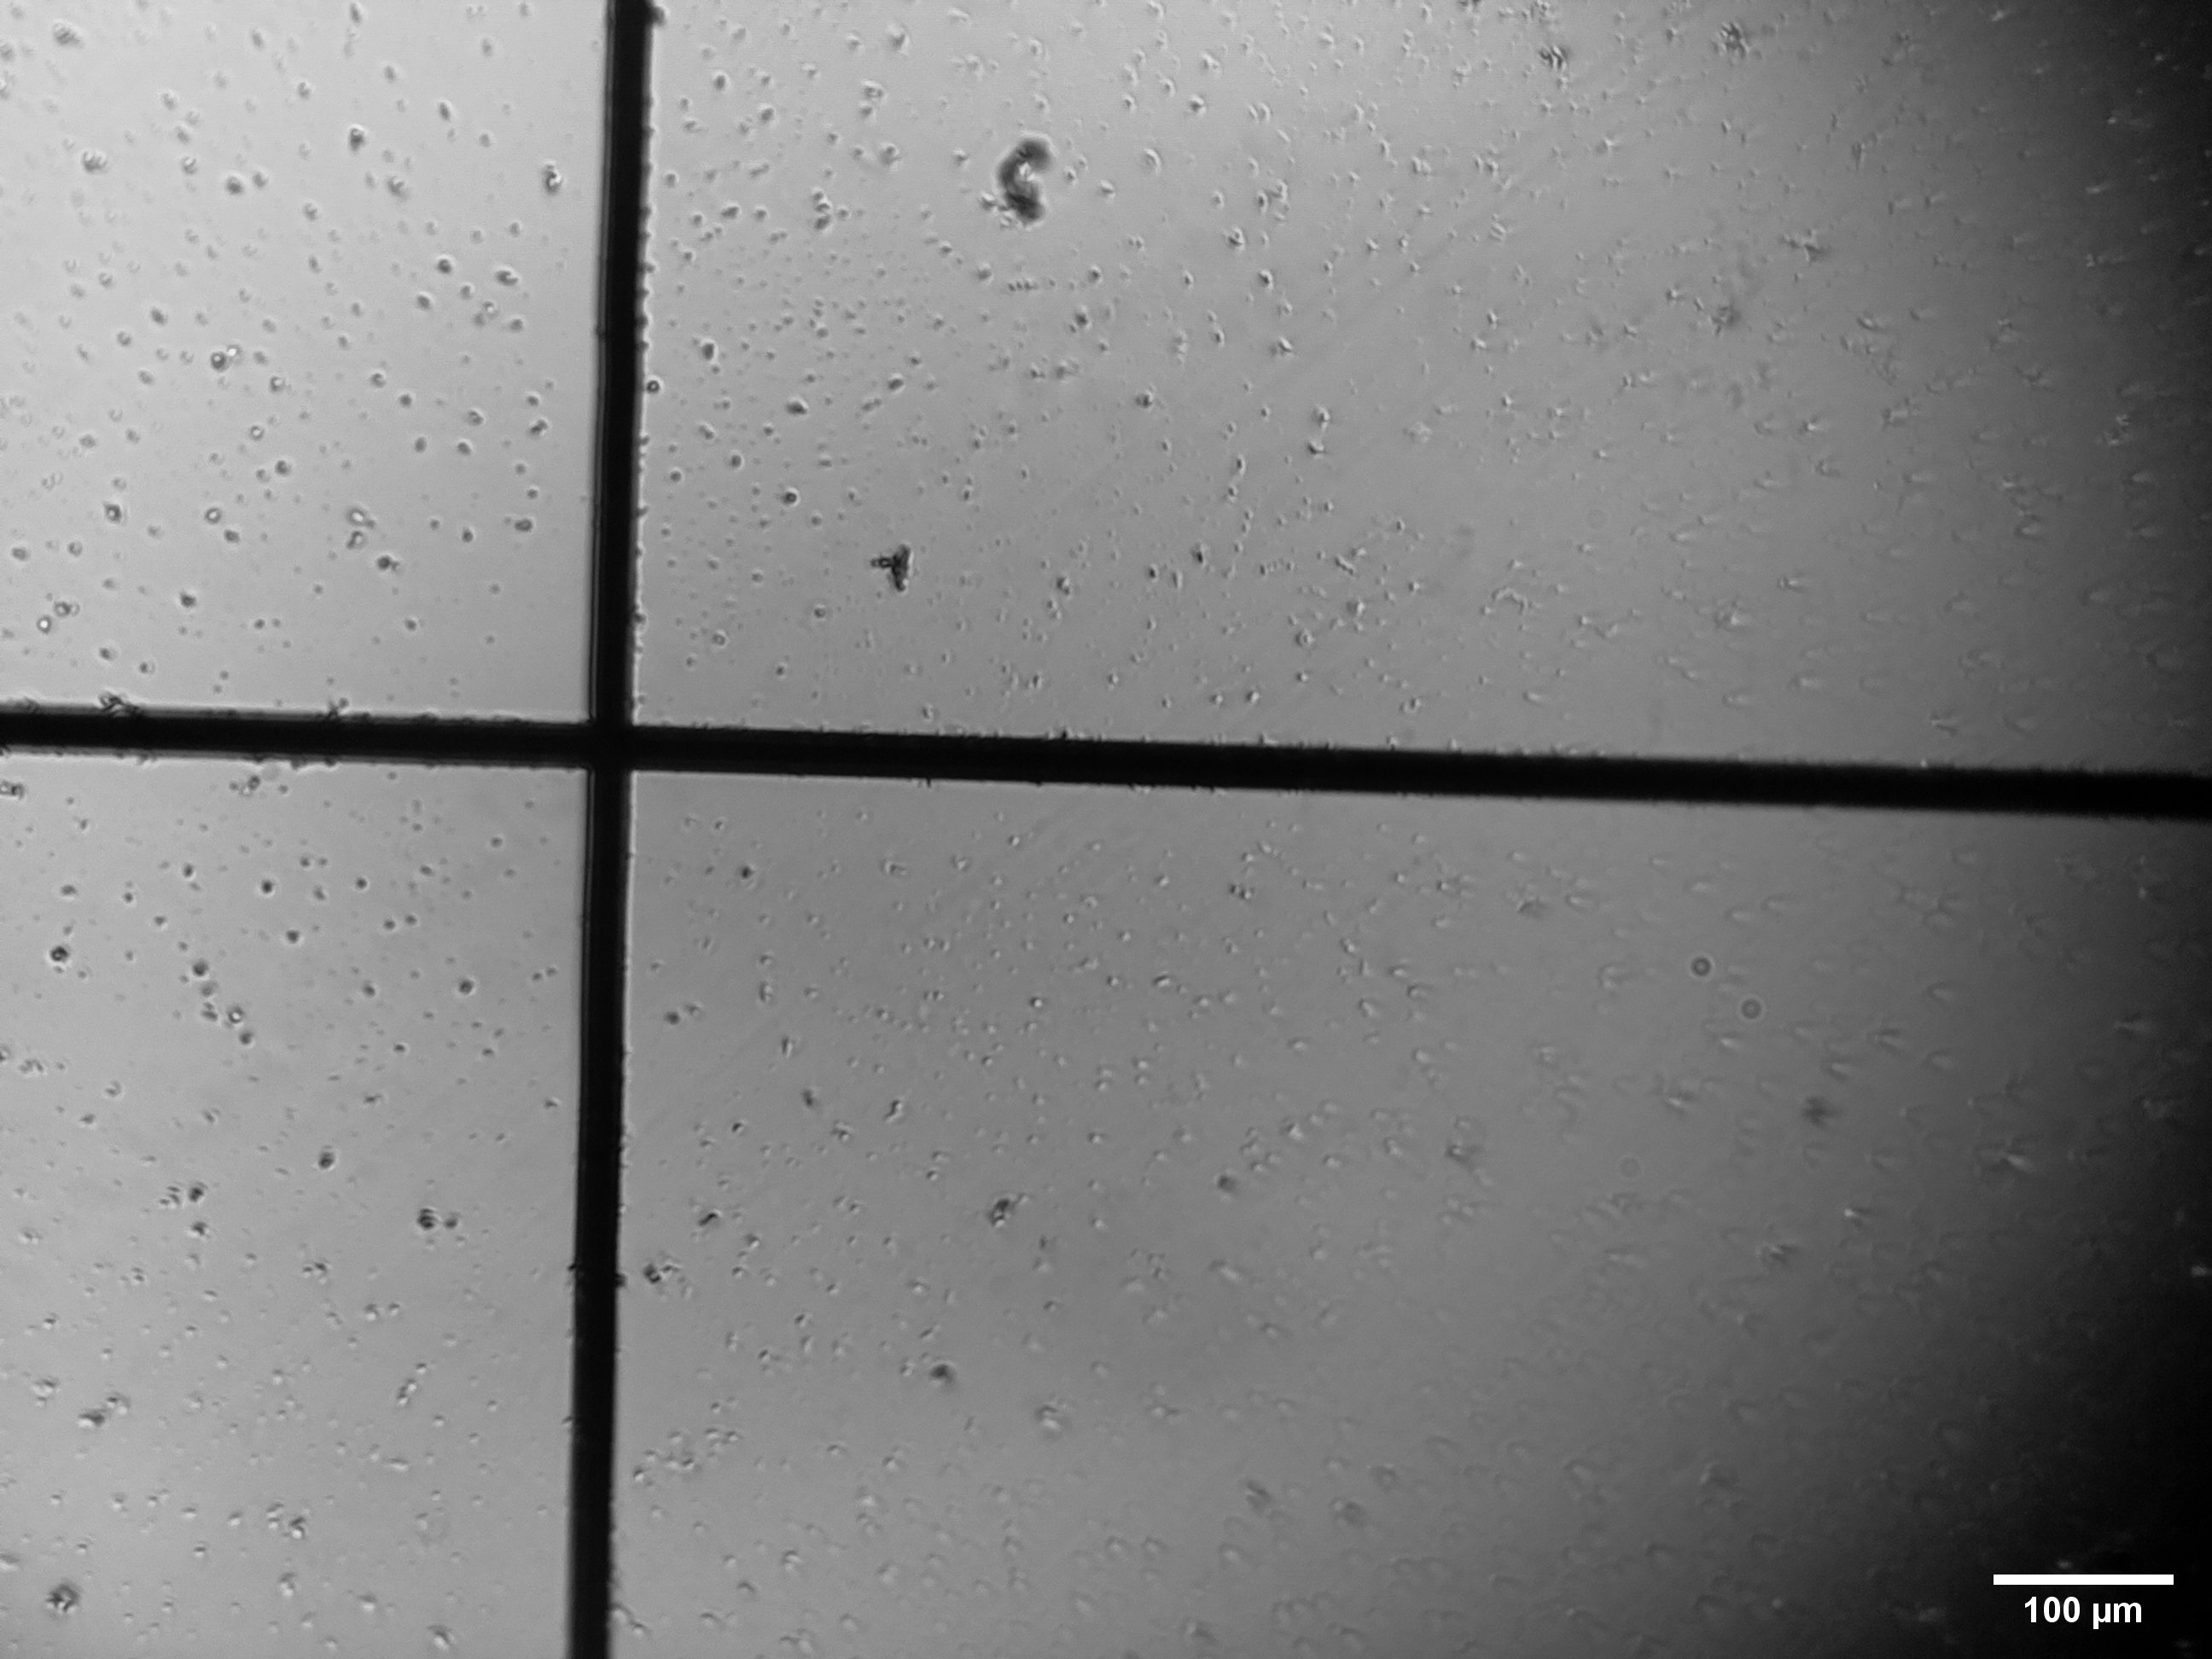
We at GSIO Georgia, have just finished building the low cost basic optics module v6 microscope and have been testing it extensively with great results ( see pictures below). We are a small non-profit dedicated to advancing science and science education in Georgia, and are currently working on a project to manufacture 100 units of the v6 low-resolution basic modules and distribute them to schools free of charge all across Georgia.
We want to translate the server/open flexure client or at least the web browser GUI to Georgian and have just started getting our heads around the software docs. How would we go about doing this? I am guessing it would be modifying the source code from openflexure-microscope-server/webapp?
Thank you,
Mika
Our v6 build ( lacking the photodiode condenser lense):
@MikaNanikashvili that sounds like a fantastic project, thank you for sharing it here.
None of our content is currenly translation-aware. That is, there are ways to make it easier to give different tranlations for software and documentation and to switch between different languages, which we have not yet worked out how to implement. That means, unfortunately, that at present it would need to be a brute force copy with the translation in the core code. We can certainly help to show you where to find the places that the user-facing text lives.
You have some very nice images from your build, your optics and illumination are built and aligned well. It would be helpful to us to know why you have chosen to build v6 rather than the v7 beta. We have tried to improve robustness and useability from v6 to v7, so if there are things that make v6 better for you then we have maybe taken a wrong turn somewhere.
For scalability and projects like ours getting things translated to local languages is really important, perhaps we can help through the experiences from doing it[ in our project to create a general solution for other languages. Certainly only truly scalable solution I can see is using an LLM based translation that is then curated and modified to make it accurate by someone who is trying to do it in that specific language, leaving essentially minor edits to be done.
That’s fine with the brute force copy for now, if you could point us to it we will get cracking with it. Thank you.
As far as the choice v6 was chosen as I have personal experience printing it and assembling it during covid in Edinburgh. Also the total amount of plastic is less (185 grams vs 250) and for scaling it it cuts the manufacturing cost both in plastic weight and printing time for us. We might go for v7 if you say it’s more robust and usable, I haven’t dug in to the stls to see what we could optimize/remove to lower the plastic weights so maybe it’s a good idea. As far as the optics go, I was surprised too, as it doesn’t have a condenser lenses for the led but to be fair the blurriness around the edges of cells and tissues seems quite high to me.
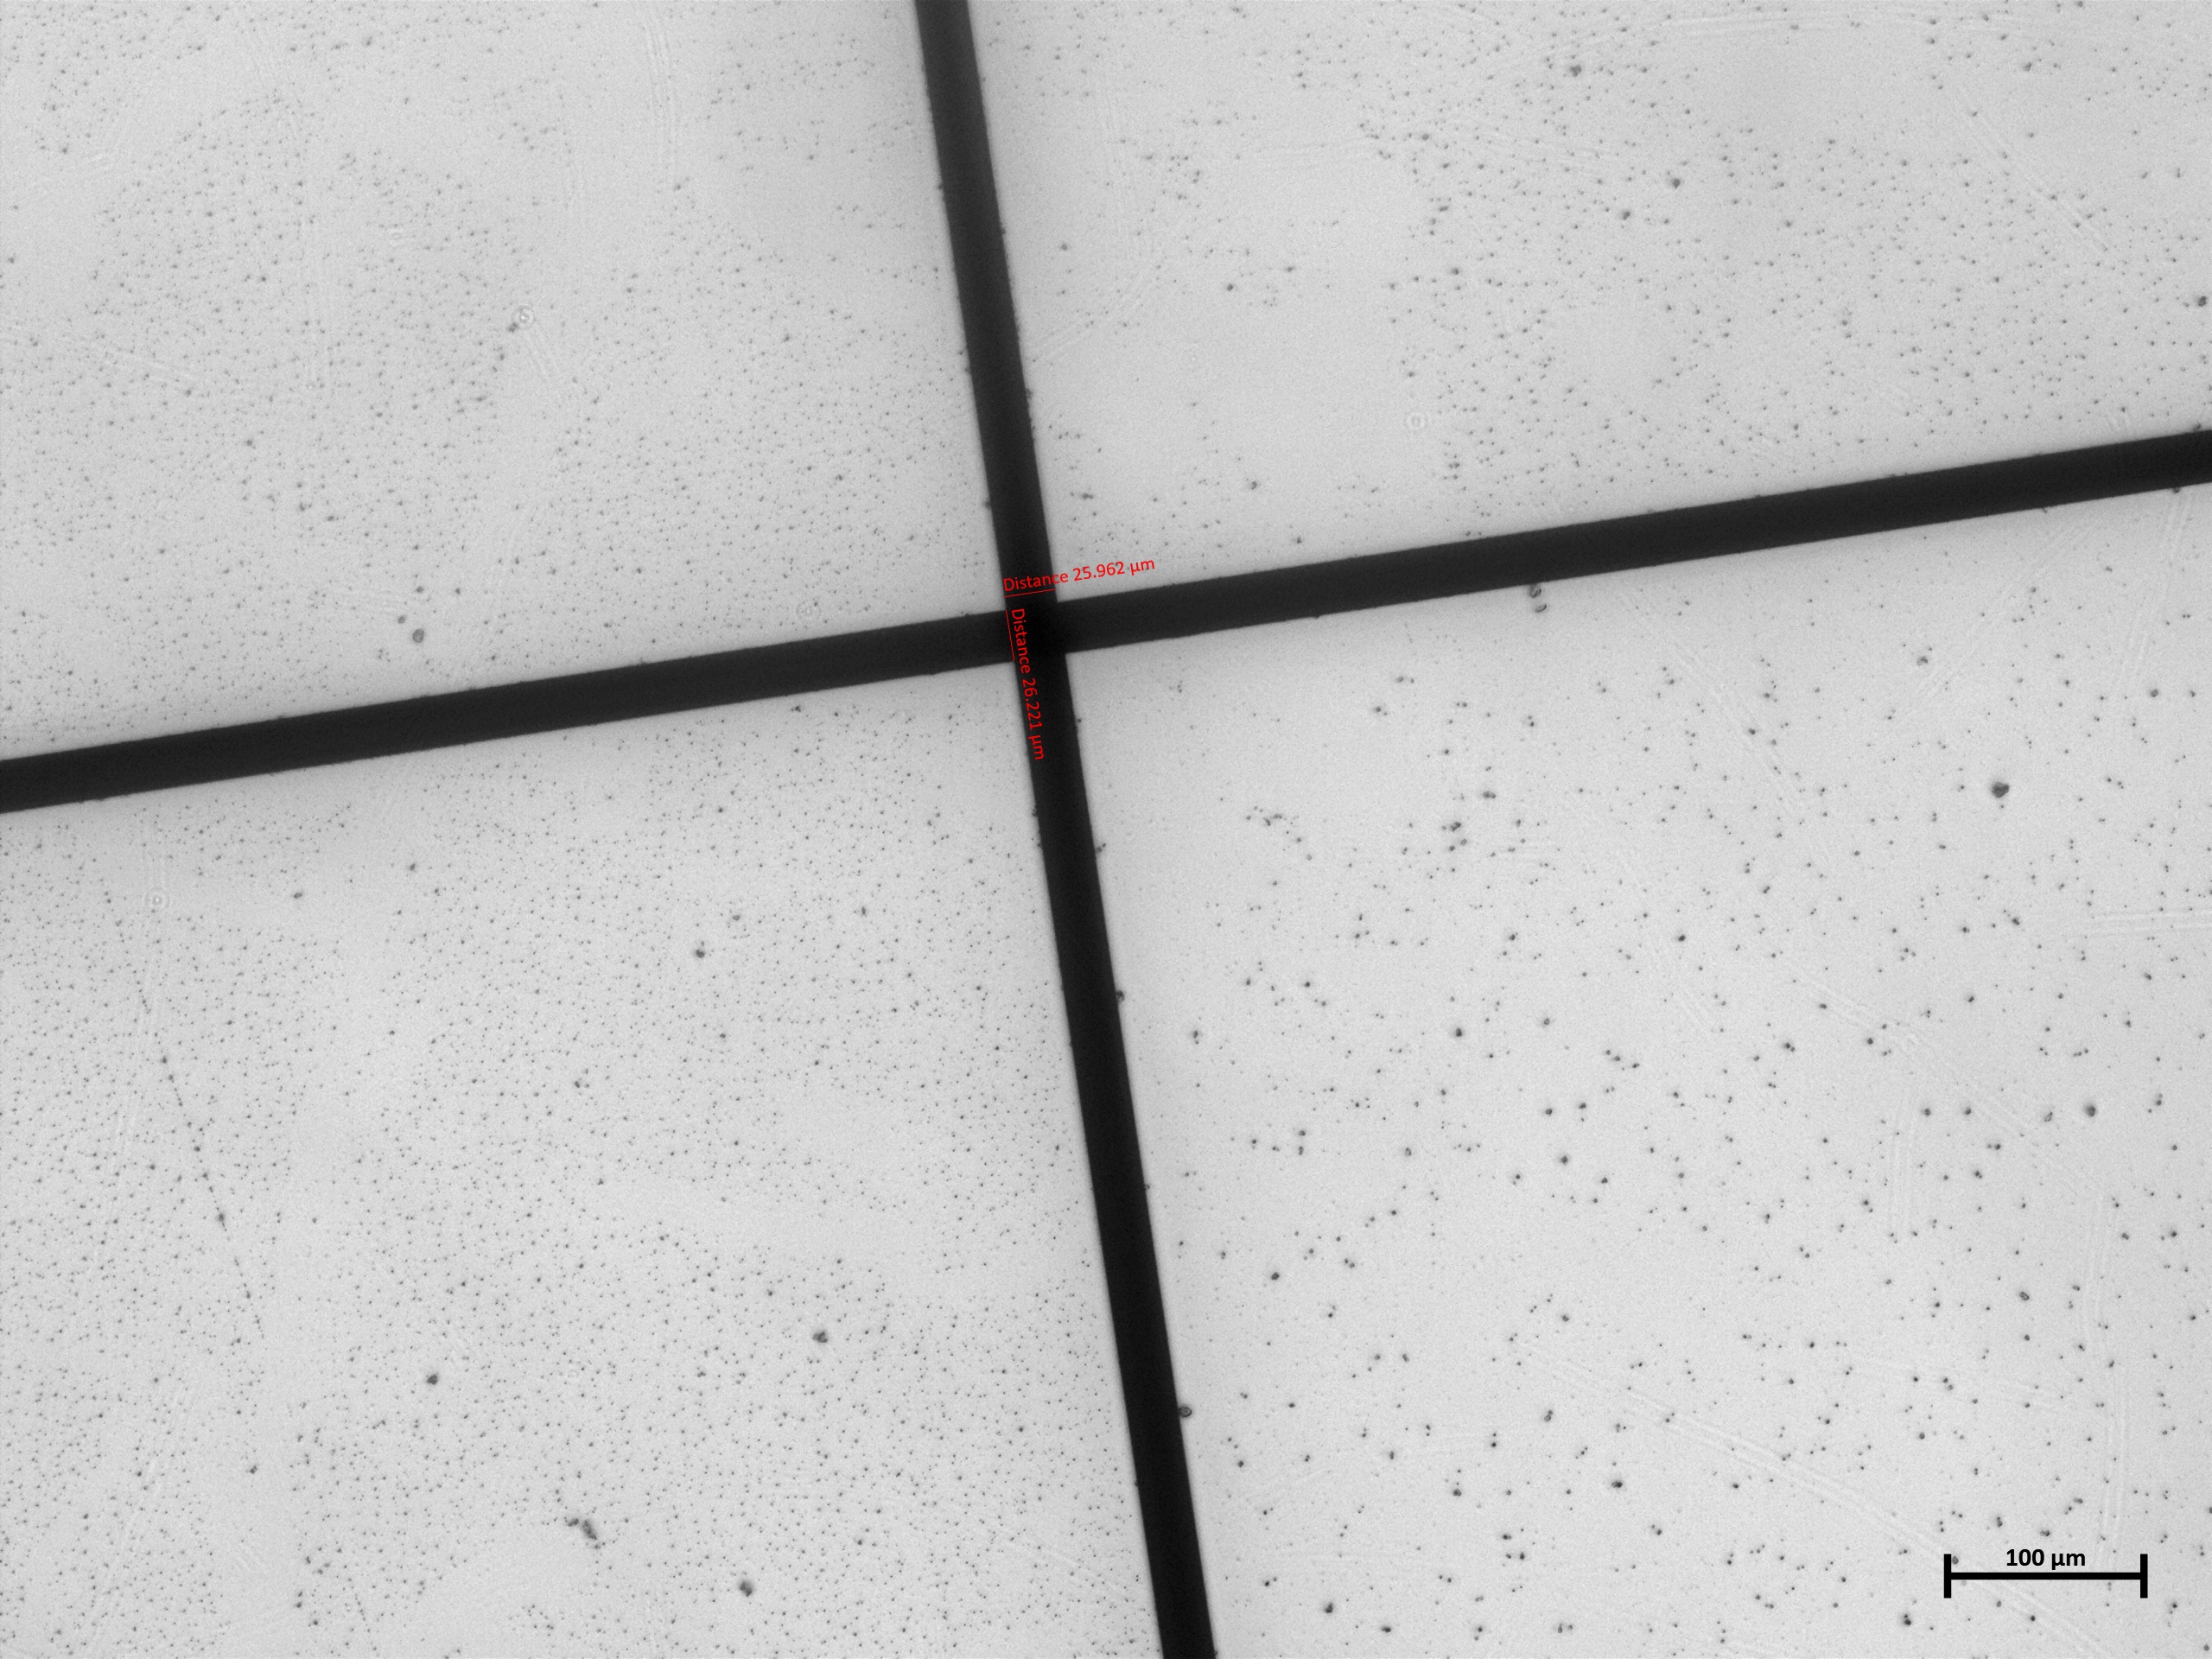
Here’s a picture of a mesh micrometer with line thickness of 26 um taken with ZEISS LSM 900 10 times objective and the v6 low cost optics module with v1.3 camera:
Thank you for explaining. There is a bit more plastic in the v7 in two places. The main body has channels to keep the motor wires tidy and the stand has a wider base to aid stability. It is nice to hear that the Pi camera v1.3 support that one of our users added is useful for you.
It sounds as though you are not planning to add motors. We have a version of v7 for manual operation. It takes away the cable channels and motor lugs and is much neater for manual use. In that version we go a stage further to lower cost by using a webcam instead of the Pi camera and a Pi. You can equally use the Pi camera version of the basic optics and our software for better image quality. The very minimal stand designed for that version does not have a place for a Pi, but you can use other bases. We introduced the electronics drawer to make access easier and to keep the microscope screwed to the stand. We found with version 6 that when people had to unscrew the main body to access the electronics, they often then did not screw it back together afterwards. If you do not use the motors, the drawer is less necessary. A short stand would hold the Pi and would save plastic and printing time. I am pretty sure that it would actually fit in the no pi stand (the white stand in the first image on the linked thread)
What do we think is made better in v7? The stage and illumination are made much more robust and more user friendly. The stage top now uses embedded nuts, rather than threading the sample clips into the plastic. Stripping those plastic threads is a failure mode that would require a complete new main body. The illumination on v6 is not lockable and was very prone to being knocked out of position. The v7 illuminaton has a locking dovetail. It is also narrower, which allows the sample clips on the stage to sit on the same side as the illumination, making far better access for inserting a slide. The v7 illumination is completely compatible with the v6 body if you want to.
Other changes are more in the internal structure, improving printing in a couple of places. V7 has a reduced number of different screws - all M3 screws are now 10mm length, M2 and M2.5 machine screws are replaced with a single type of self-tapping screws. The band insertion tool is also made so that it is stronger, which makes it easier to use. Together with the slight change to the design of the feet this should really help in assembling 300 actuators in your project! Again, the new tool and the new feet should be compatible with v6 if needed.
Thanks @MikaNanikashvili, I really agree that translation is essential and something we really need to look into. As has been mentioned a few times the software stack in general is really in need of some love.
We do have a strategy for overhauling it, but it is a slow and longer term project. The front end we use for the server is Vue.js, there are ways to localised Vue. A are services that help with app translations (such as Crowdin) which start with AI translation and then allow human tweaking. They also aware of the app as it changes over time.
I see that you are not using motors on your microscopes. One way to cut plastic but get a more robust microscope may be to use the manual V7:
This can be used with the picamera and the openflexure software. But it can also be used with a webcam and any other webcam viewing software. This may help in the short term for translations. @WilliamW is in the middle of updating the documentation to use a C270 webcam
So having written all that, I think that I have some recommendations. These are in order from the least change to your v6, up to a v7 version that I think you will find better.
Use the v7 band tool and v7 feet to aid in assembly.
Use the v7 illuminaton. This fits with a 5mm LED still, but see note later.
Try out the v7 manual body for printing speed and the amount of plastic used.
Get a feel for the v7 ‘no Pi’ stand. Personally I think the better stability is really worth it, but if it does not fit your needs, I believe that we can make the v7 manual fit the v6 base just by moving two lugs. Alternatively we can help you to design your ideal base.
If you are assembling 100 microscopes, it is alomost certainly worth considering the value of time saving by getting a PCB made for the illumination. With 100 units the cost of a complete board, with components, is very low, and it takes a lot of time out of building.
Ok, I am not familiar with the code base, so I probably shouldn’t say something. But in general forking off a project should be avoided if at all possible. Adding i18n support now will save you a lot of work later. It also allows translators to deal with the translations and developers with the code.
Gettext is probably the first place to look for tooling. Although I am really not an l10n person. Looks like there is a Vue gettext module. Gettext is also a Python stdlib module.
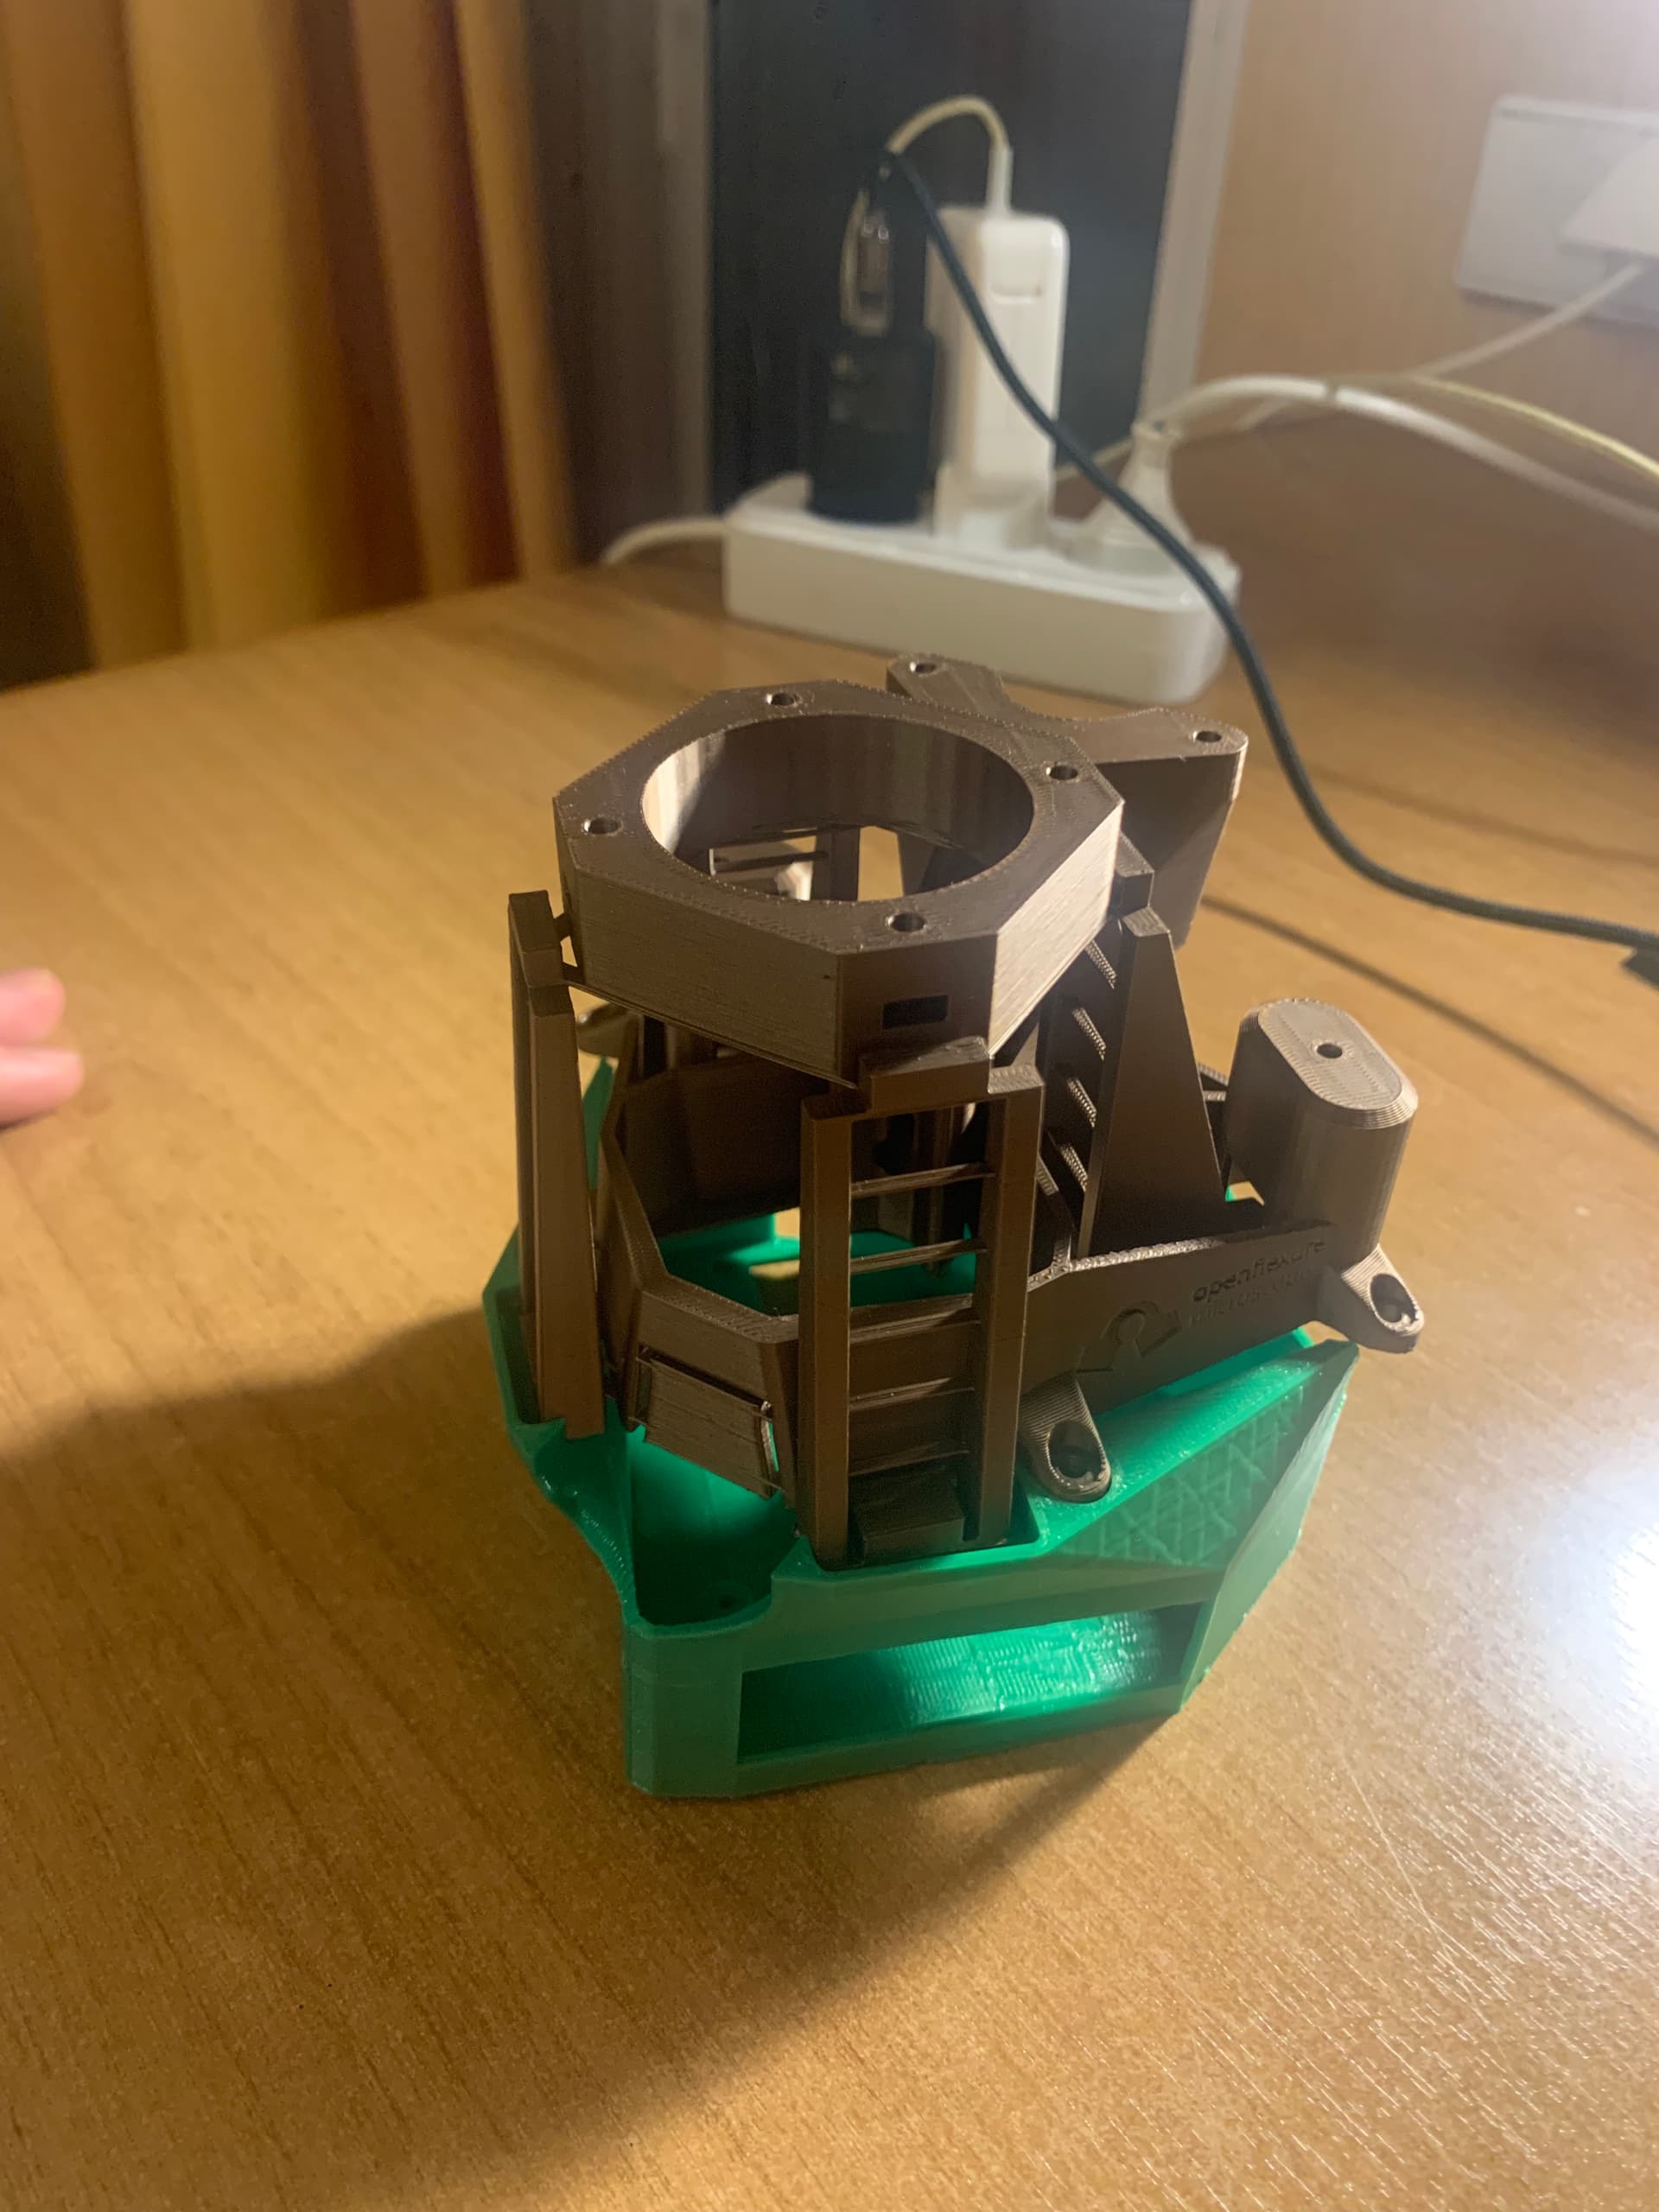
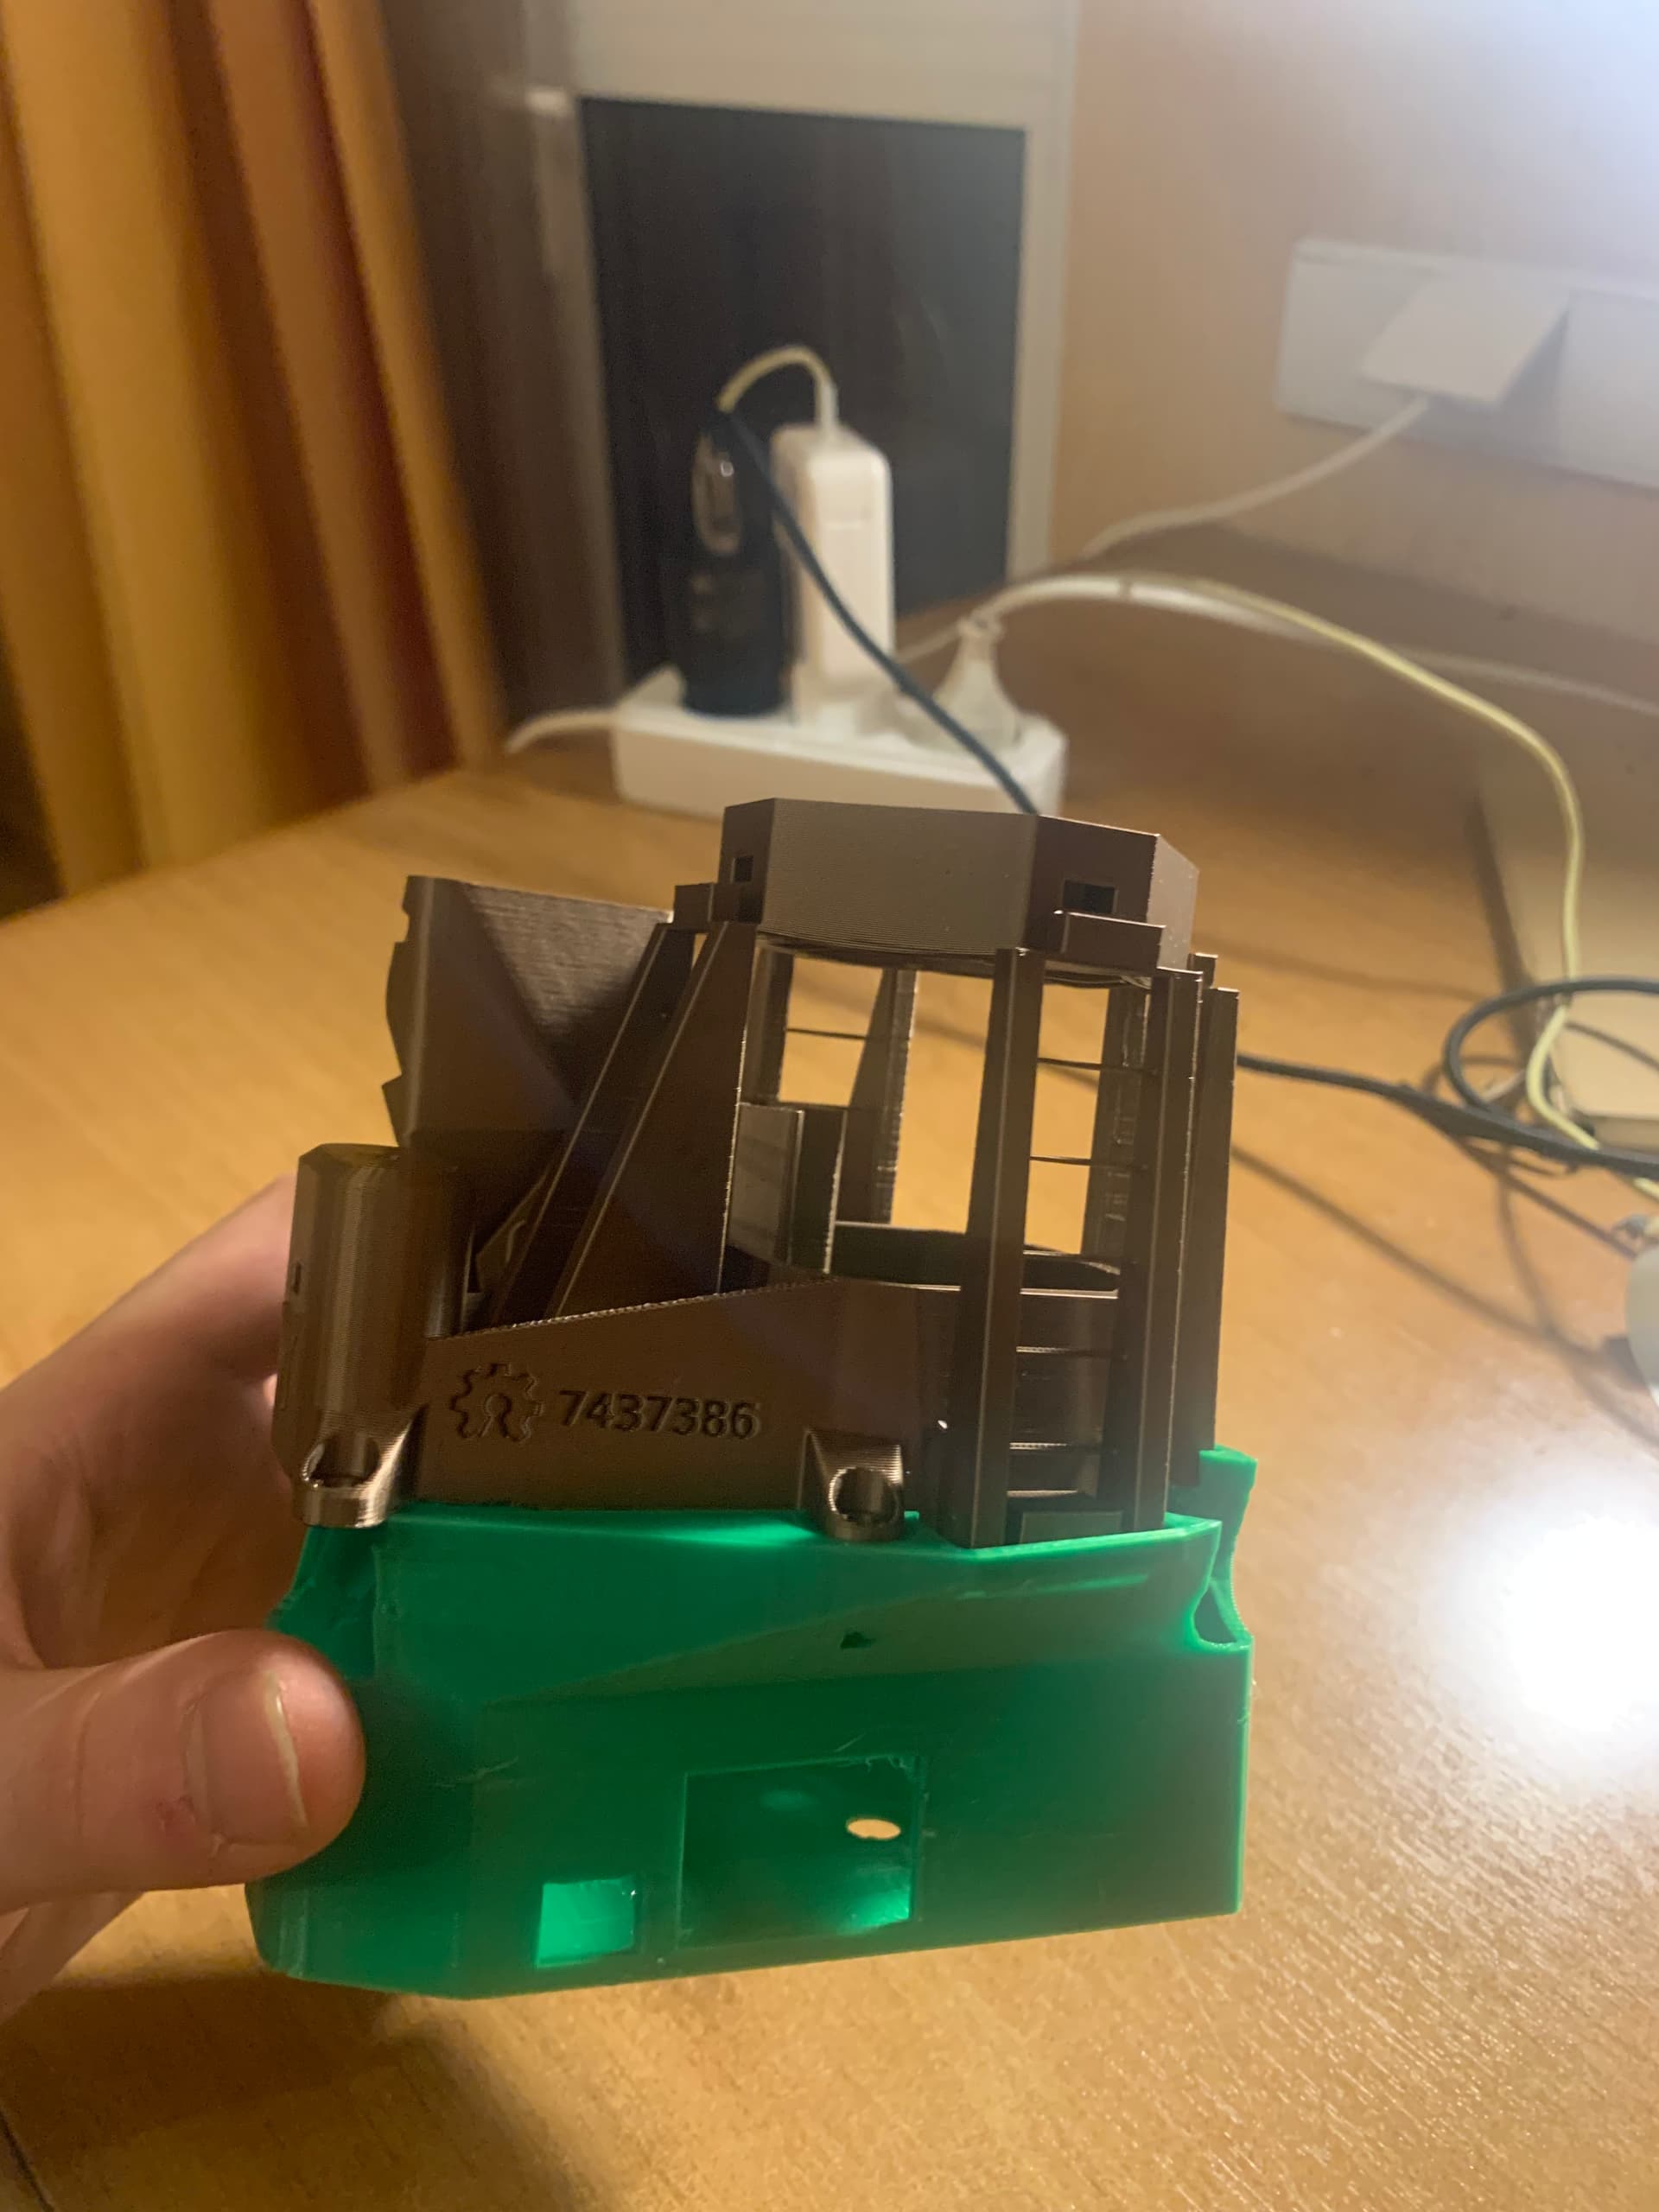
Thank you all for your replies. Thanks for such detailed explanations @WilliamW. Few updates, I have printed the v7 manual body and used the v6 electronics housing, it fits ok just with the two screw holes sticking out, even thought the v7 body is slightly wider and you need to stretch the v6 housing for it to fit. Pictures attached at the end.
V7 body is for sure more robust, amount of plastic is not that different and the time is quite similar.
@j.stirling I have been digging through the OpenFlexure / openflexure-connect · GitLab and have been struggling a bit on how to get about locating where all the files for the vue server that you see in the browser are. I am guessing it’s in appmenu.js, background.js but there is also remotemenu.js. If anybody from the team can help out where I should be looking and for what would be much appreciated!
After I posted I had a look in CAD at placing v7 on the v6 base. The actual microscope shape seems not to have changed, but as you have found, the lugs under the stage mount in a slightly different place. It would not be a huge job to make a version of the v7 body with these lugs moved to the v6 position, the two mounting holes in the microscope ‘floor’ added between the actuators, and the lugs by the actuators removed.
Rather than doing that, I had a bit of a play with making a version of the v7 stand which is short and accommodares a Pi without motor controller. I think that will work, but I have not test printed it
Connect is just a viewer. All of the Vue is served from the microscope’s sever and is in the server repository. The default branch you see on the server Repo is the V3 development branch. For the current v2 you need the master branch
I have done a test print of the modified v7 pi stand, and I have tidied up the CAD and put it in a merge request !423.
From the view app button on that merge request you get a full set of the modified build instructions. The new stands are not mentioned anywhere, you can find them in the all_stls.zip as microscope_stand_with_pi3.stl and microscope_stand_with_pi4.stl.
They are now 58g to print, so a bit more than the 41g v6 stand, but much lightened from the 141g full v7 stand and drawer.
Hello, could you please advise which files in which repository need to be modified for translation into other languages? After making the modifications, is it necessary to compile and output, then reinstall or replace? Thank you very much.
Thank you very much for your reply. In fact, today I have already used AI to replace the text on the web control interface with other languages. I downloaded the files from the https://gitlab.com/openflexure/openflexure-microscope-server repository, modified the text language in the relevant files, compiled and generated the updated files, and then uploaded them to the Raspberry Pi 4, which solved the problem. I also had AI organize the files, text, and the entire process that needed to be replaced into a markdown document. I’m not sure if it would be appropriate to post this to the forum.
Hi @bluebaby21, It would be interesting to see the result.
The plan is to introduce an i18n internationalisation framework which should help with internationalising not just text, but also date formats and some other things. One key difficulty for this is that a fair bit of the text is defined server side (python), and some of the other text is in the UI (javascript/Vue).
Generally these frameworks go through the code looking for any strings marked for translation. It the creates a dictionary of words and phrases that can have translations added. This means that when code is updates only few changes to the dictionary need updating.
The difficulty is the dictionary formats for the libraries we want to use in the two languages are not compatible. So either we will need to make a two-way conversion layer to merge the dictionaries, or we will need to have two different translation dictionaries for people to complete.
We are in the process of modernising the Javascript interface (almost complete) and reinstating the extension framework in the c3 server. I hope that within the next couple of months we will have a semi-stabled beta of the v3 server for people to give us feedback. We then need to do a bit of work on things like the upgrade mechanism and release v3 itself. Once v3 is out and we start to transition the community onto it we will try to add in translation frameworks for v3.1.
We are sorry that the v3 release has taken so long. Many very large changes were needed to underlying frameworks, and the whole camera stack needed replacing. This all coincided with some fairly unfortunate timing for our availability/funding. We are now out the other side of this and the pace of progress has really accelerated. Translation support is long overdue, but it will happen